In theory, you can write code anywhere you like, even in Notepad. In practice, software engineers use code editors or Interactive Development Environments (IDEs) that facilitate the process of writing code. Today, you’ll learn about the most popular code editor in the world - Visual Studio Code: from getting started to writing (and running!) your first program in JavaScript.
What is Visual Studio Code
Visual Studio Code (or VS Code for short) is the code editor that’s used by millions of web developers in the world. It was developed by Microsoft for all major operating systems: Windows, Linux, and macOS.
Its powerful features include:
- Writing code with IntelliSense - intelligent automated code completion
- Debugging code - running your code step-by-step to find the bugs and fix them
- Working with version control using
git - Code refactoring - renaming functions and variables in multiple files with a single command
However, these features are common across many other code editors. What makes VS Code number one is the fact that it’s both free and extensible.
You can download and install open-source extensions that enhance the functionality of Visual Studio Code. There’s a specialized extension for pretty much every task you can think about.
For example, the Prettier extension makes your code pretty by formatting it according to the common developer standards, while the Coderslang extension helps you learn JavaScript with automated verification of your coding tasks.
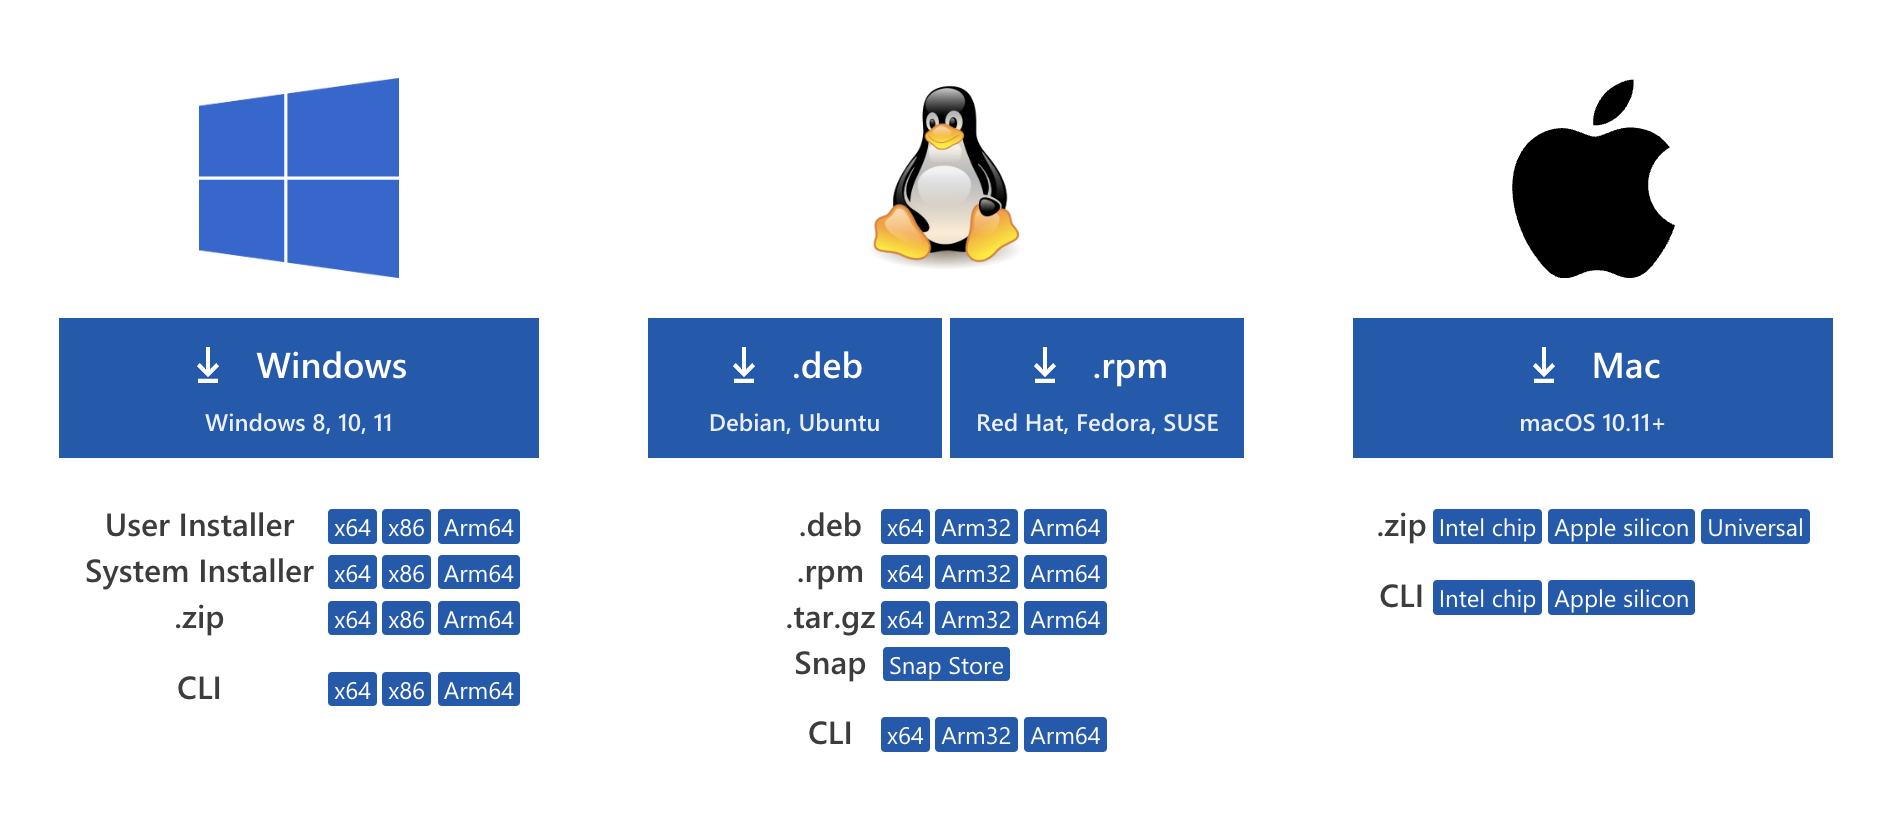
The process of downloading and installing Visual Studio code is similar for all the major operating systems. Start by getting to the VS Code download page and then follow the instructions.
Installing VS Code on Windows
- Download the installer for Windows
- Launch the installer and follow the instructions. The installation wouldn’t be much different from installing any other Windows program.
Installing VS Code on Linux
- Download the installer for Linux
- Extract the downloaded archive
VSCode-linux-x64.zipinto a new folder - Open the file
Visual Studio Code
Installing VS Code on macOS
- Download the installer for macOS
- Open the downloaded file
VSCode-osx.zip, which will extract the fileVisual Studio Code.app - Drag the file
Visual Studio [Code.app](http://Code.app)to theApplicationsfolder
In case something goes wrong with the installation process, you can always take a step back and start from scratch by visiting the download page for Visual Studio Code and selecting your operating system (Windows, macOS, Linux) and computer architecture (x64, Arm32, Arm64, Apple Silicon) from the list of available options.
Coding interface
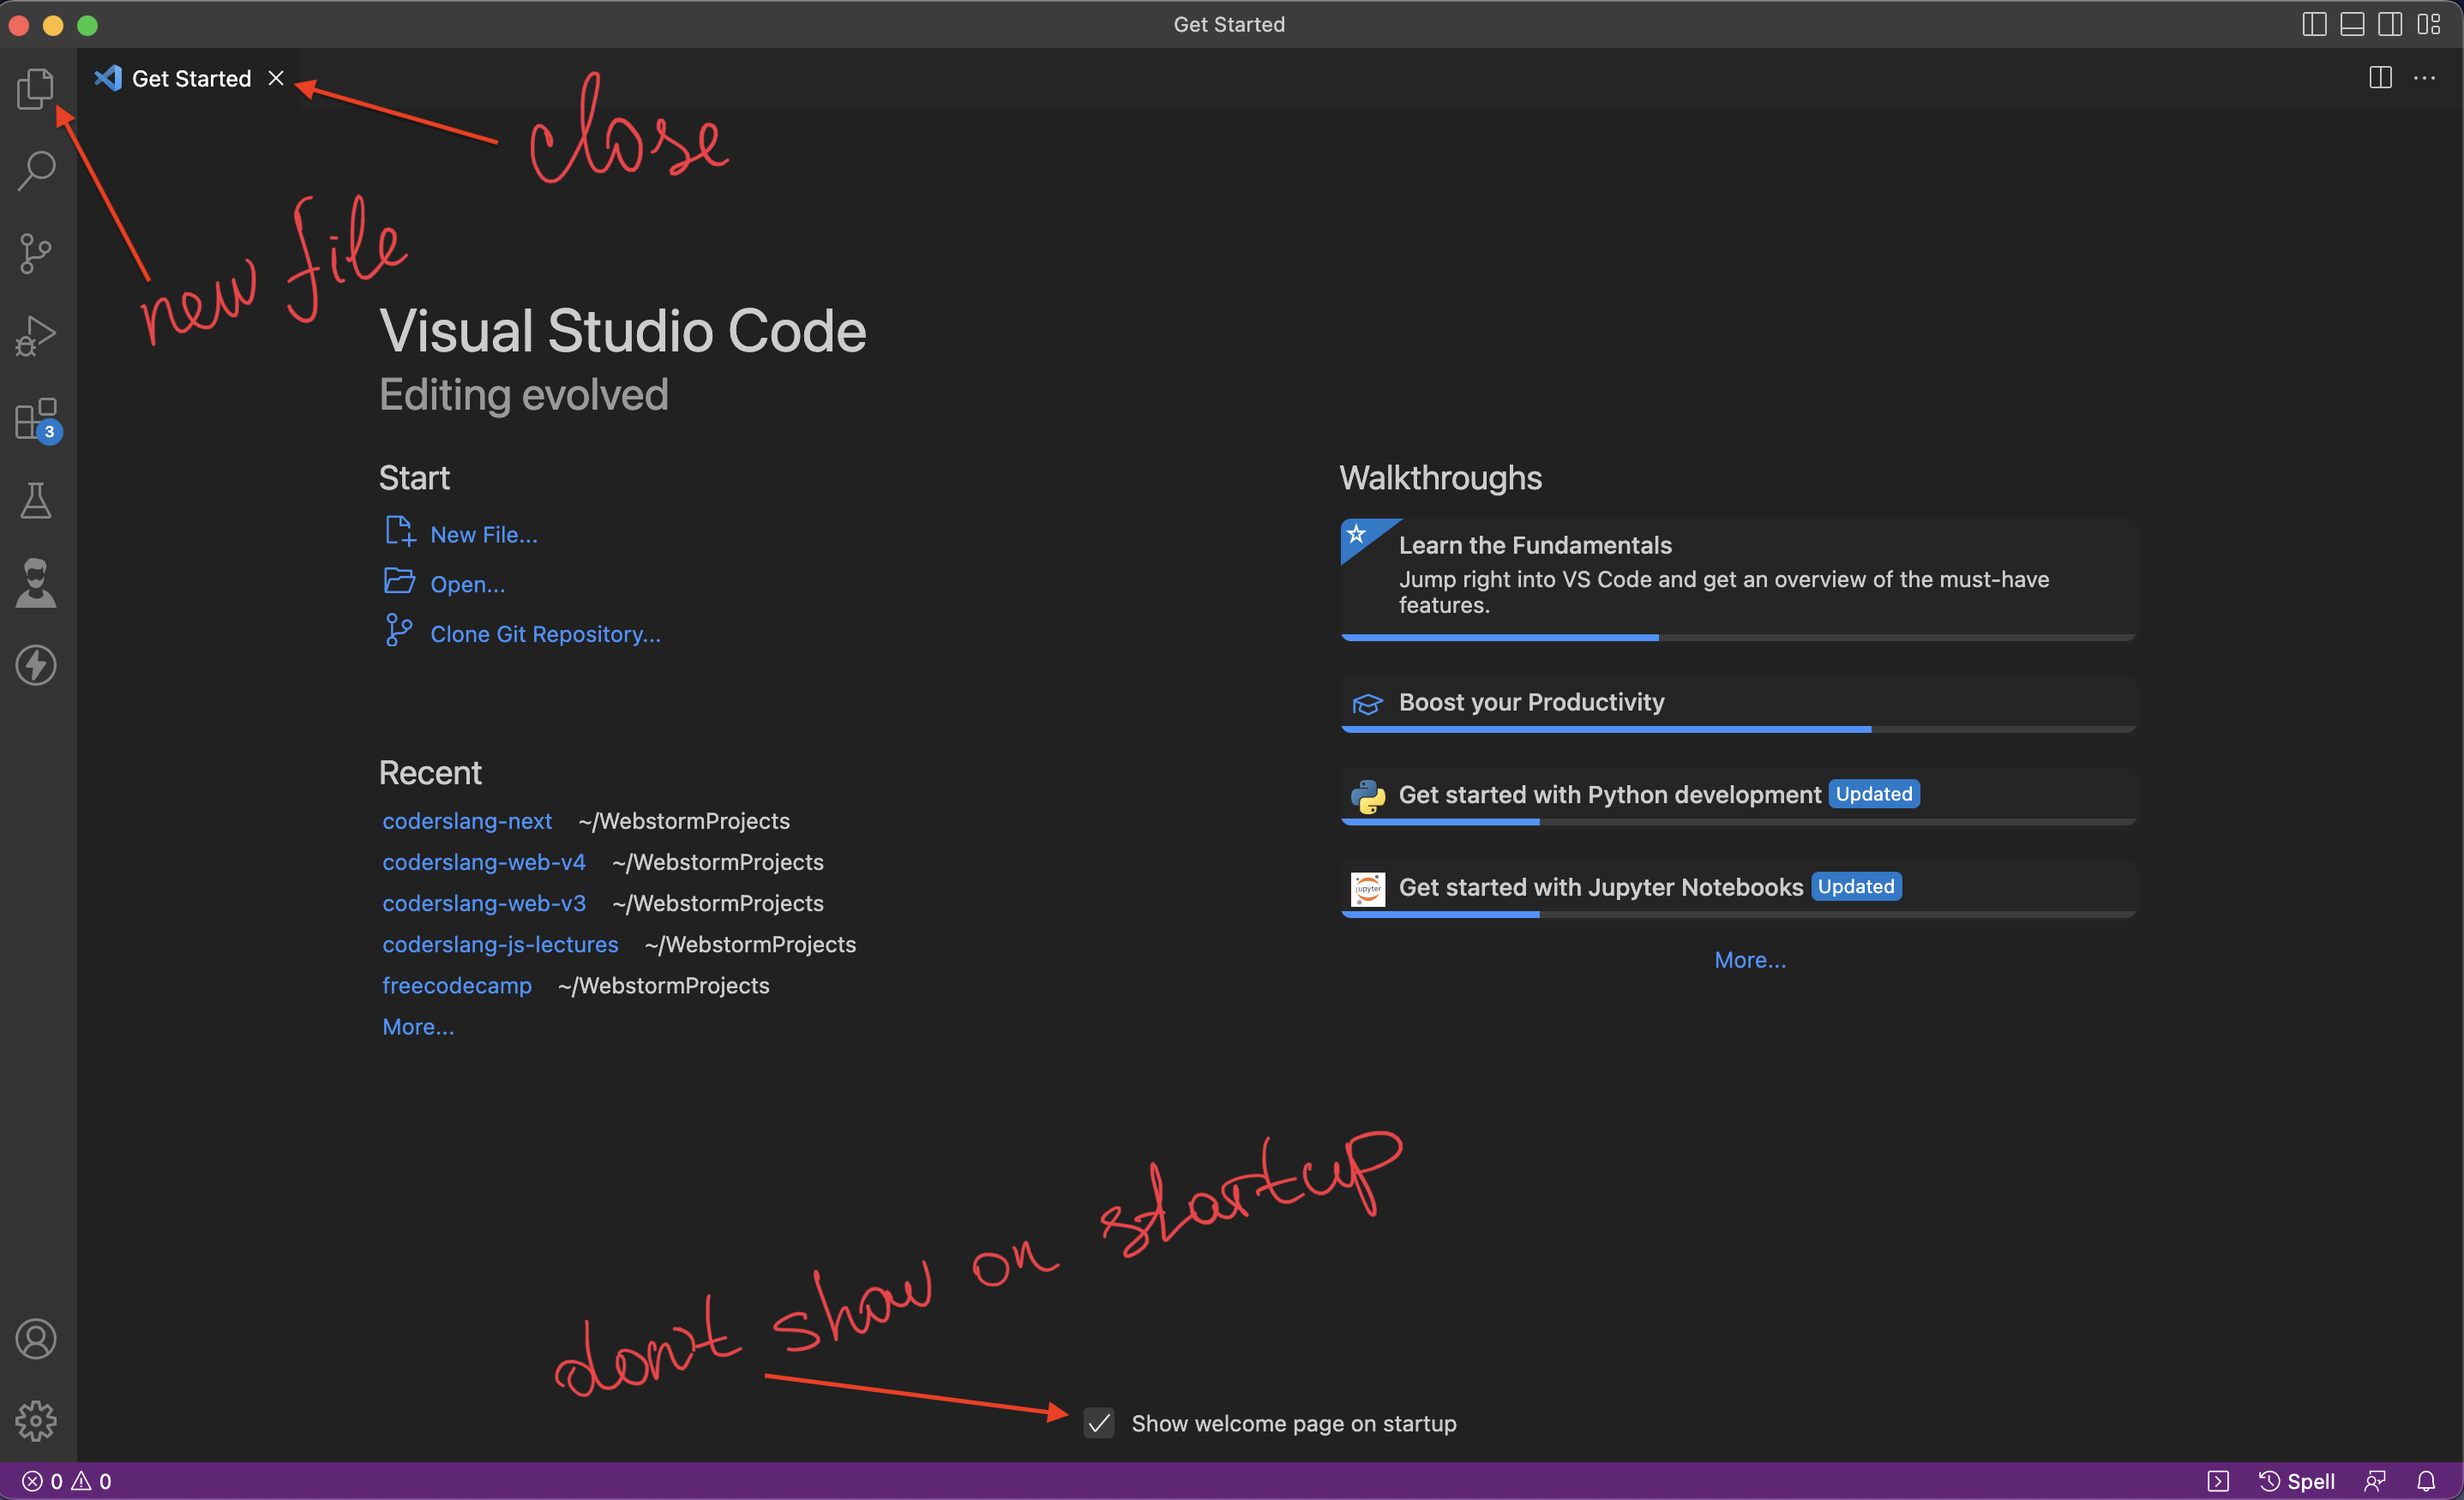
On your first launch Visual Studio code will show you the welcome page. It’s a distraction, so I suggest doing 3 things after the launch:
- Untick the checkbox “Show welcome page on startup”
- Close the “Get Started” page by clicking the
xbutton next to its name - Open a file explorer by clicking the topmost icon in the left panel
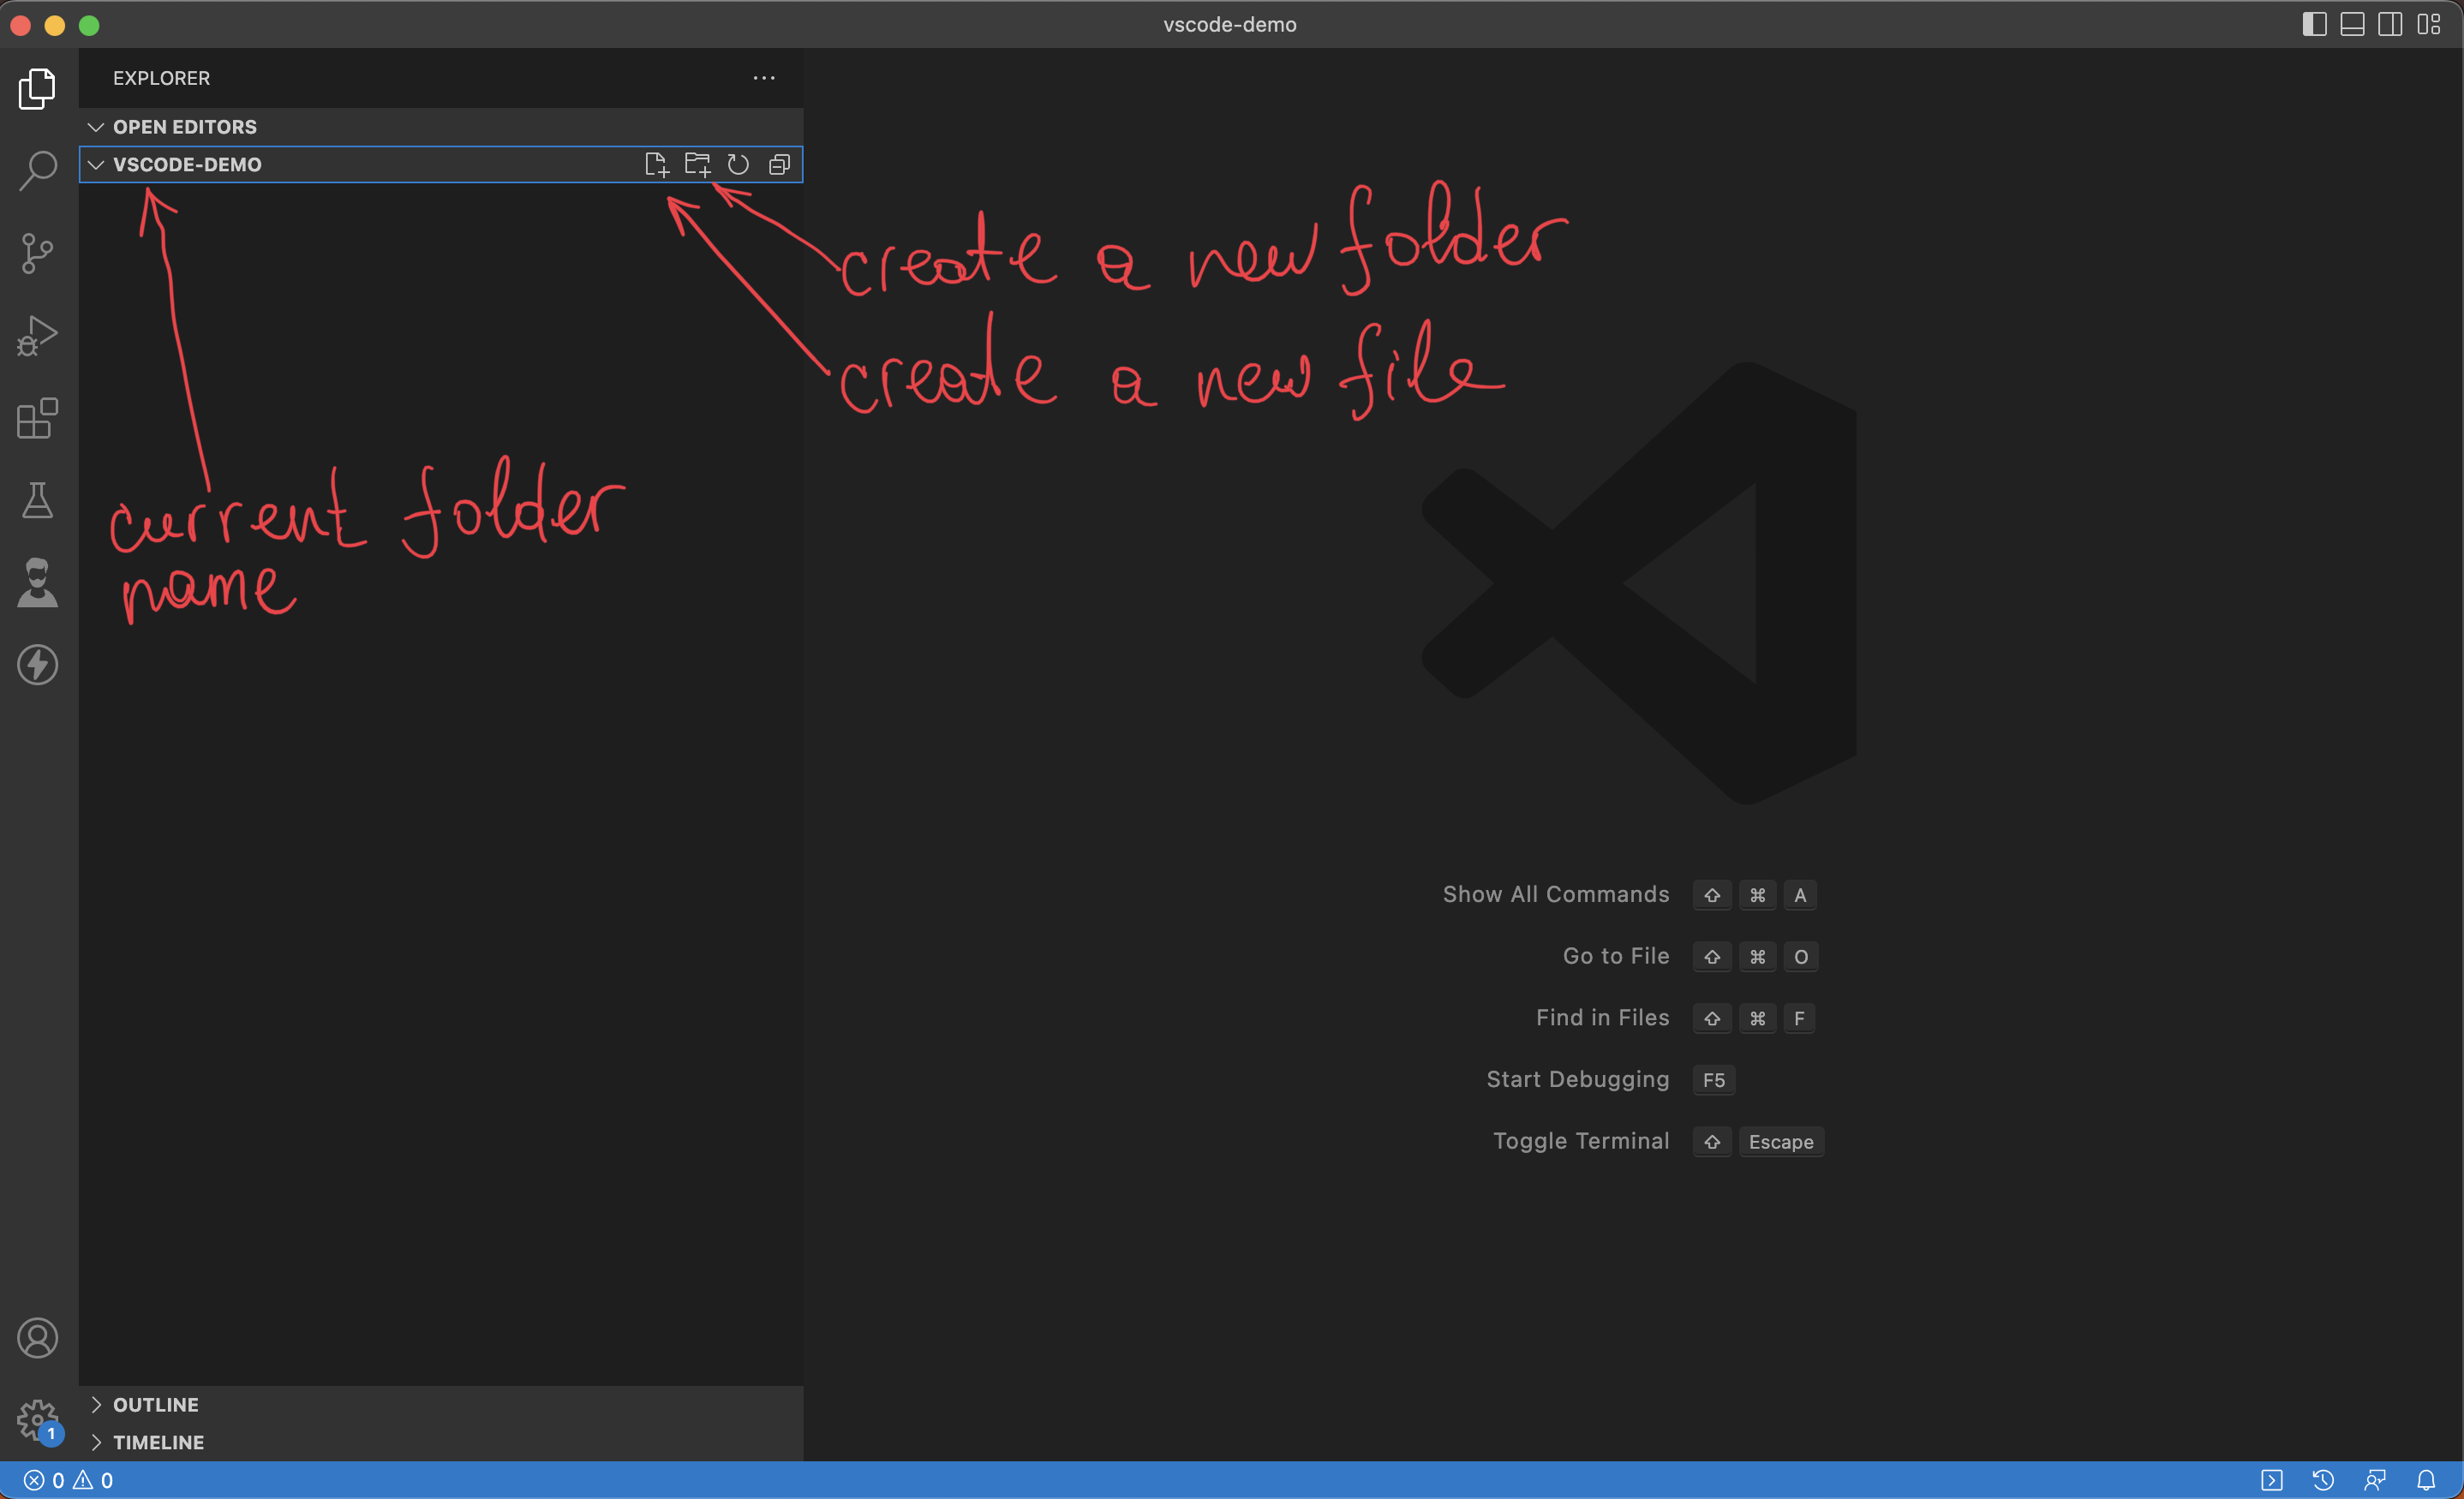
After opening a file explorer, you’ll get an option to choose a folder for your coding project. You can create a new folder or select an existing one.

Now you have options to create a subfolder or to create a new file. These options appear only when you hover over them with the pointer.
Hit the icon with the blank sheet and a plus button to create a new file.
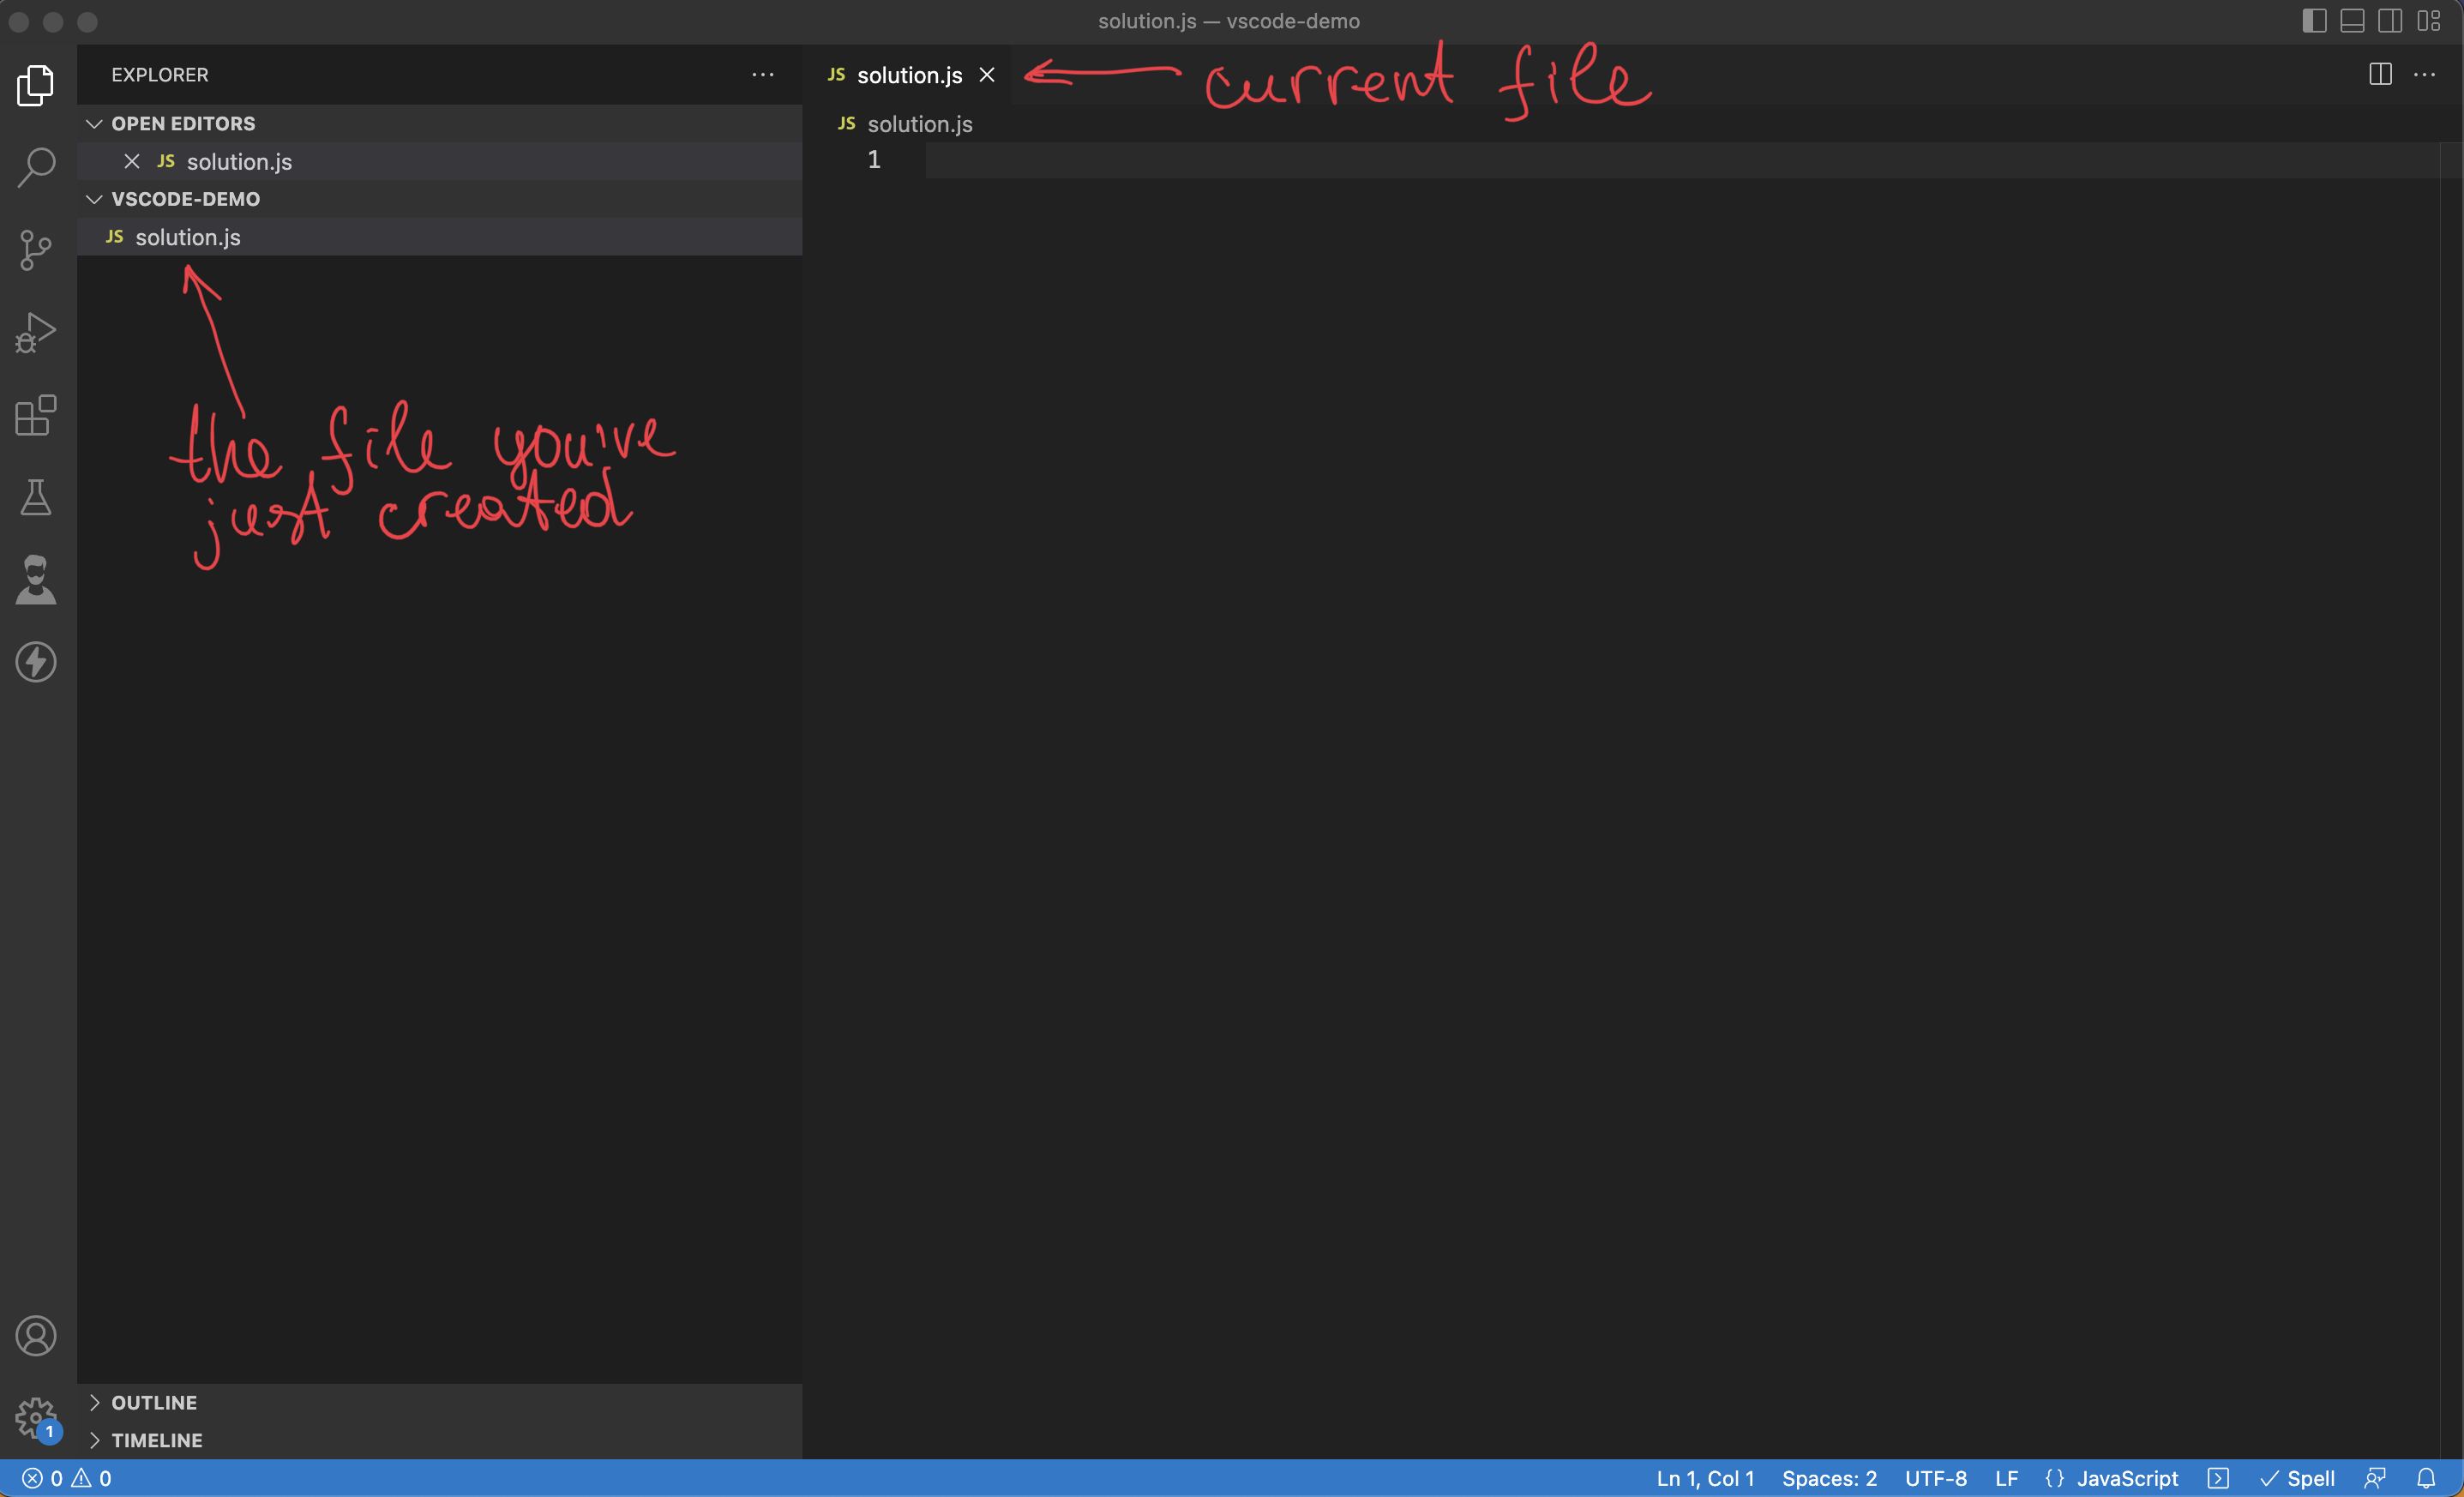
Once you create a new file, Visual Studio Code’s interface starts looking a lot like a regular text editor. The largest part of the screen is occupied by the currently opened file, the top area right above it allows you to switch between different open files and on the left hand side you can see the file explorer.
How to create your first JavaScript program in VS Code
To create a JavaScript program, you’ll need to create a file with the suffix .js. I called mine solution.js.
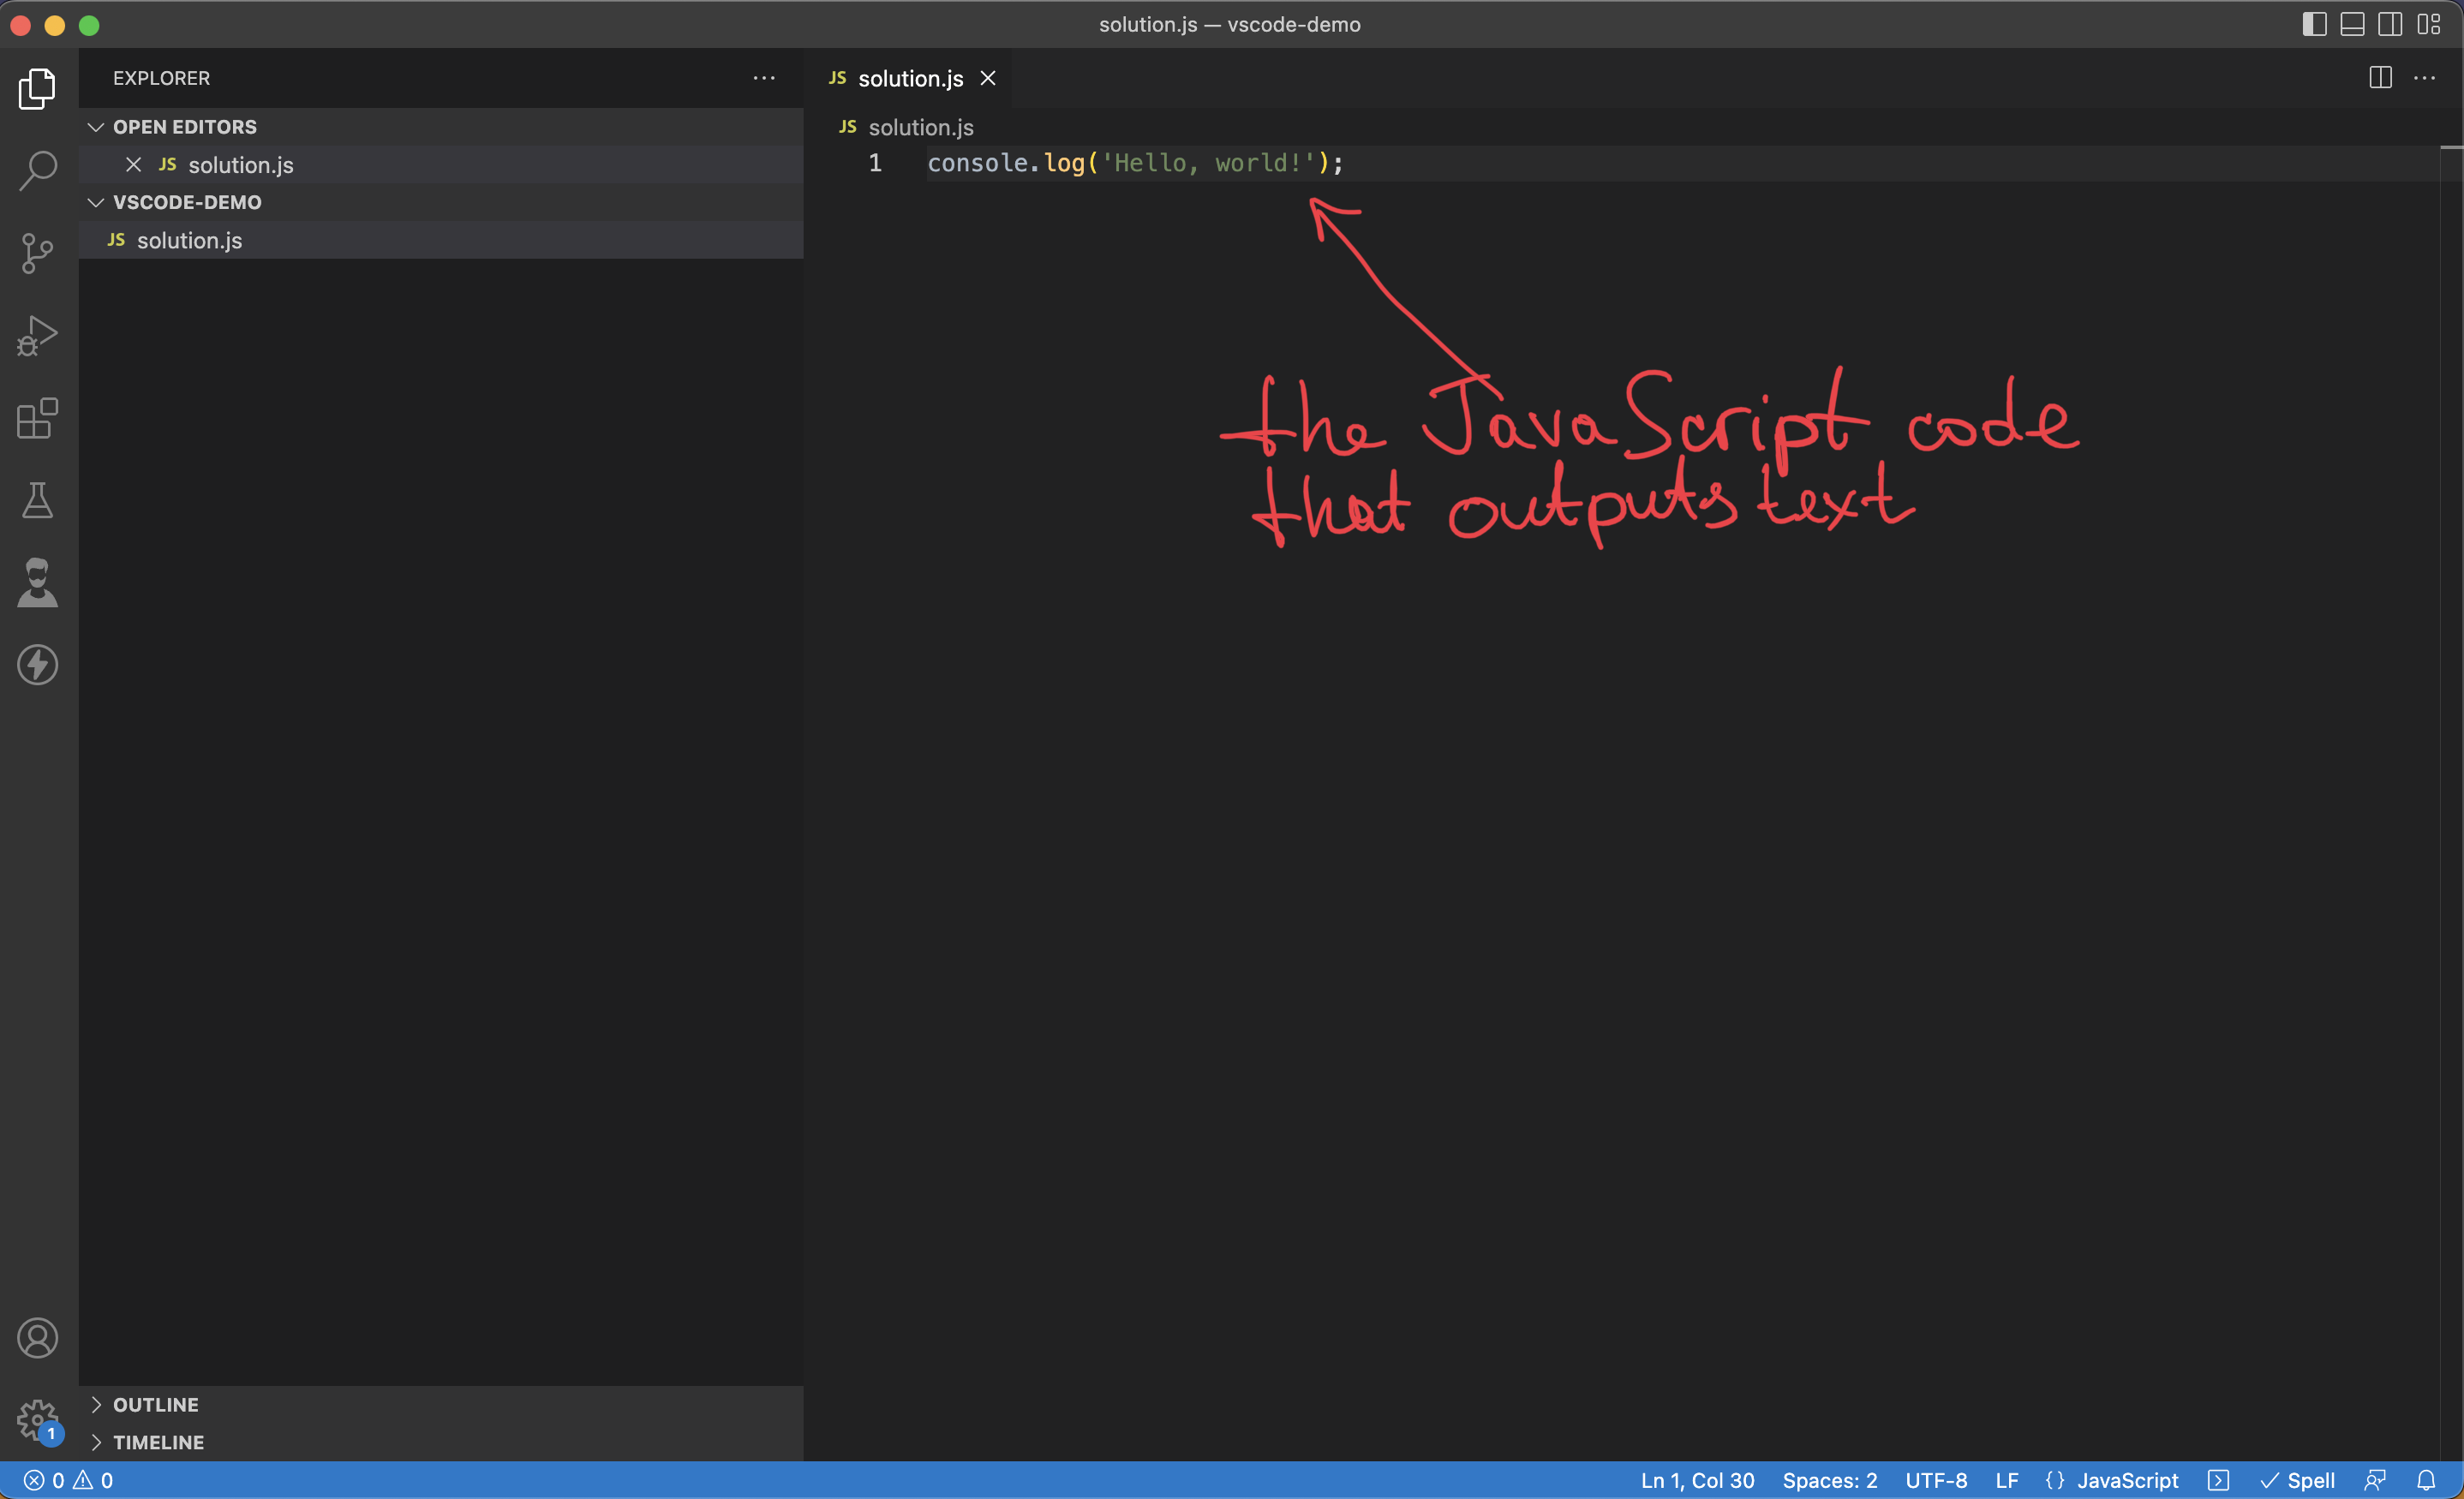
The most straightforward JavaScript program consists of a command console.log that prints out text to the screen.
console.log('Hello, world!');
The code above will print the string Hello, world! to the screen when you execute the program.
How to run JavaScript code in Visual Studio Code
By default, JavaScript runs in the web browser. To run JavaScript code that’s detached from the web browser and HTML, you’ll need to install Node.js.
Node.js is a powerful software that allows you to use JavaScript for building backend services.
At the moment, we’re only interested in Node.js for demo purposes, as it’s the easiest way to run your JS code VS Code.
Node.js installation
Node.js is open-source software, that you can run on all major operating systems (Windows, Linux and macOS).
The Node.js installation starts by going to the official download page. There, you can choose your operating system and download the appropriate installer.
After the download, follow the installer instructions.
Verify the Node.js installation
After you install Node.js on your computer, you’ll need to restart Visual Studio Code. It’s an important step and if skip it, you’ll get the error while trying to run your code.
After restarting Visual Studio Code, get back to where you were and open your JavaScript file.
The next step is to open an integrated terminal. You can do it by clicking a tiny button in the bottom left corner of the VS Code.
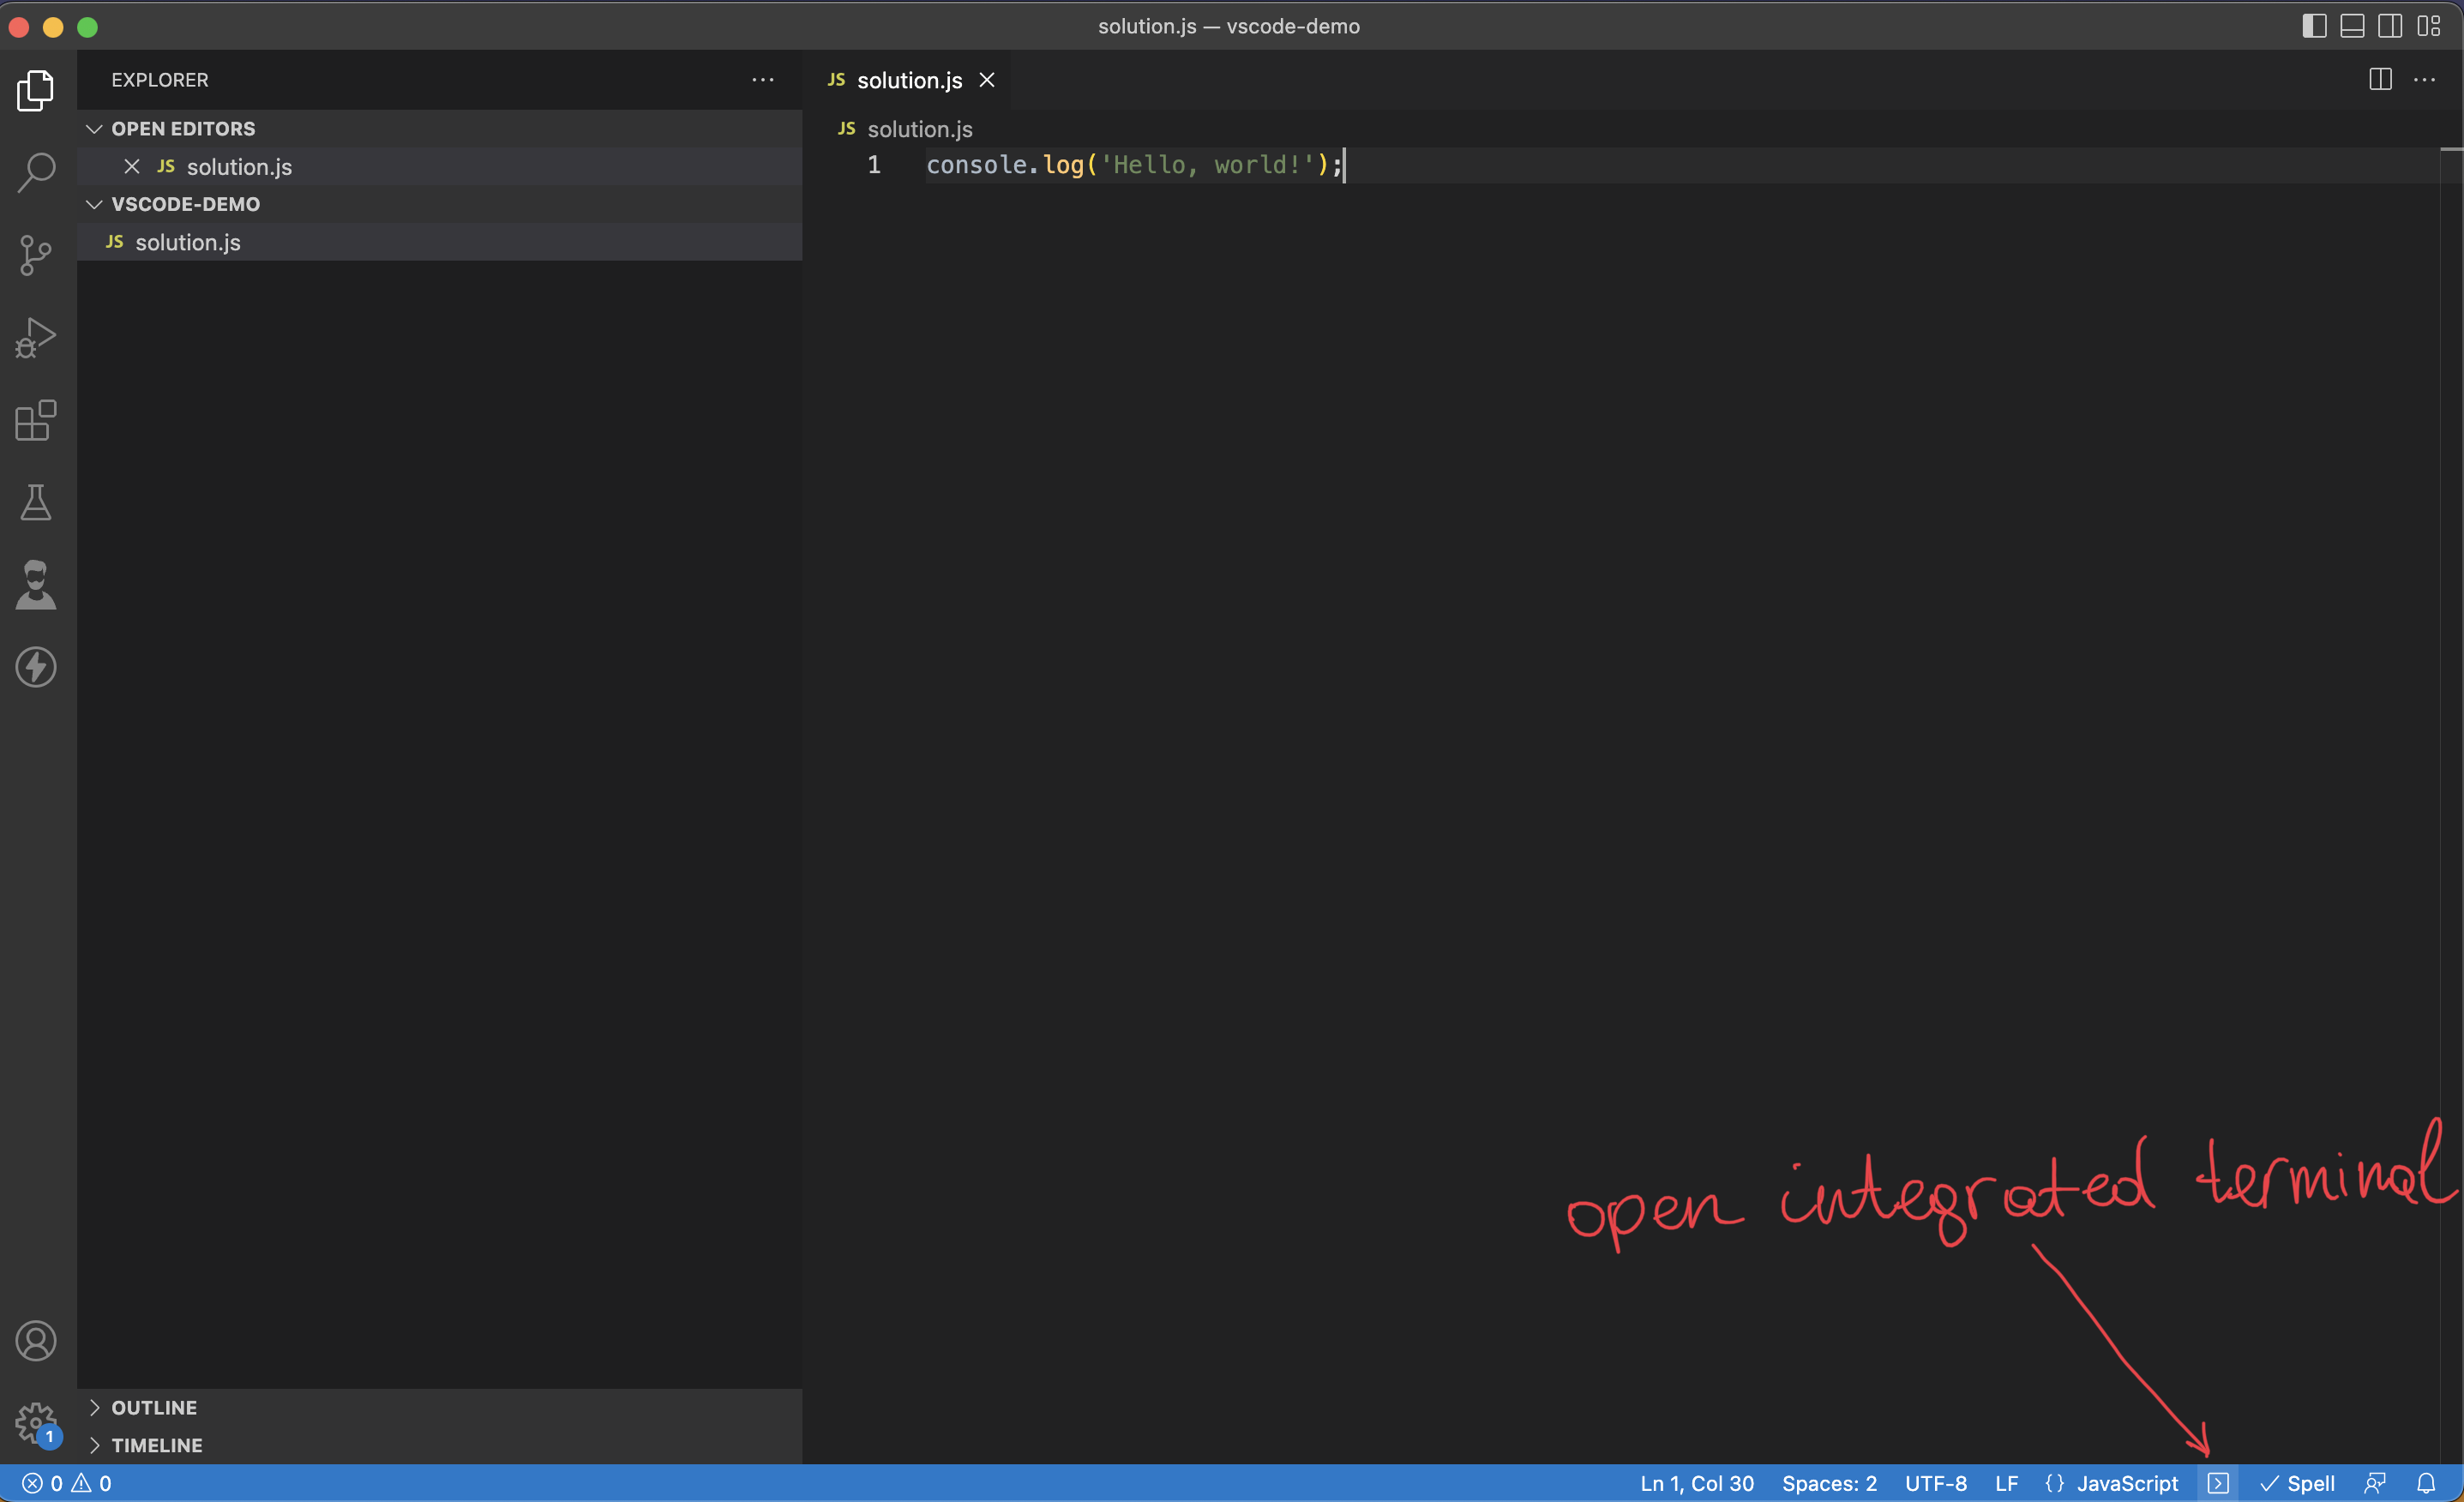
Alternatively, you can use a shortcut Ctrl + Shift + U (Windows and Linux) or Cmd + Shift + U (macOS).
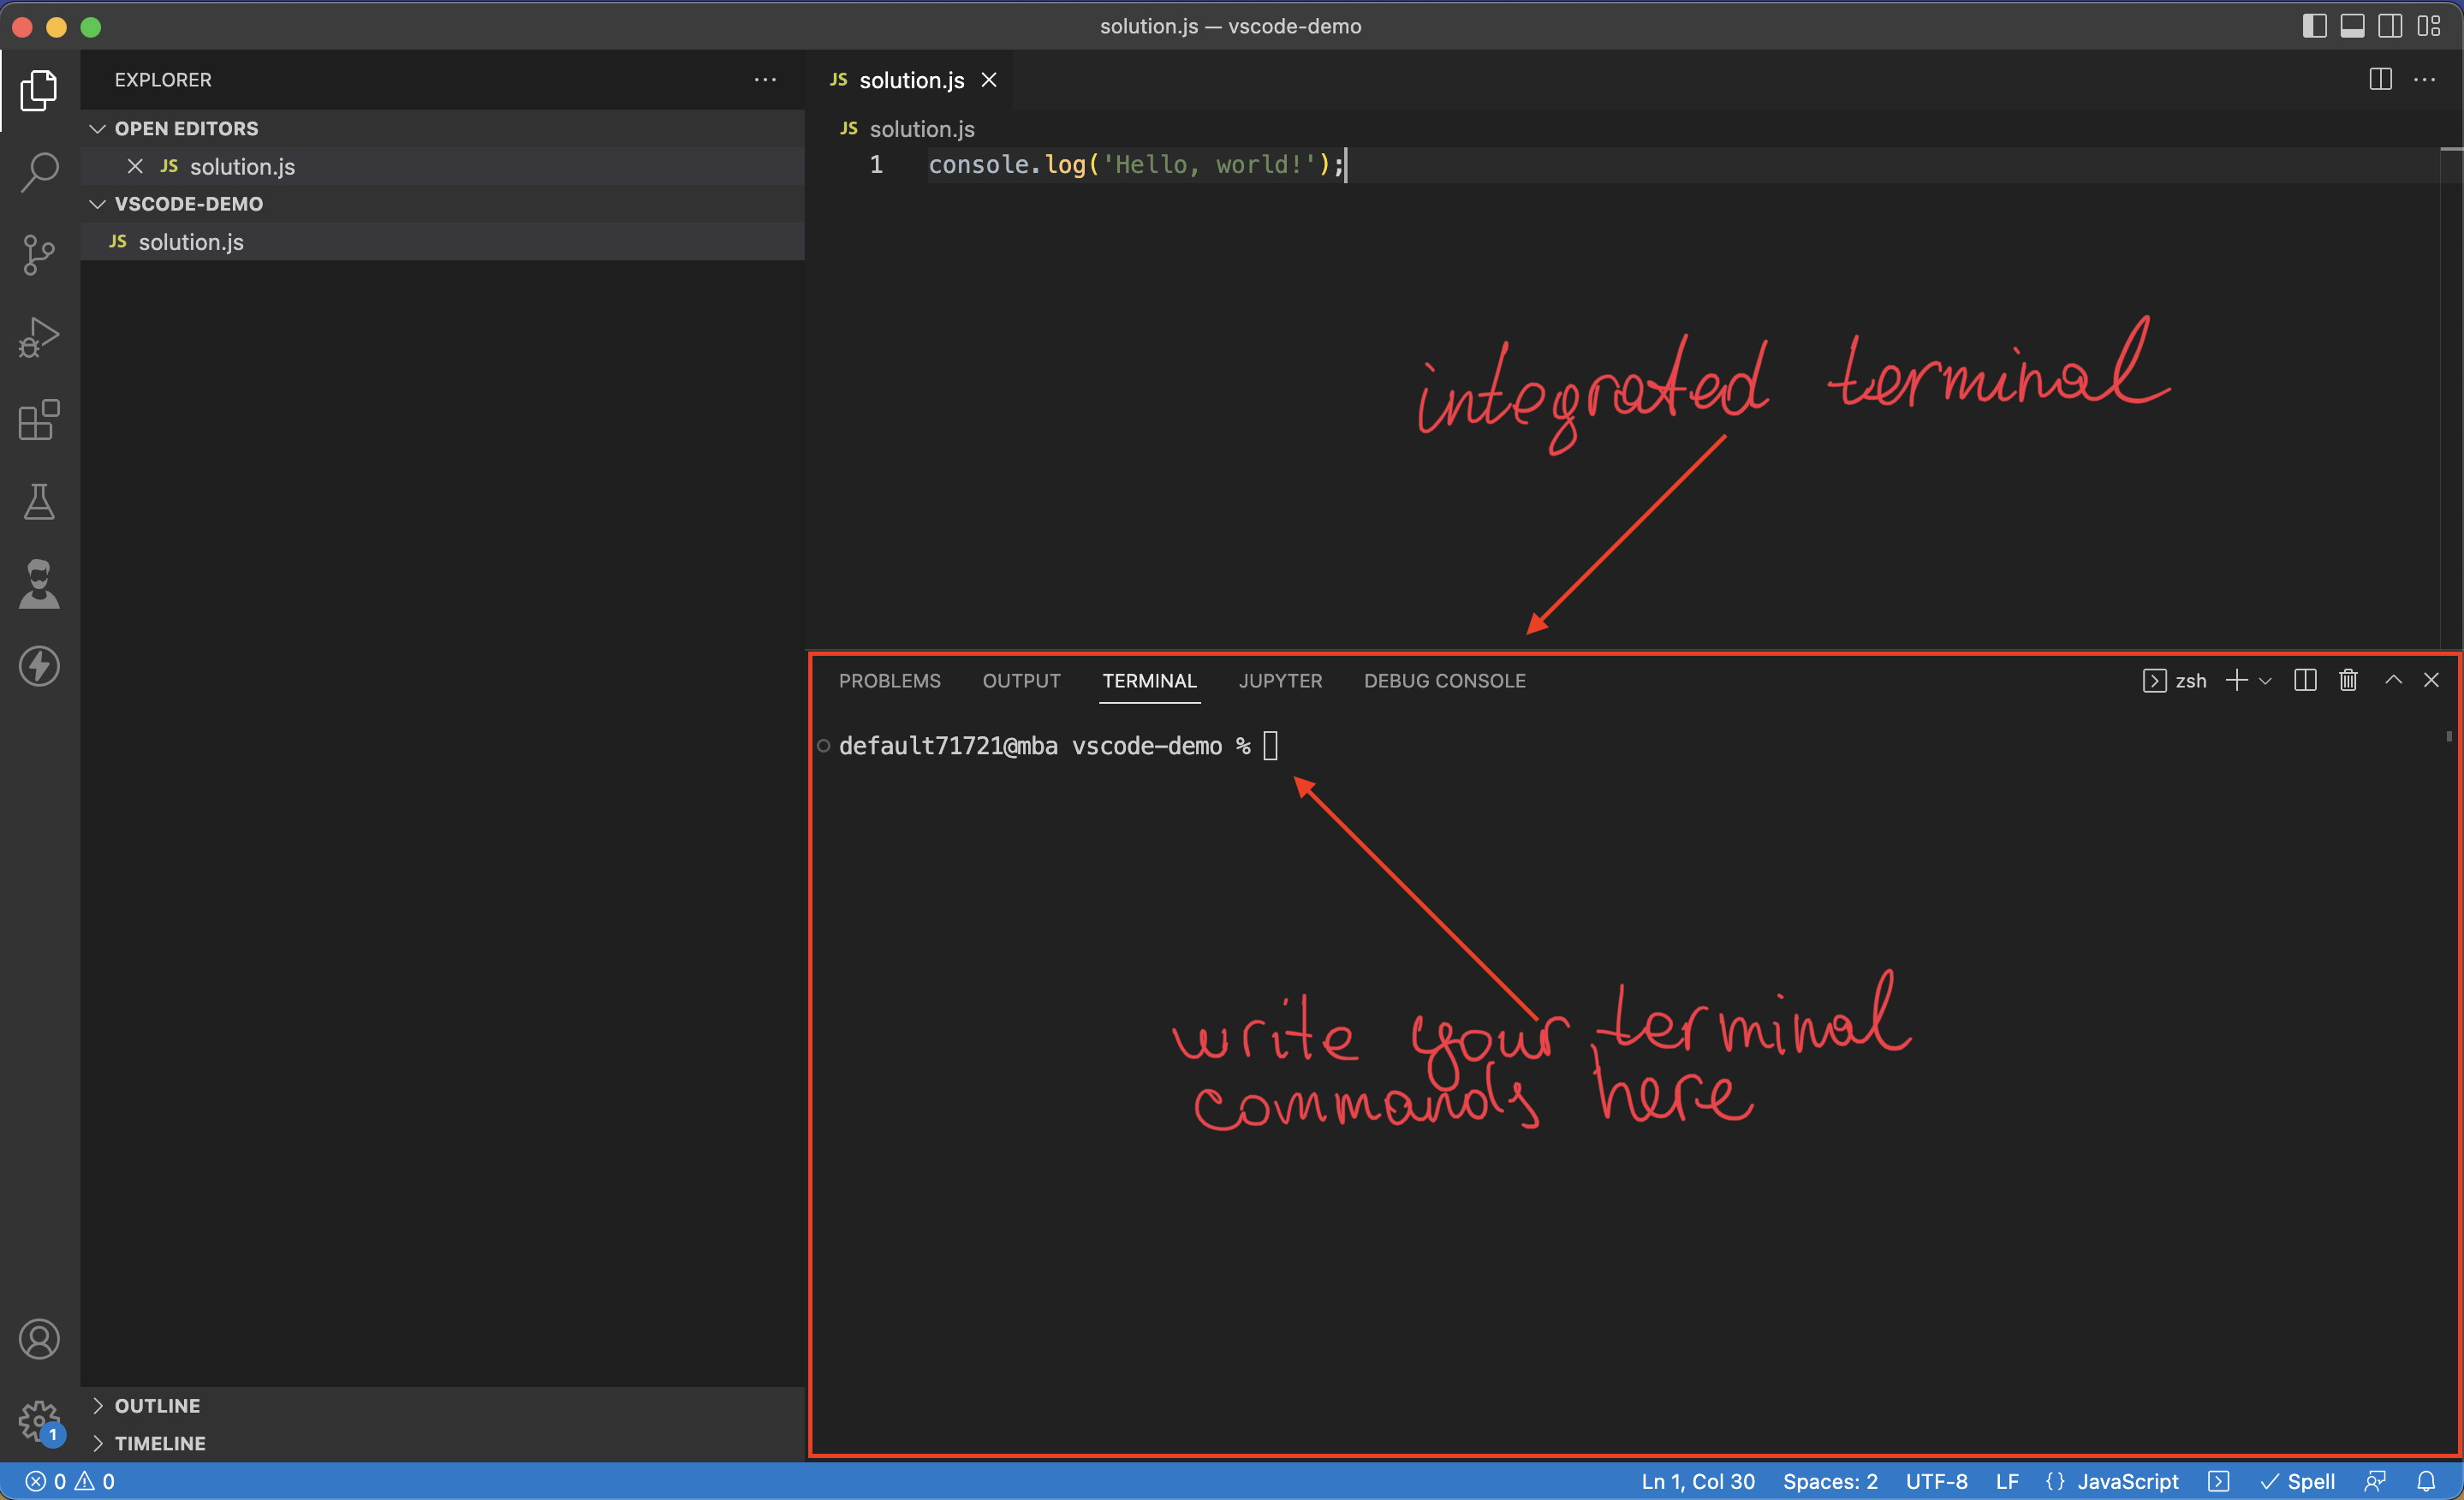
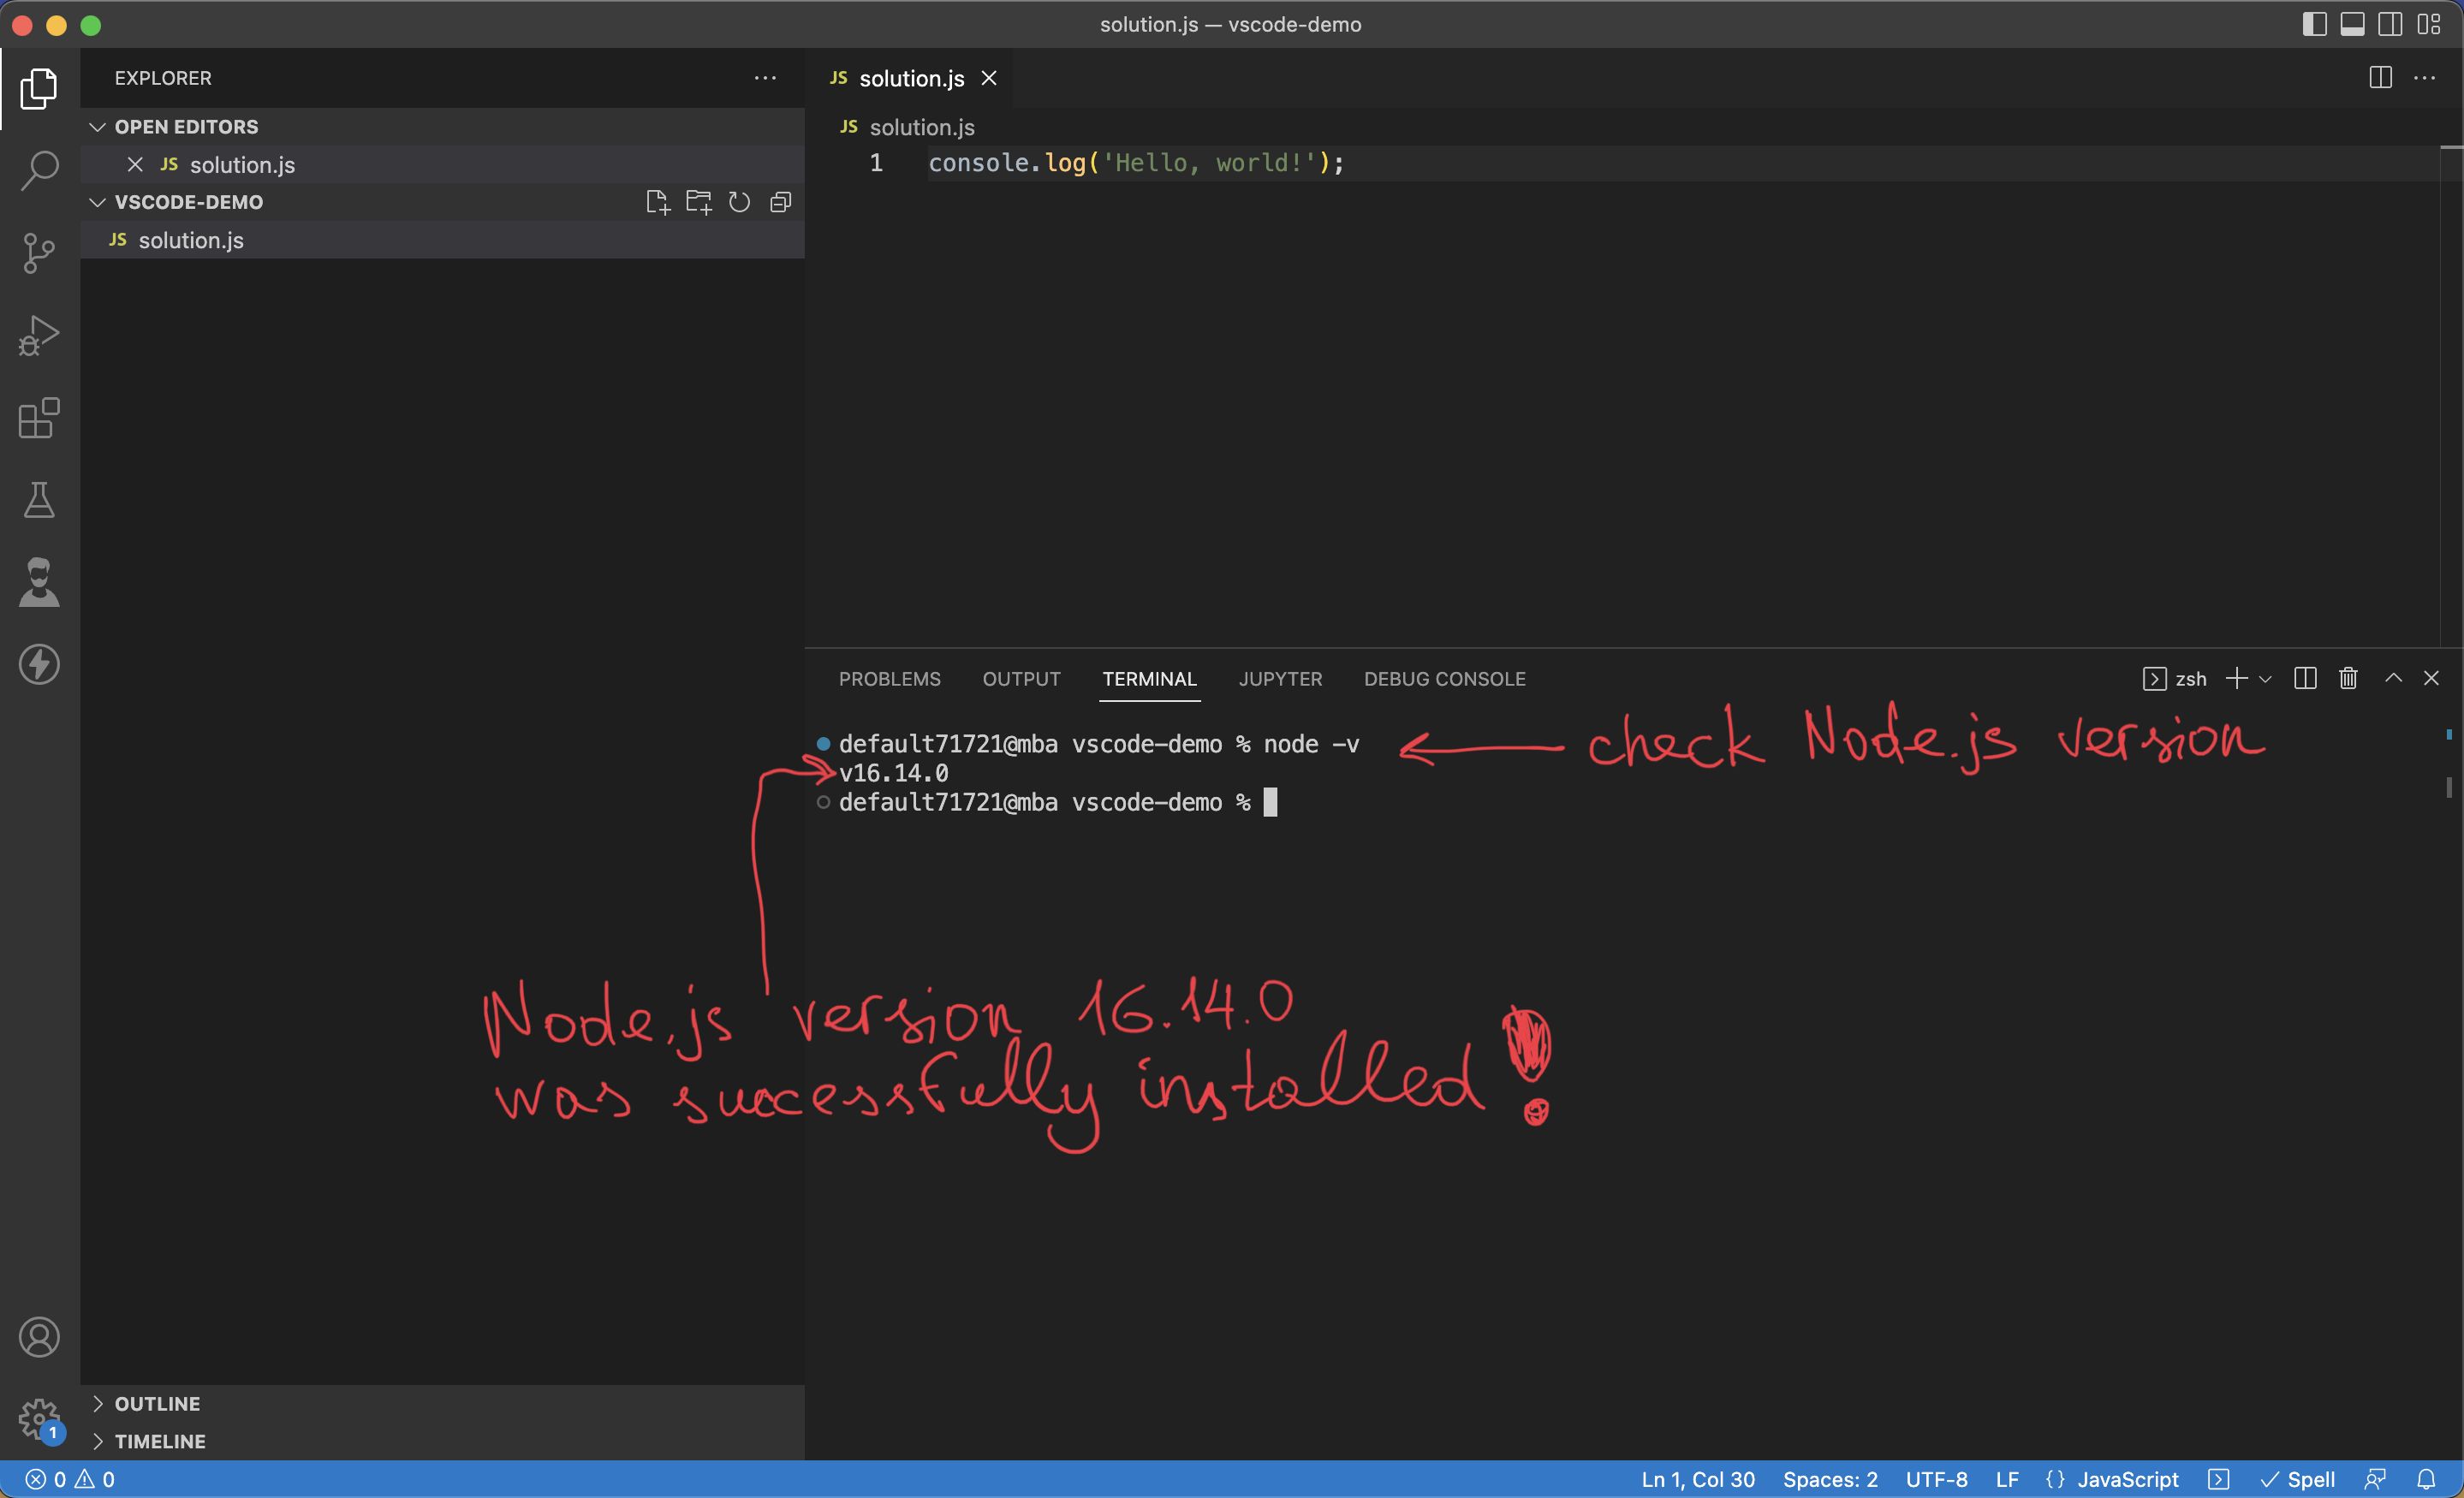
The first command that you’ll type in the intergrated terminal should be
node -v
It will verify that Node.js was successfully installed on your computer.
If Node.js is not installed or you haven’t restarted VS Code after installing Node.js, you’ll get the following error.
The term 'node' is not recognized as the name of a cmdlet,
function, script file, or operable program.
To fix this error, go back and complete the Node.js installation. Then, restart your computer after you finish the installation process.
Verifying your Node.js installation is a great accomplishment. This means you can now run your JavaScript files in Visual Studio Code without a need for the browser!
Run JavaScript program with Node.js in VS Code terminal
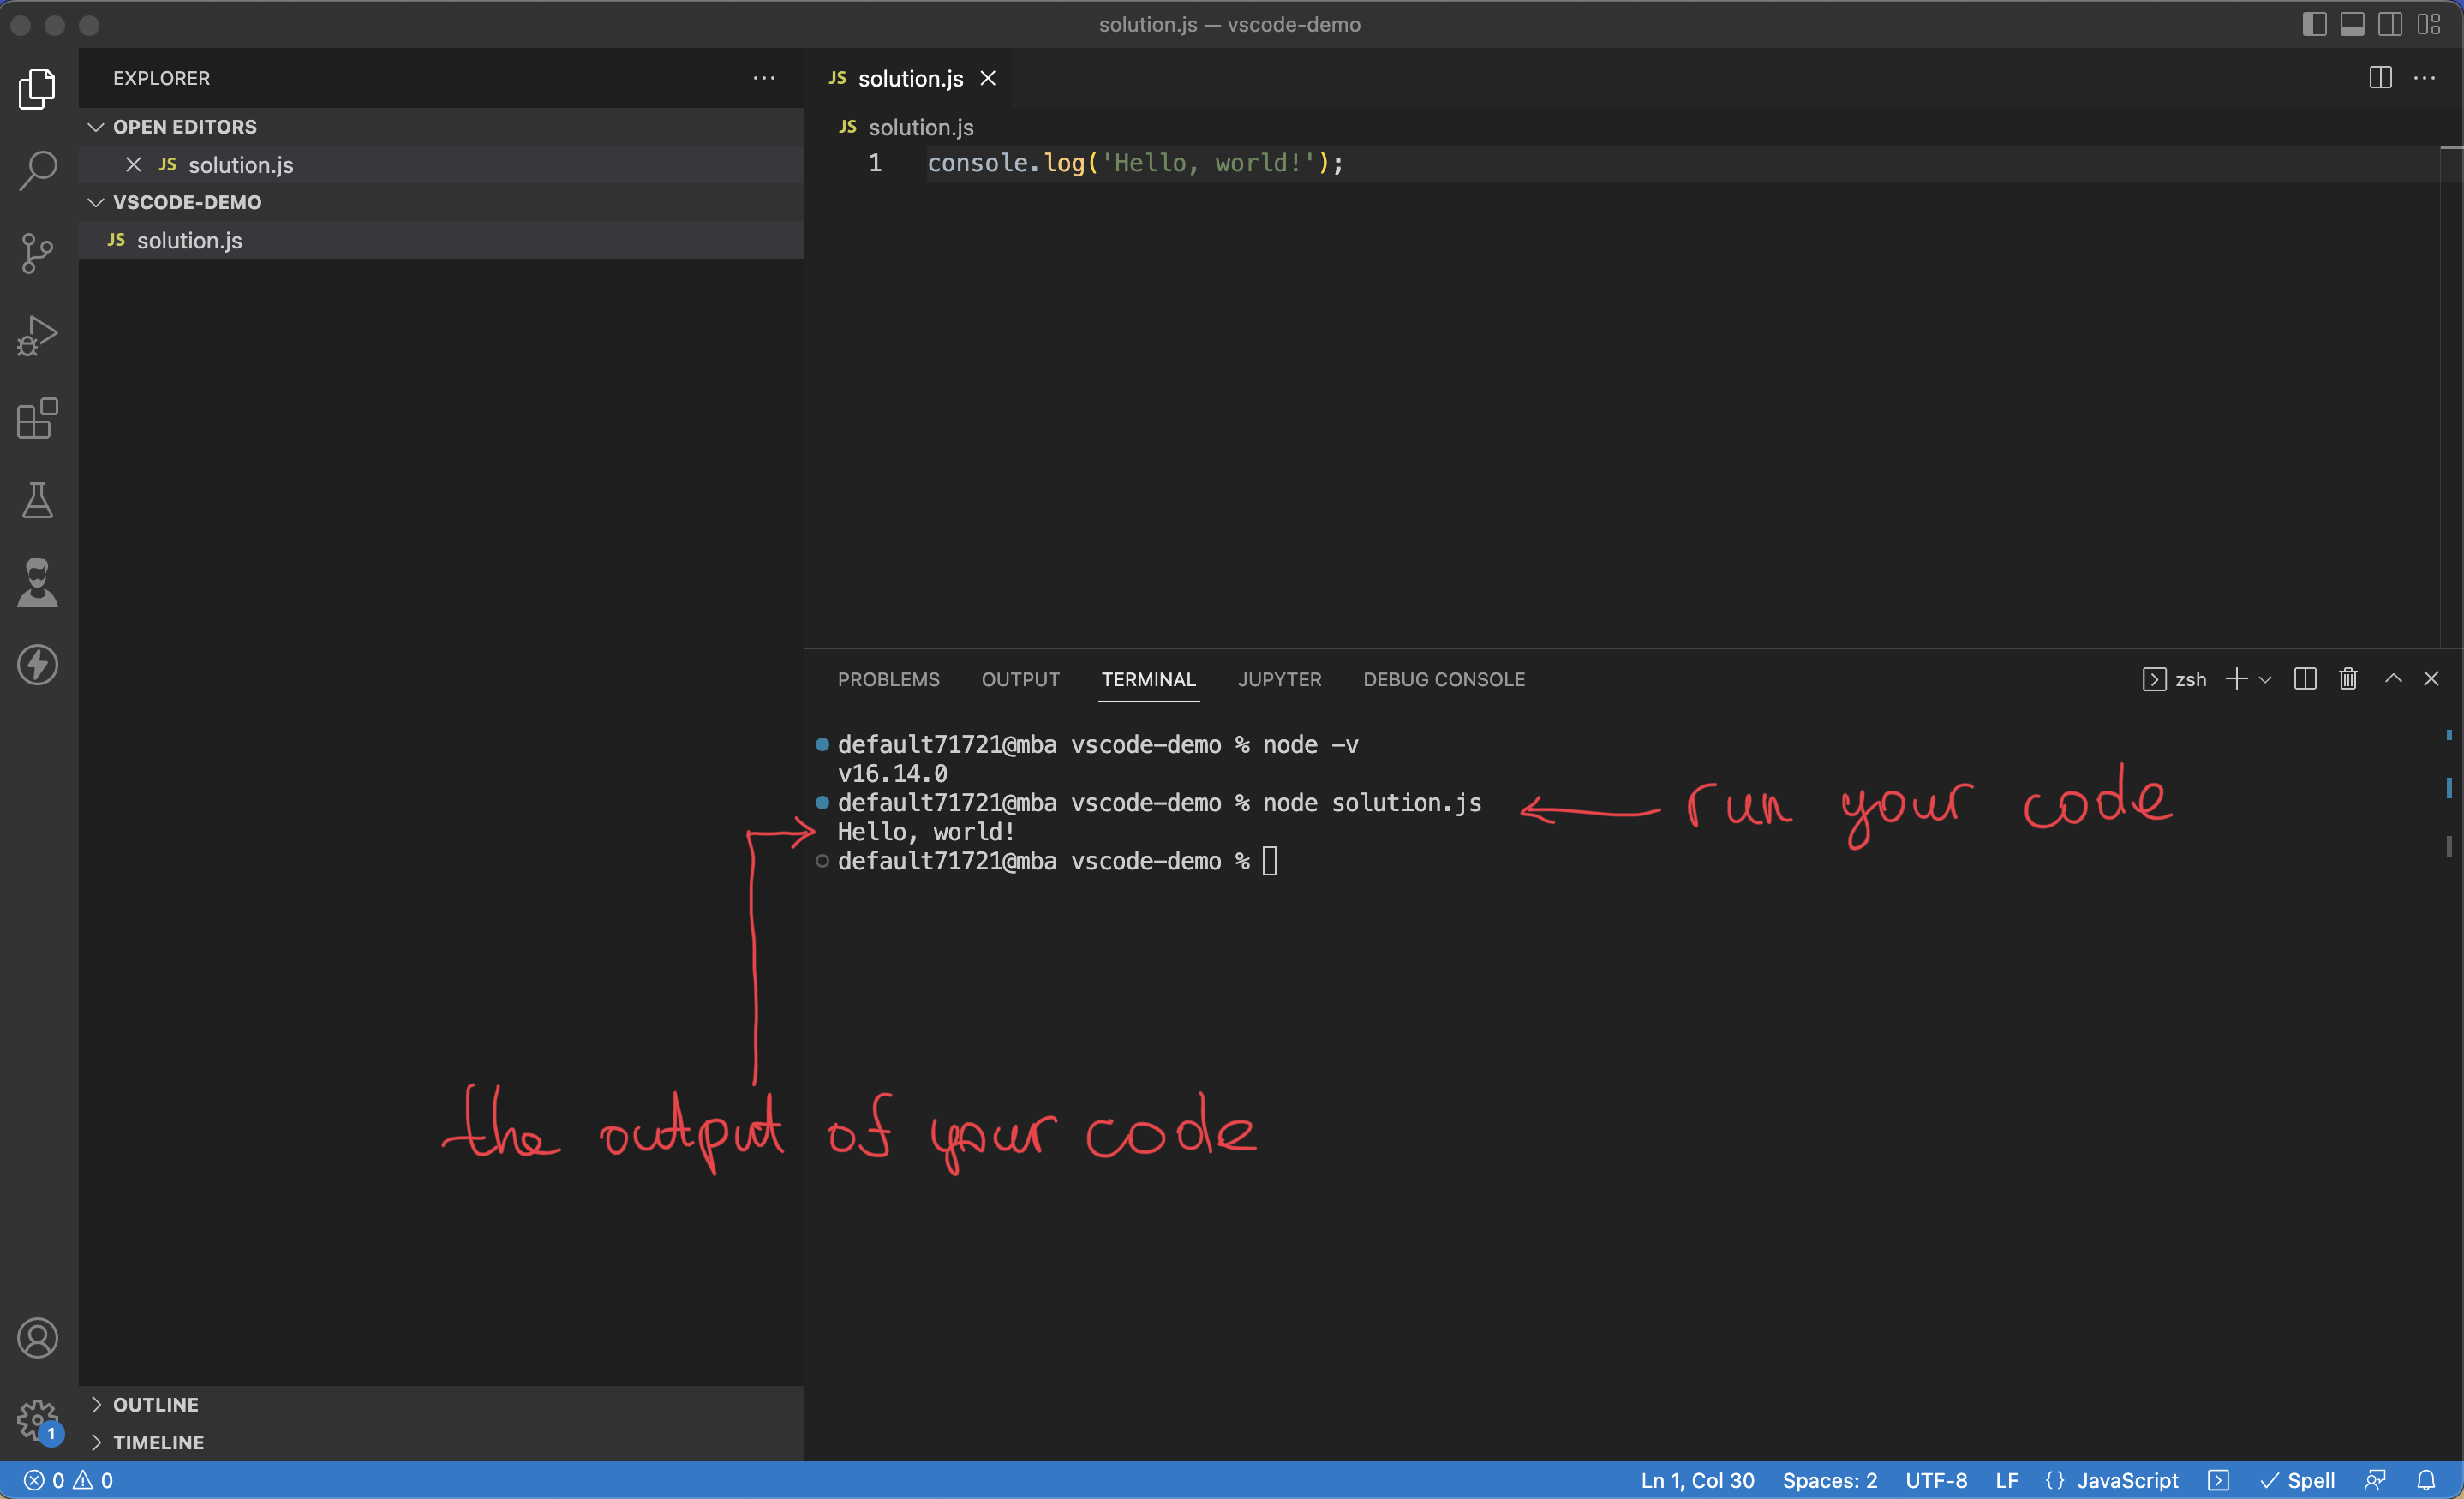
You can execute your JavaScript code by typing the command node *filename* in your terminal.
The filename part of the command changes depending on which file you want to run.
My code is written in the file solution.js, and thus the command I’m using to execute my JavaScript file looks like this.
node solution.js
Here’s what happens after I type it into the terminal and hit the “Return” key (or “Enter”).
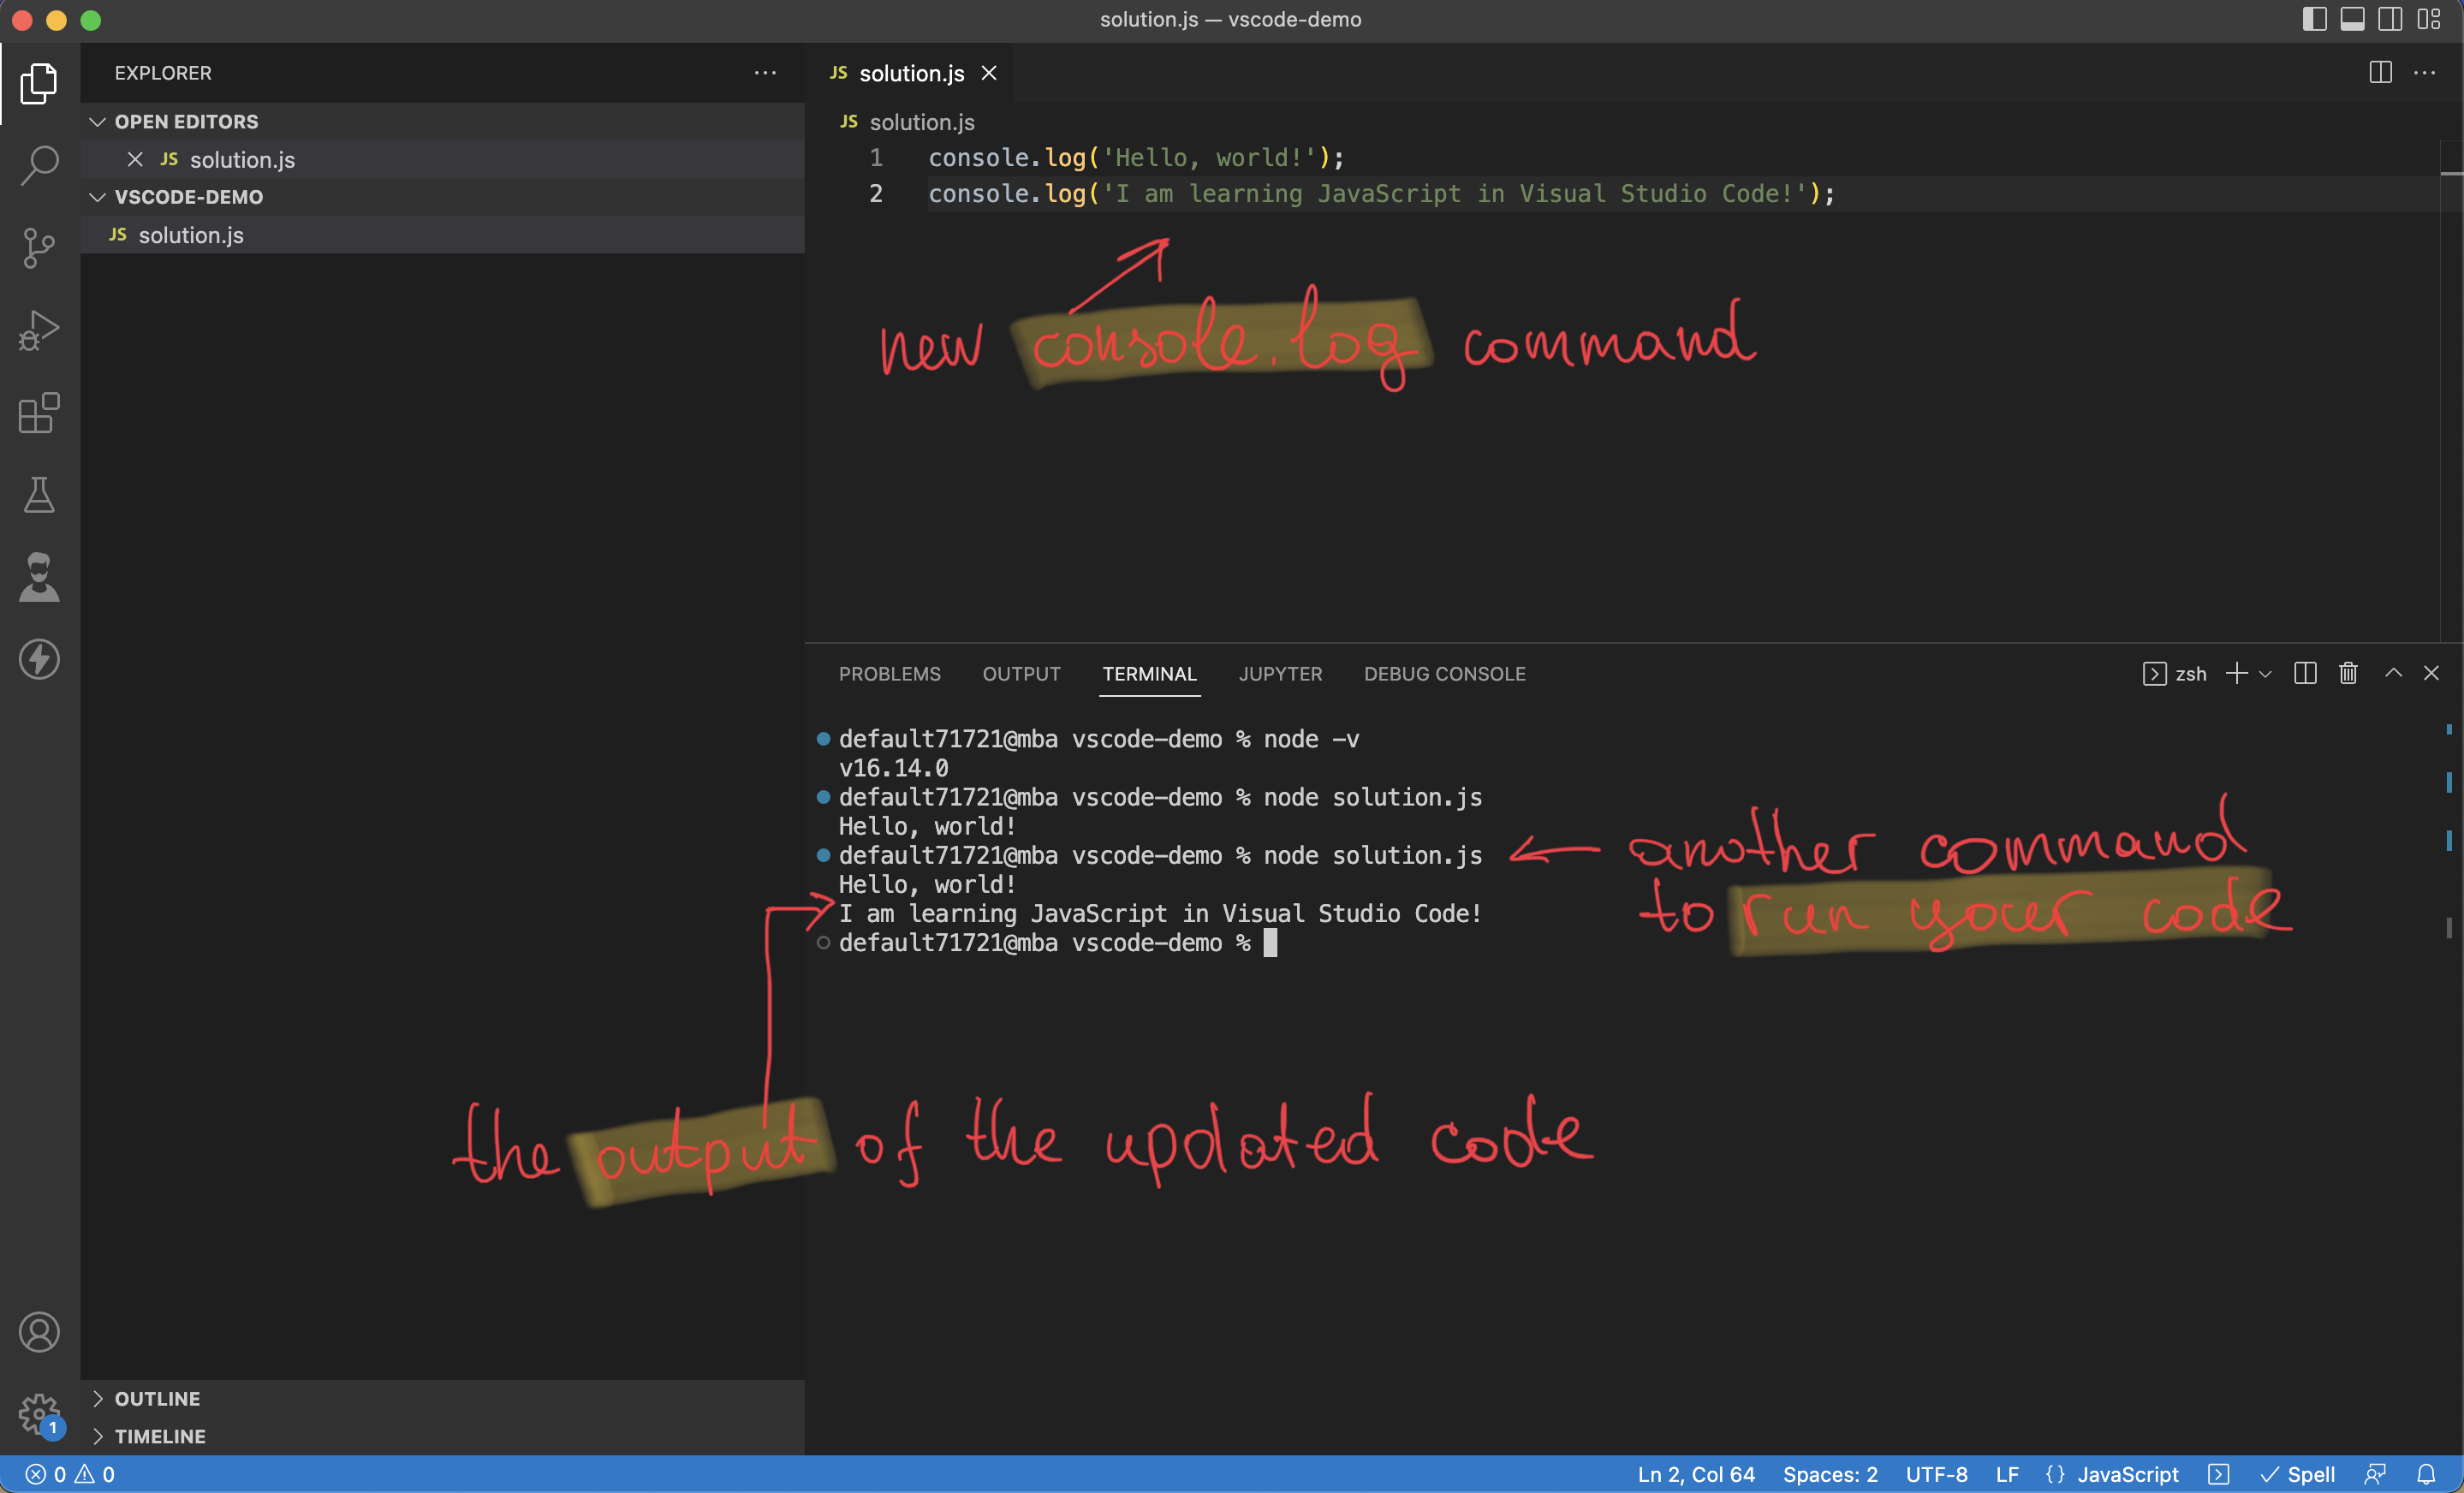
Try adding another line to your JavaScript file and running it again.
console.log('Hello, world!');
console.log('I am learning JavaScript in Visual Studio Code!');
And here’s the result.
Using Visual Studio Code extensions to learn JavaScript
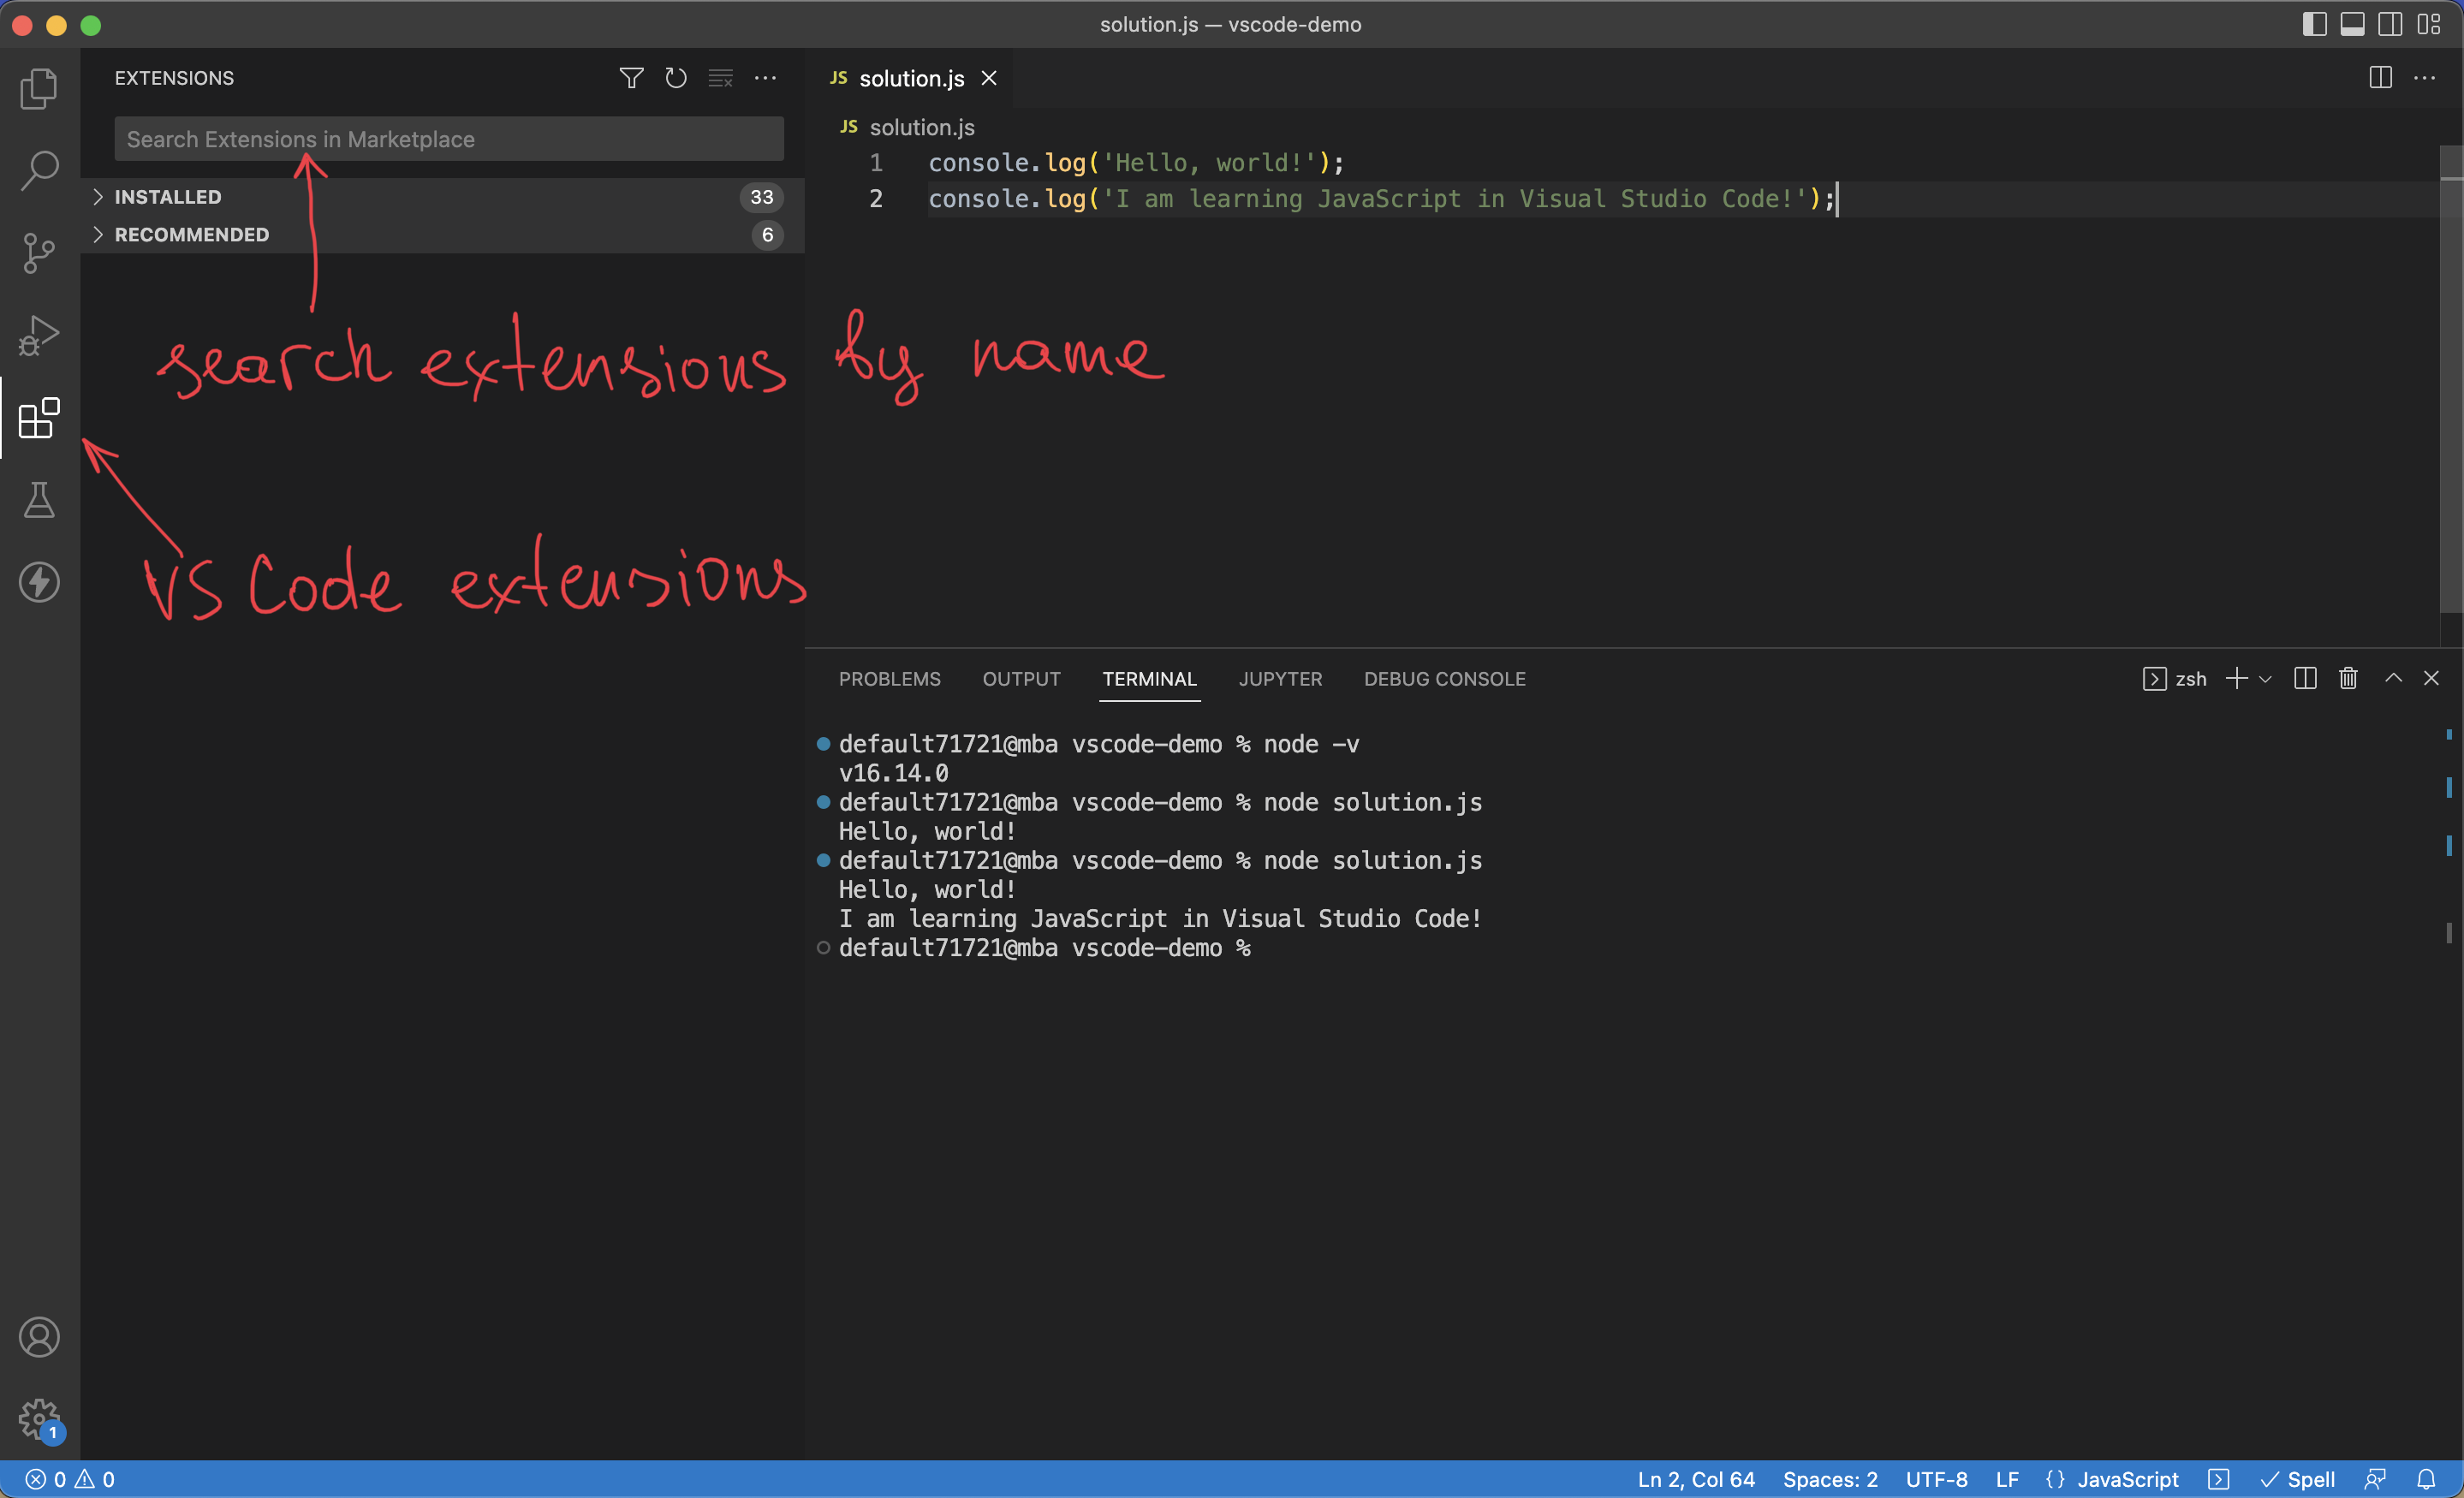
One of the most powerful features of Visual Studio Code is the ability to install free open-source extensions.
One way to search for Visual Studio code extensions is by visiting the VS Code extension marketplace in your web browser.
Alternatively, you can find and install extensions from the Visual Studio code itself.
Coderslang VS Code extension gives you access to hundreds of coding tasks plus the ability to automatically verify your solution.
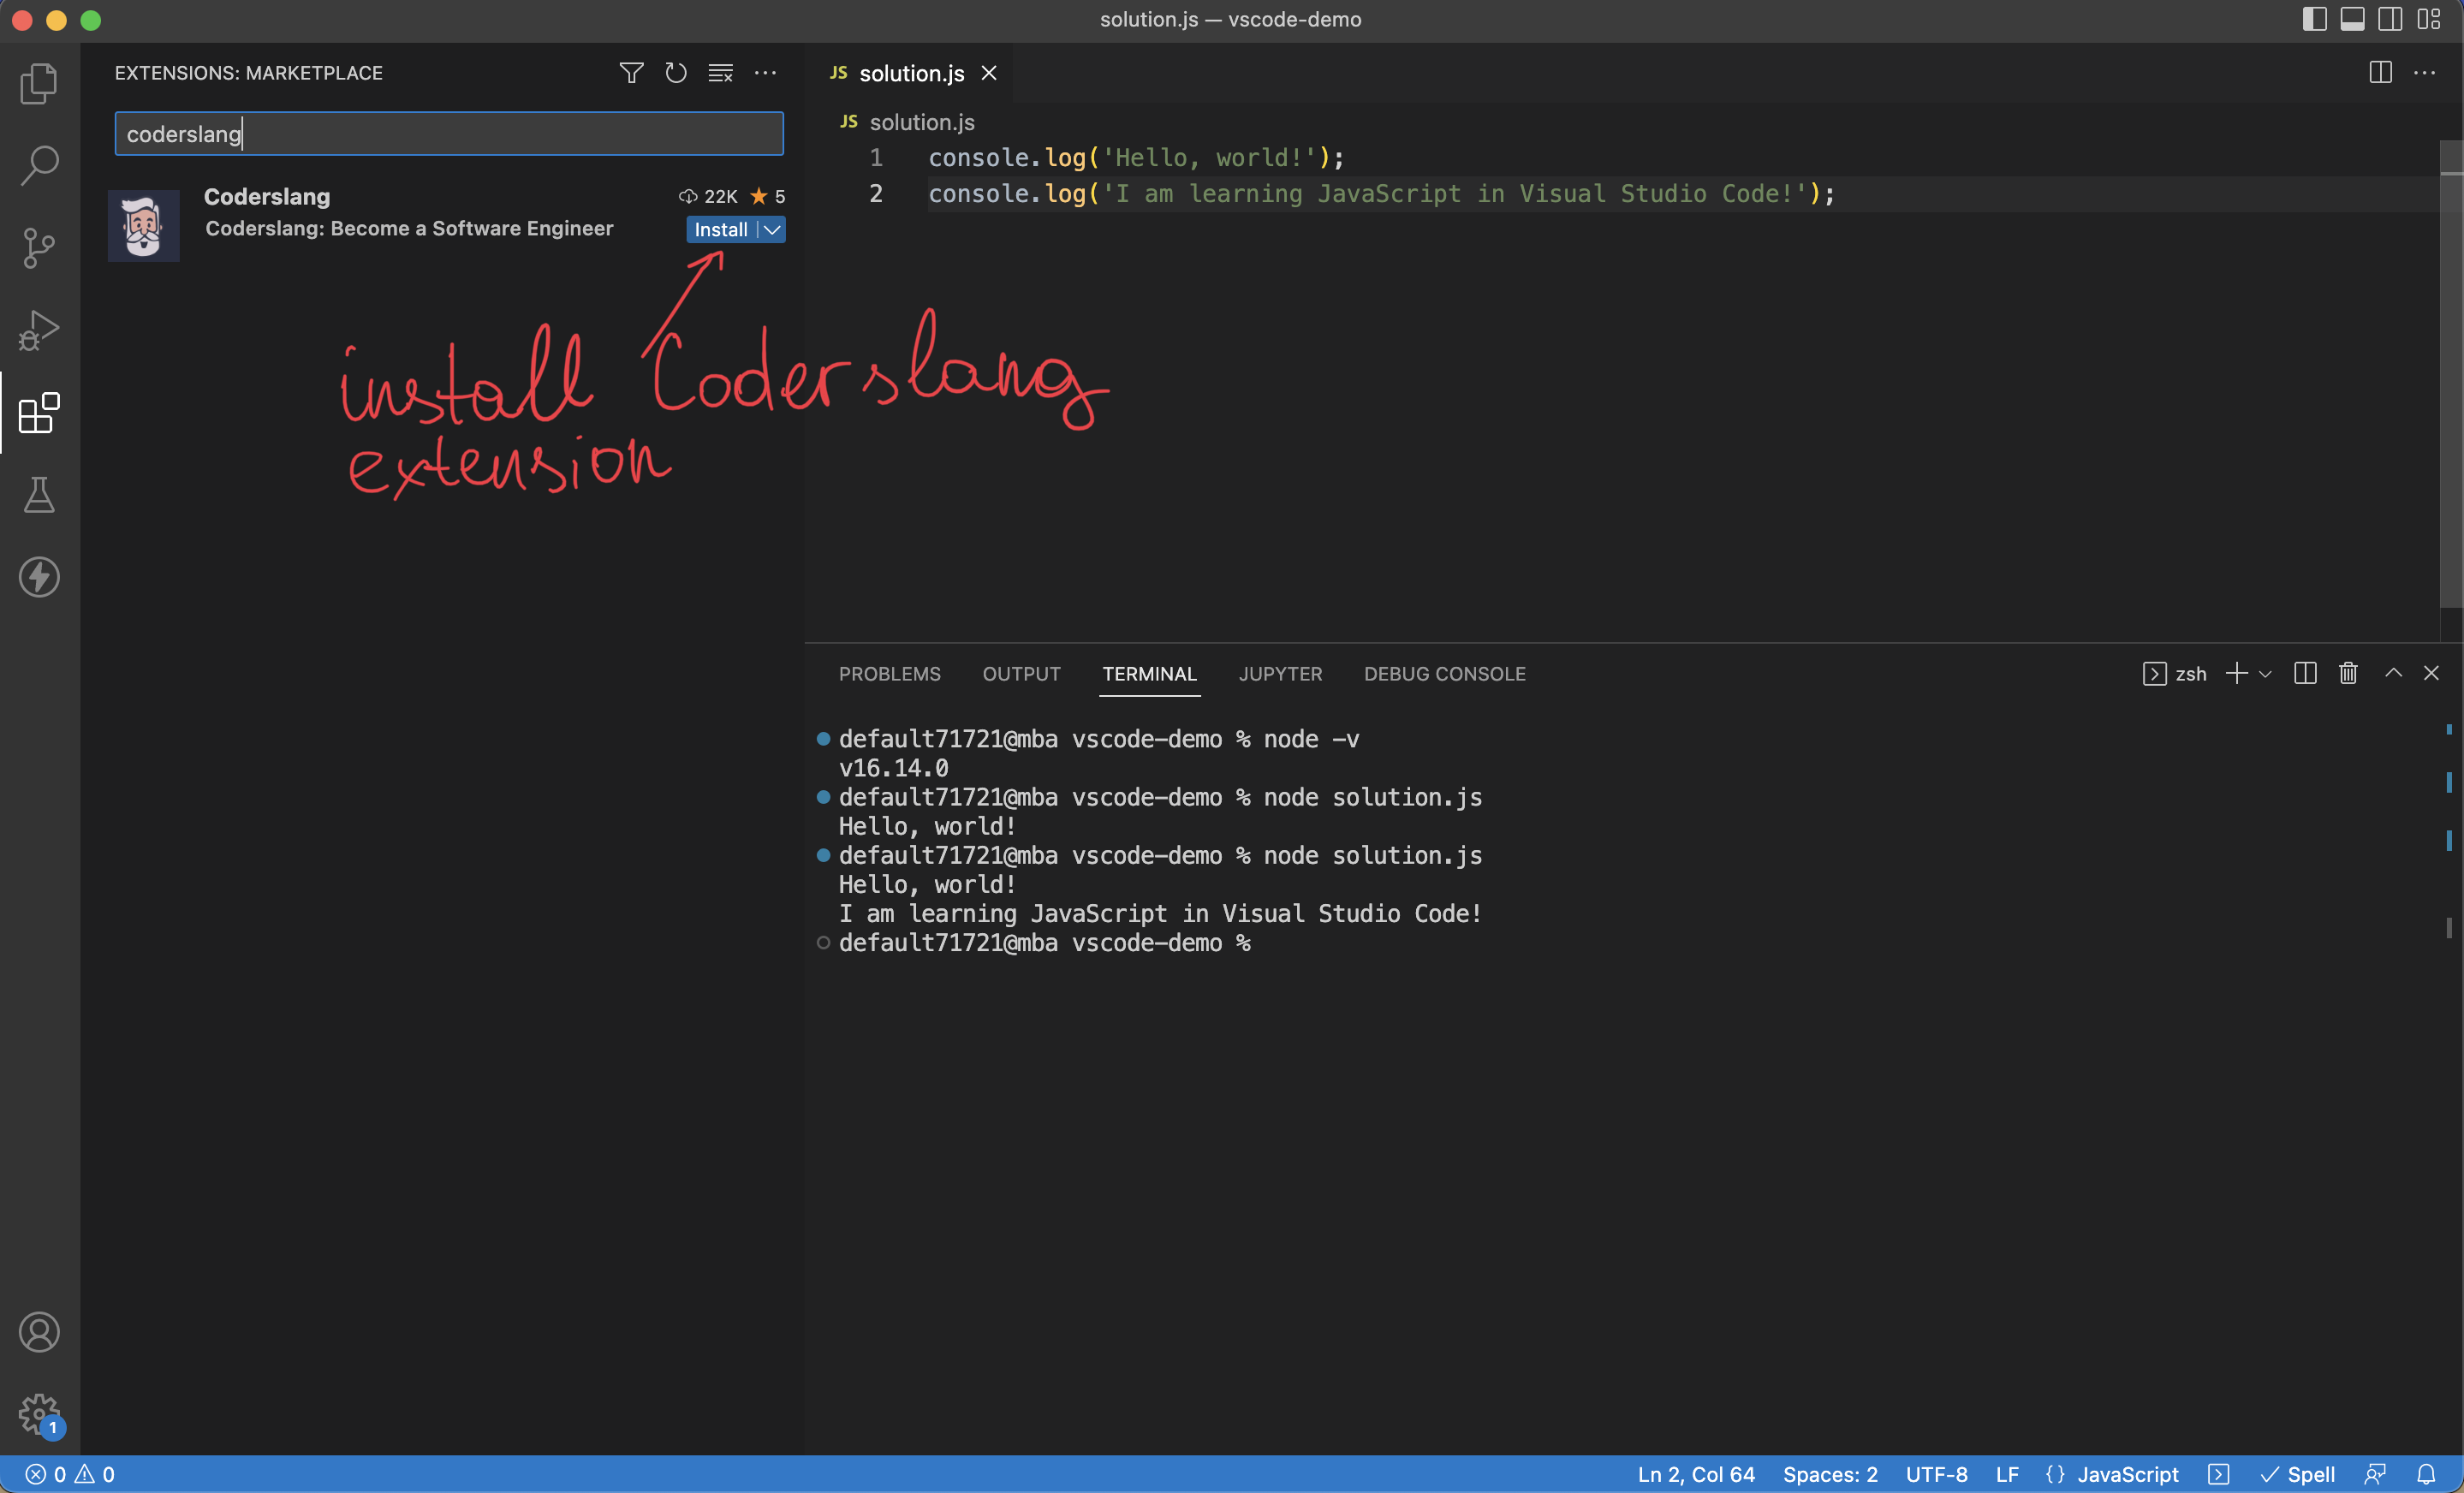
Type coderslang into the search box to find the extension, and then click Install
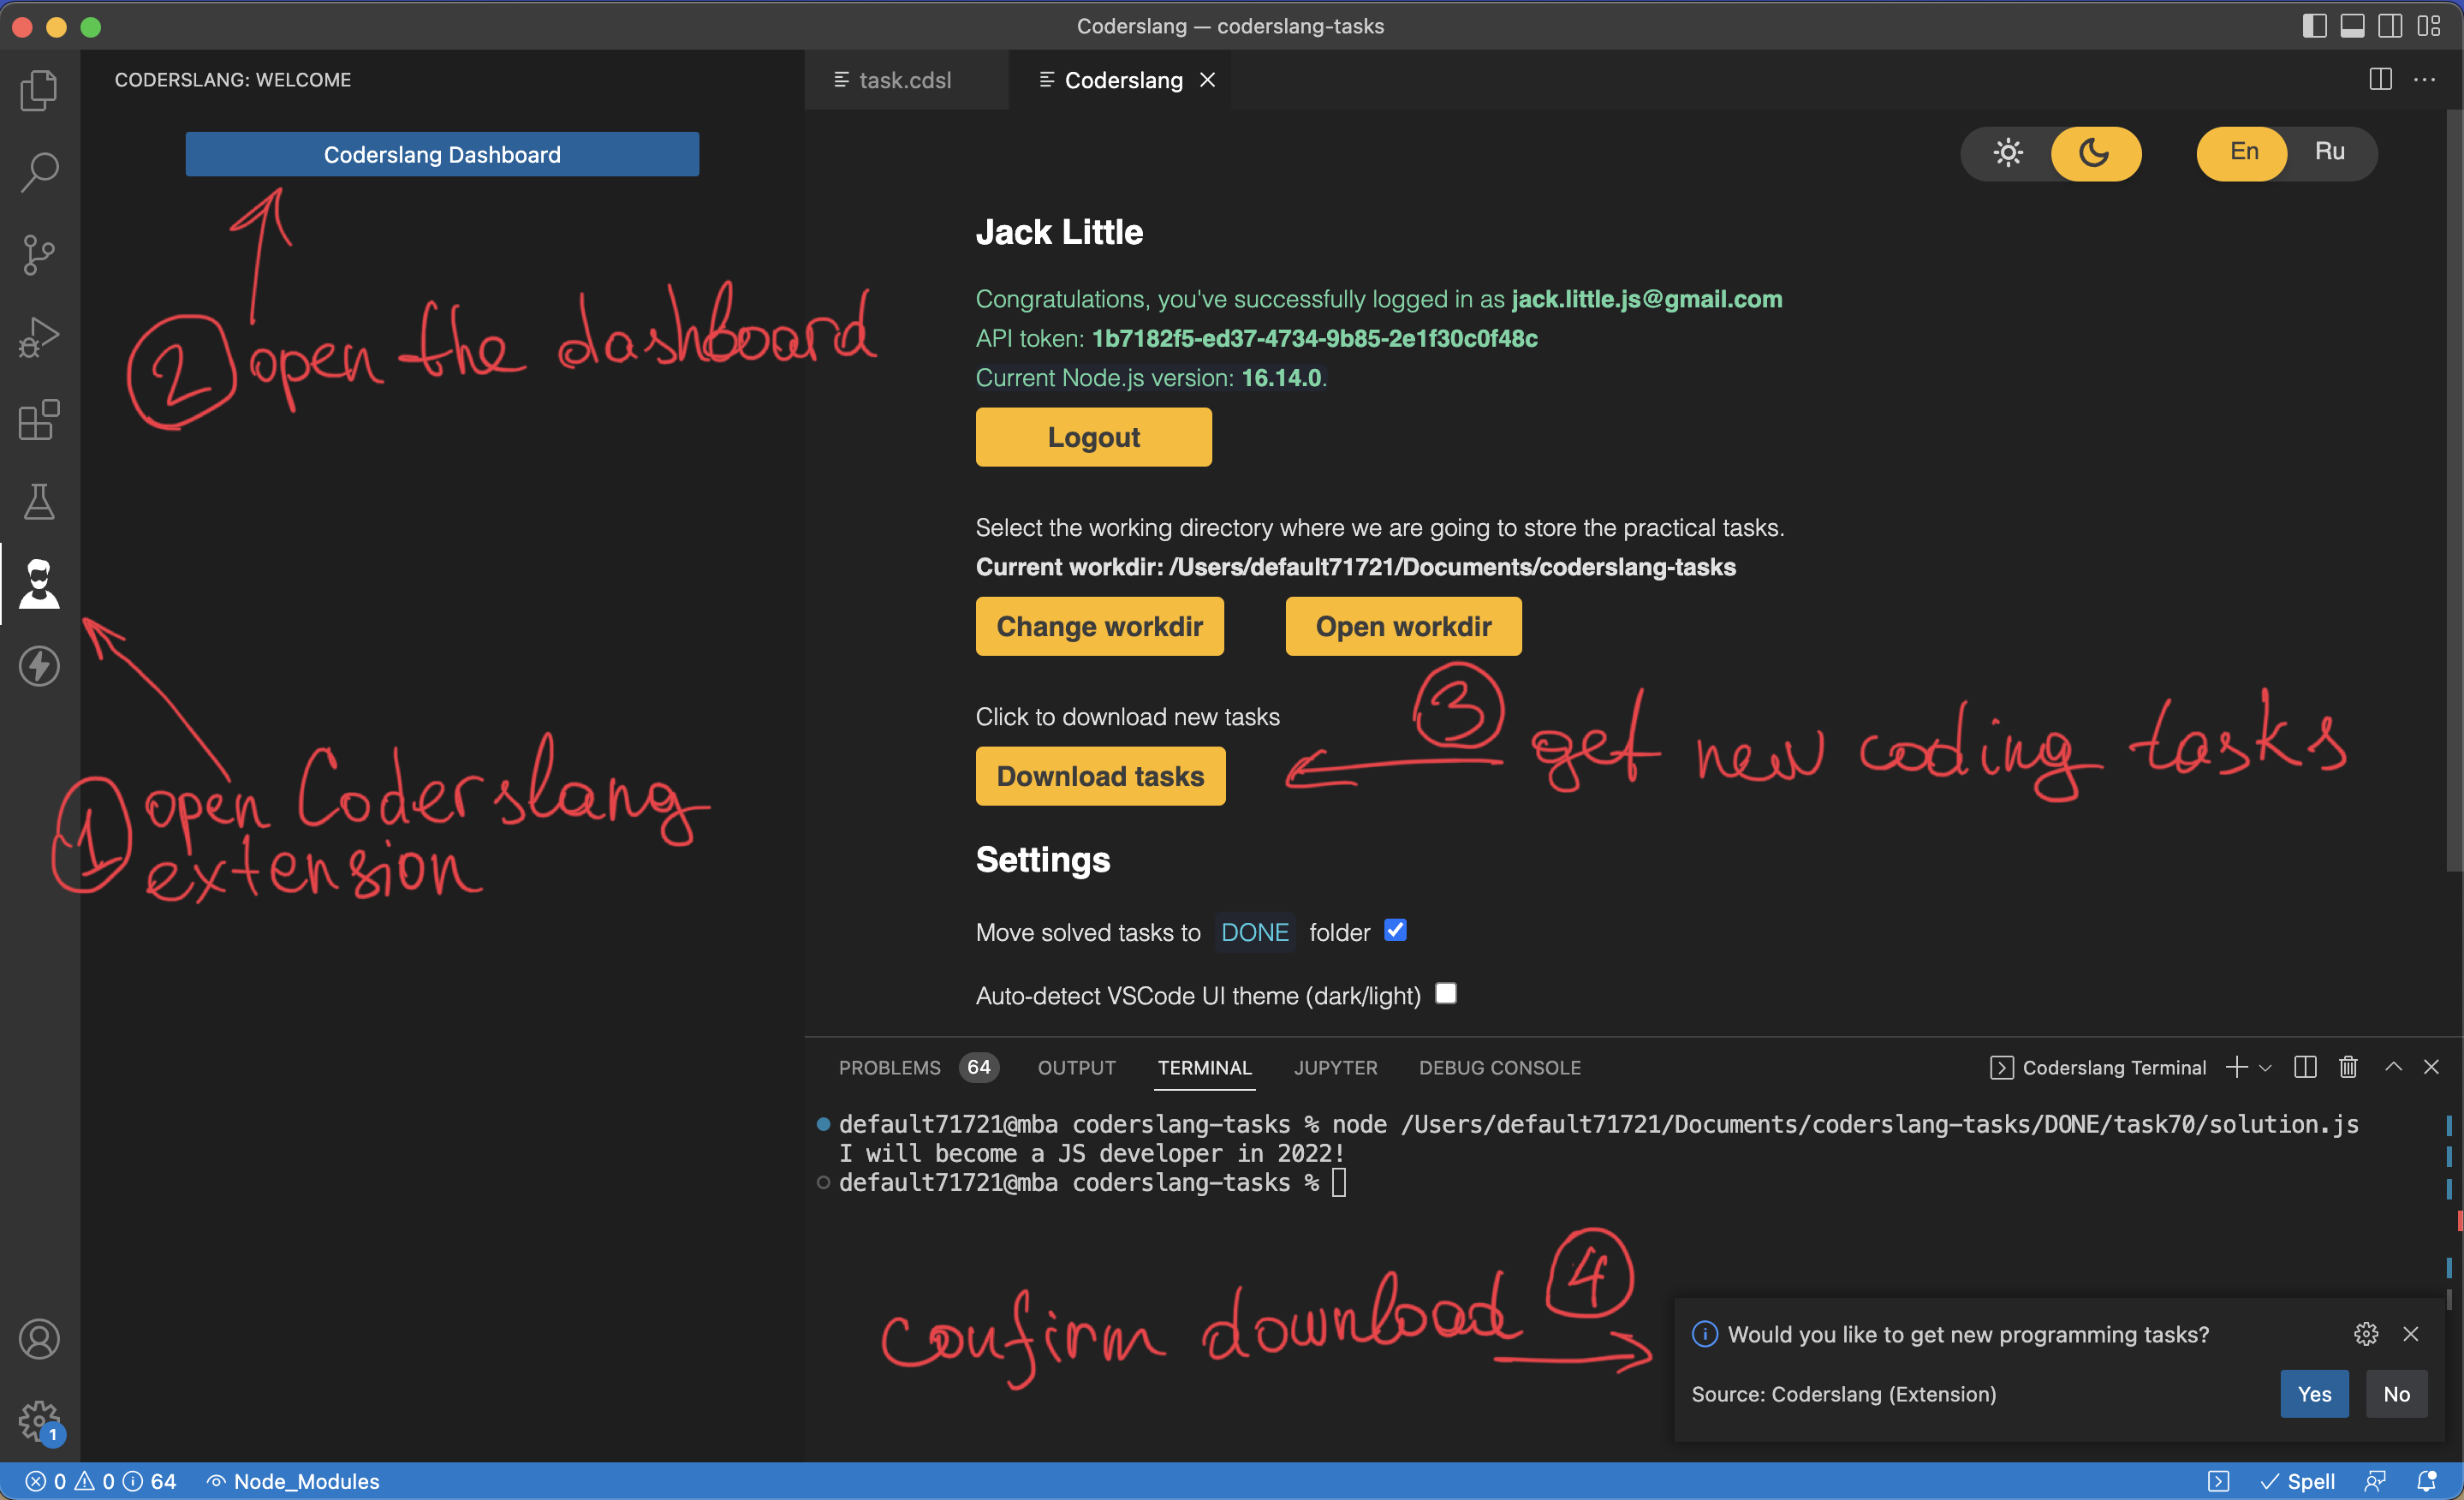
After installing the extension, you’ll get a new icon in the left menu. Click it and proceed to the Coderslang Dashboard.
The prerequisite to start learning JavaScript with Coderslang is creating an account at js.coderslang.com
Once you register, you can retrieve your API key from the settings section to login into the Coderslang VS Code extension.
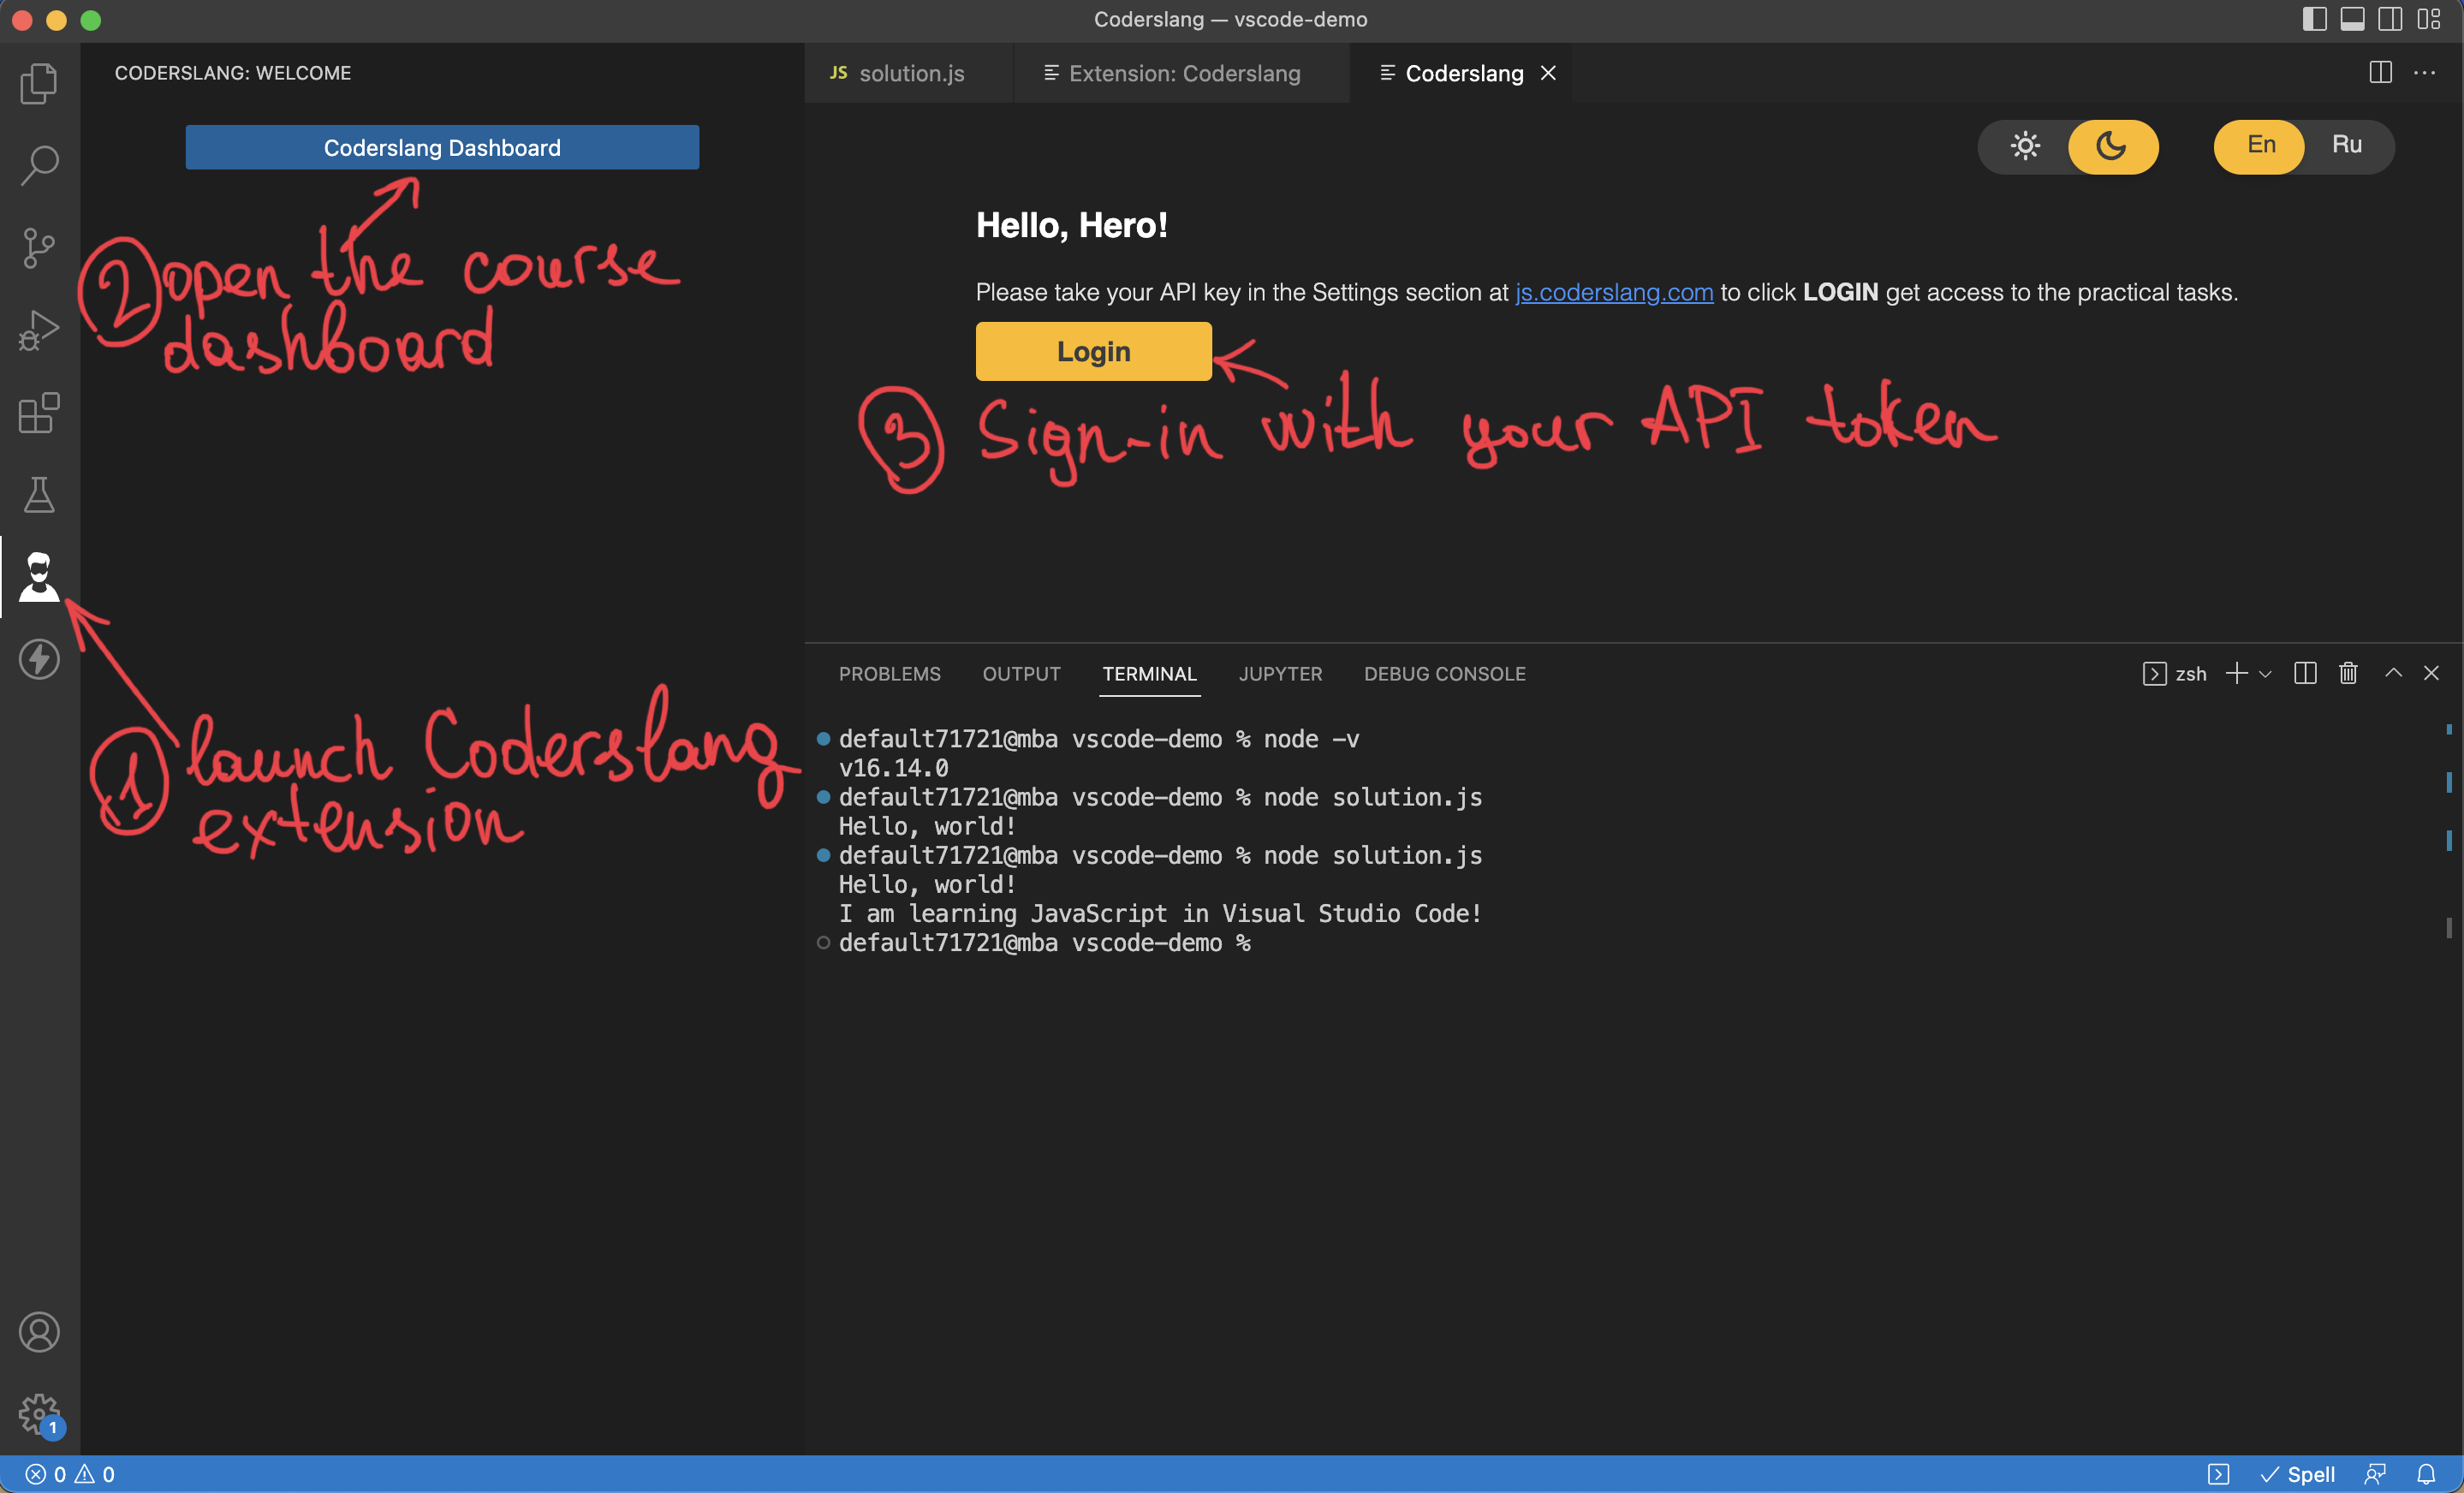
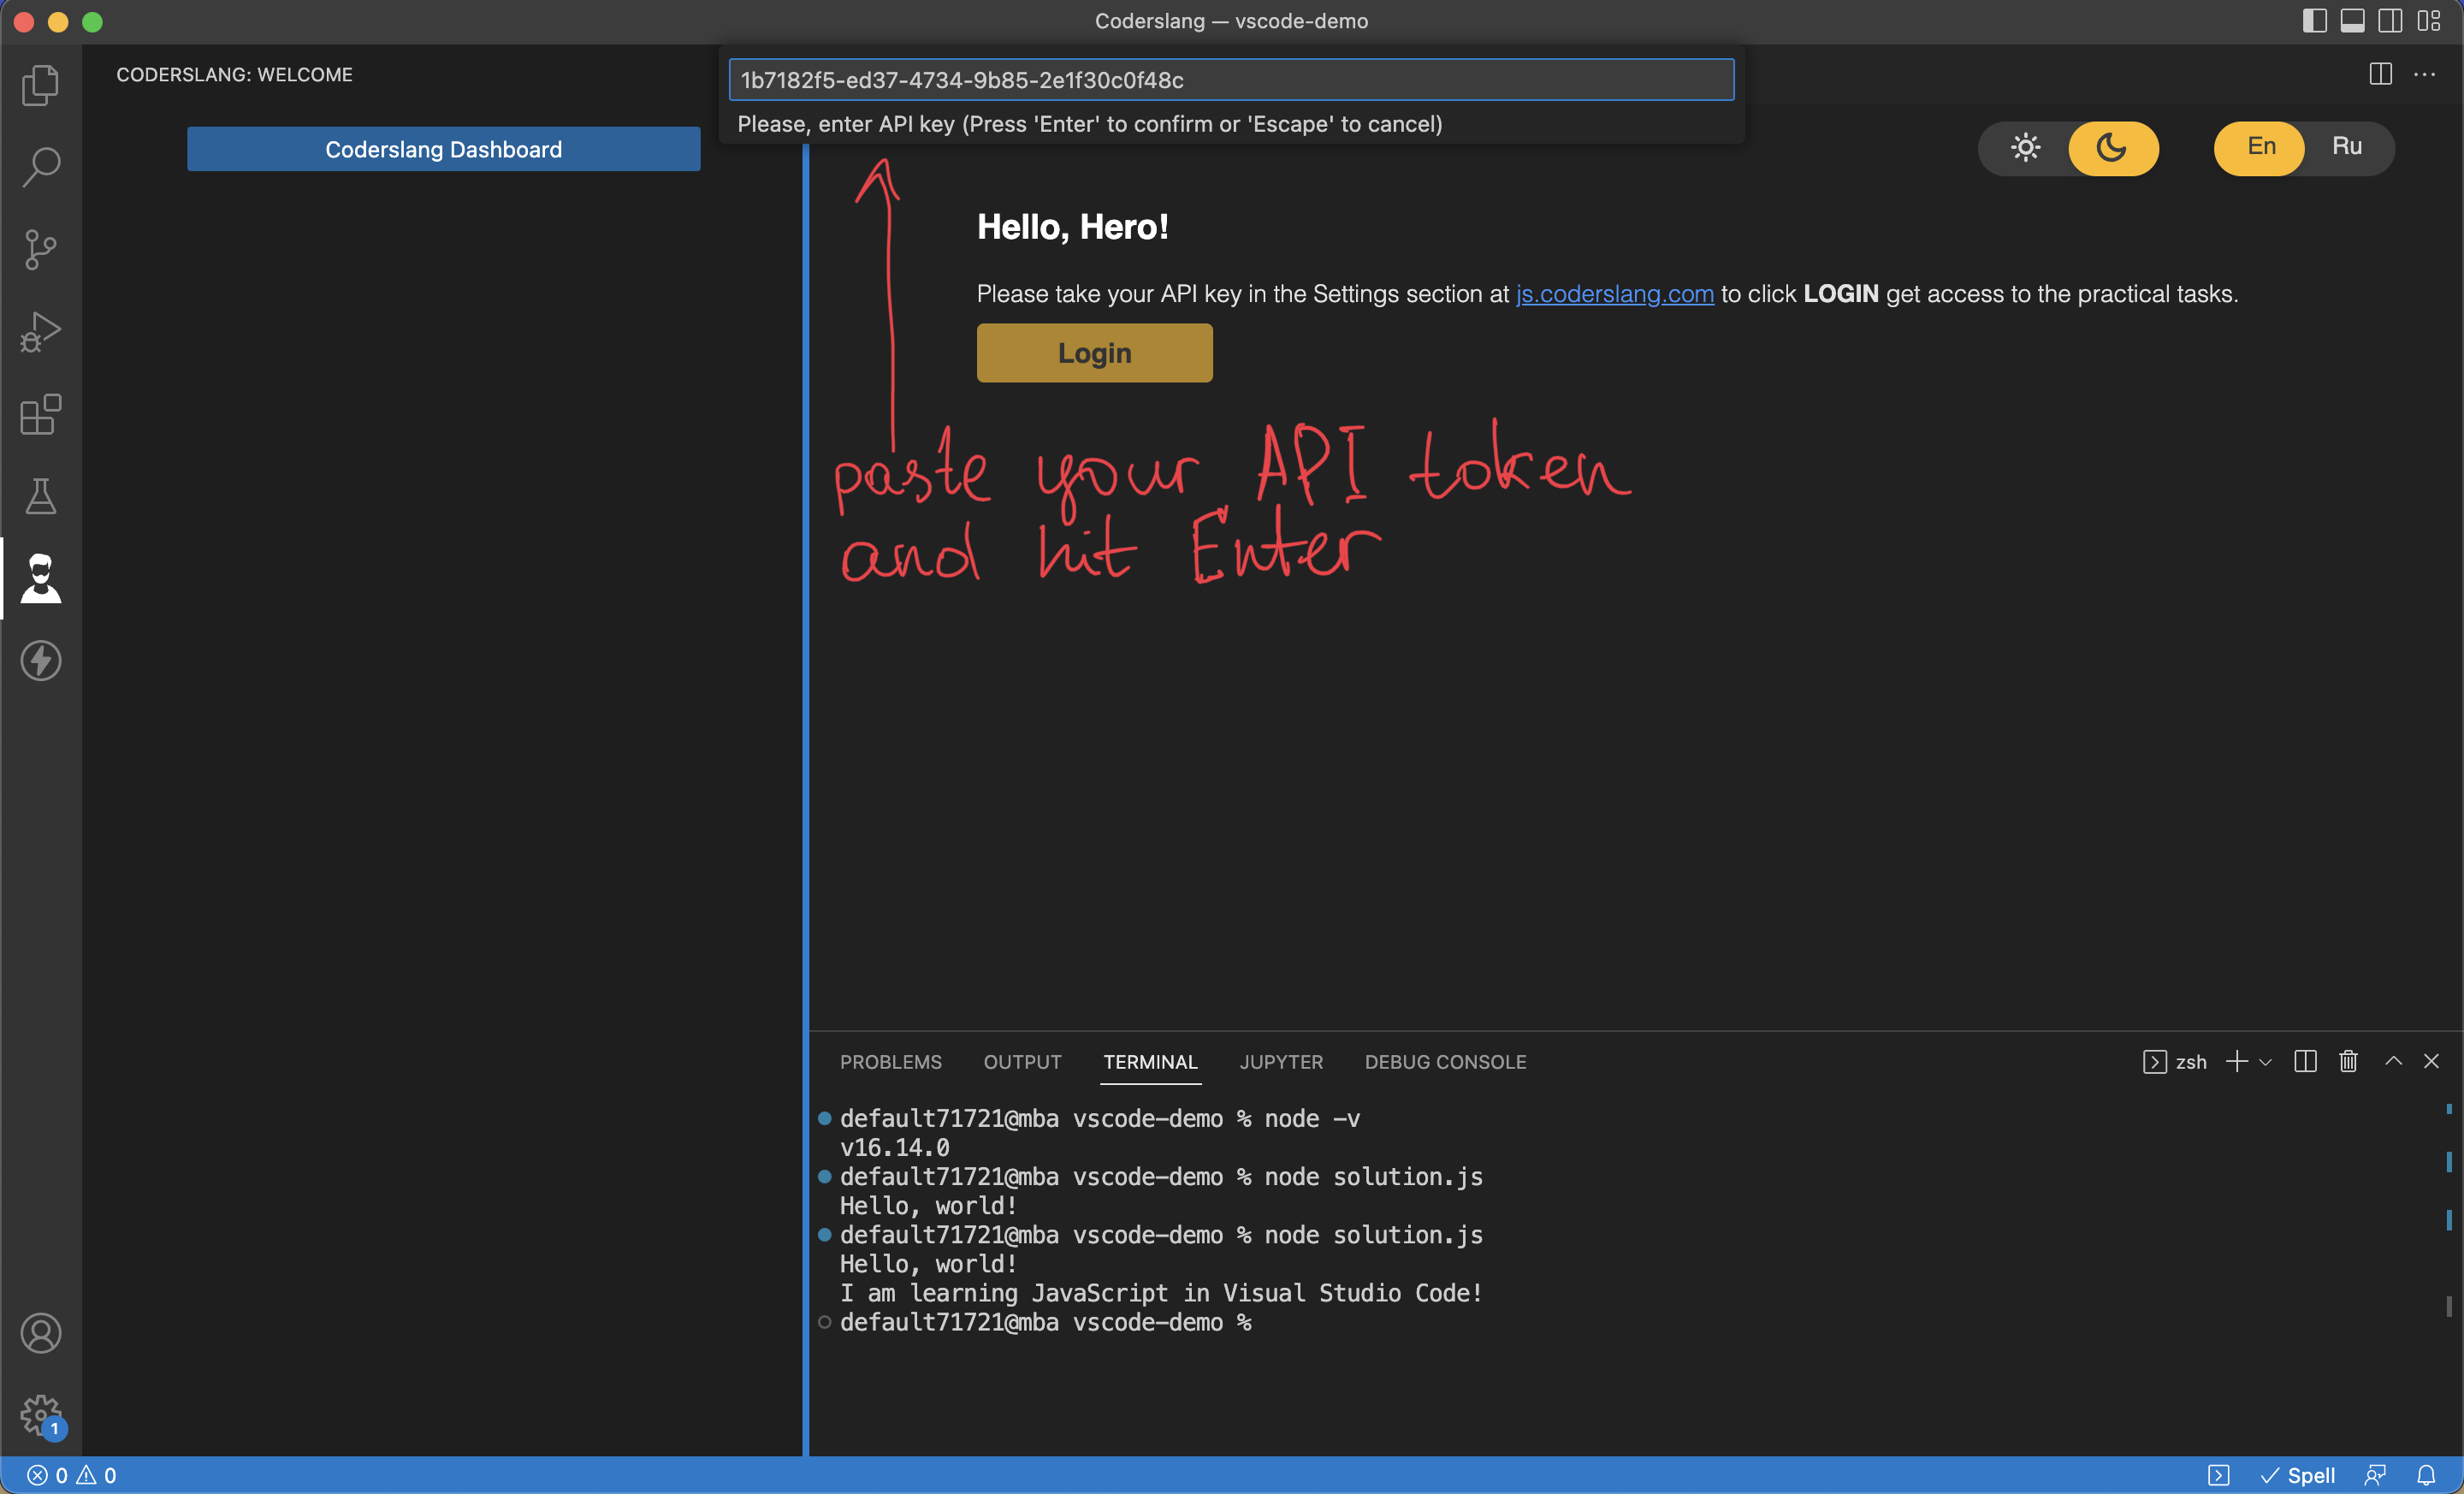
Press the login button, paste your API token into the input field, and hit Enter.
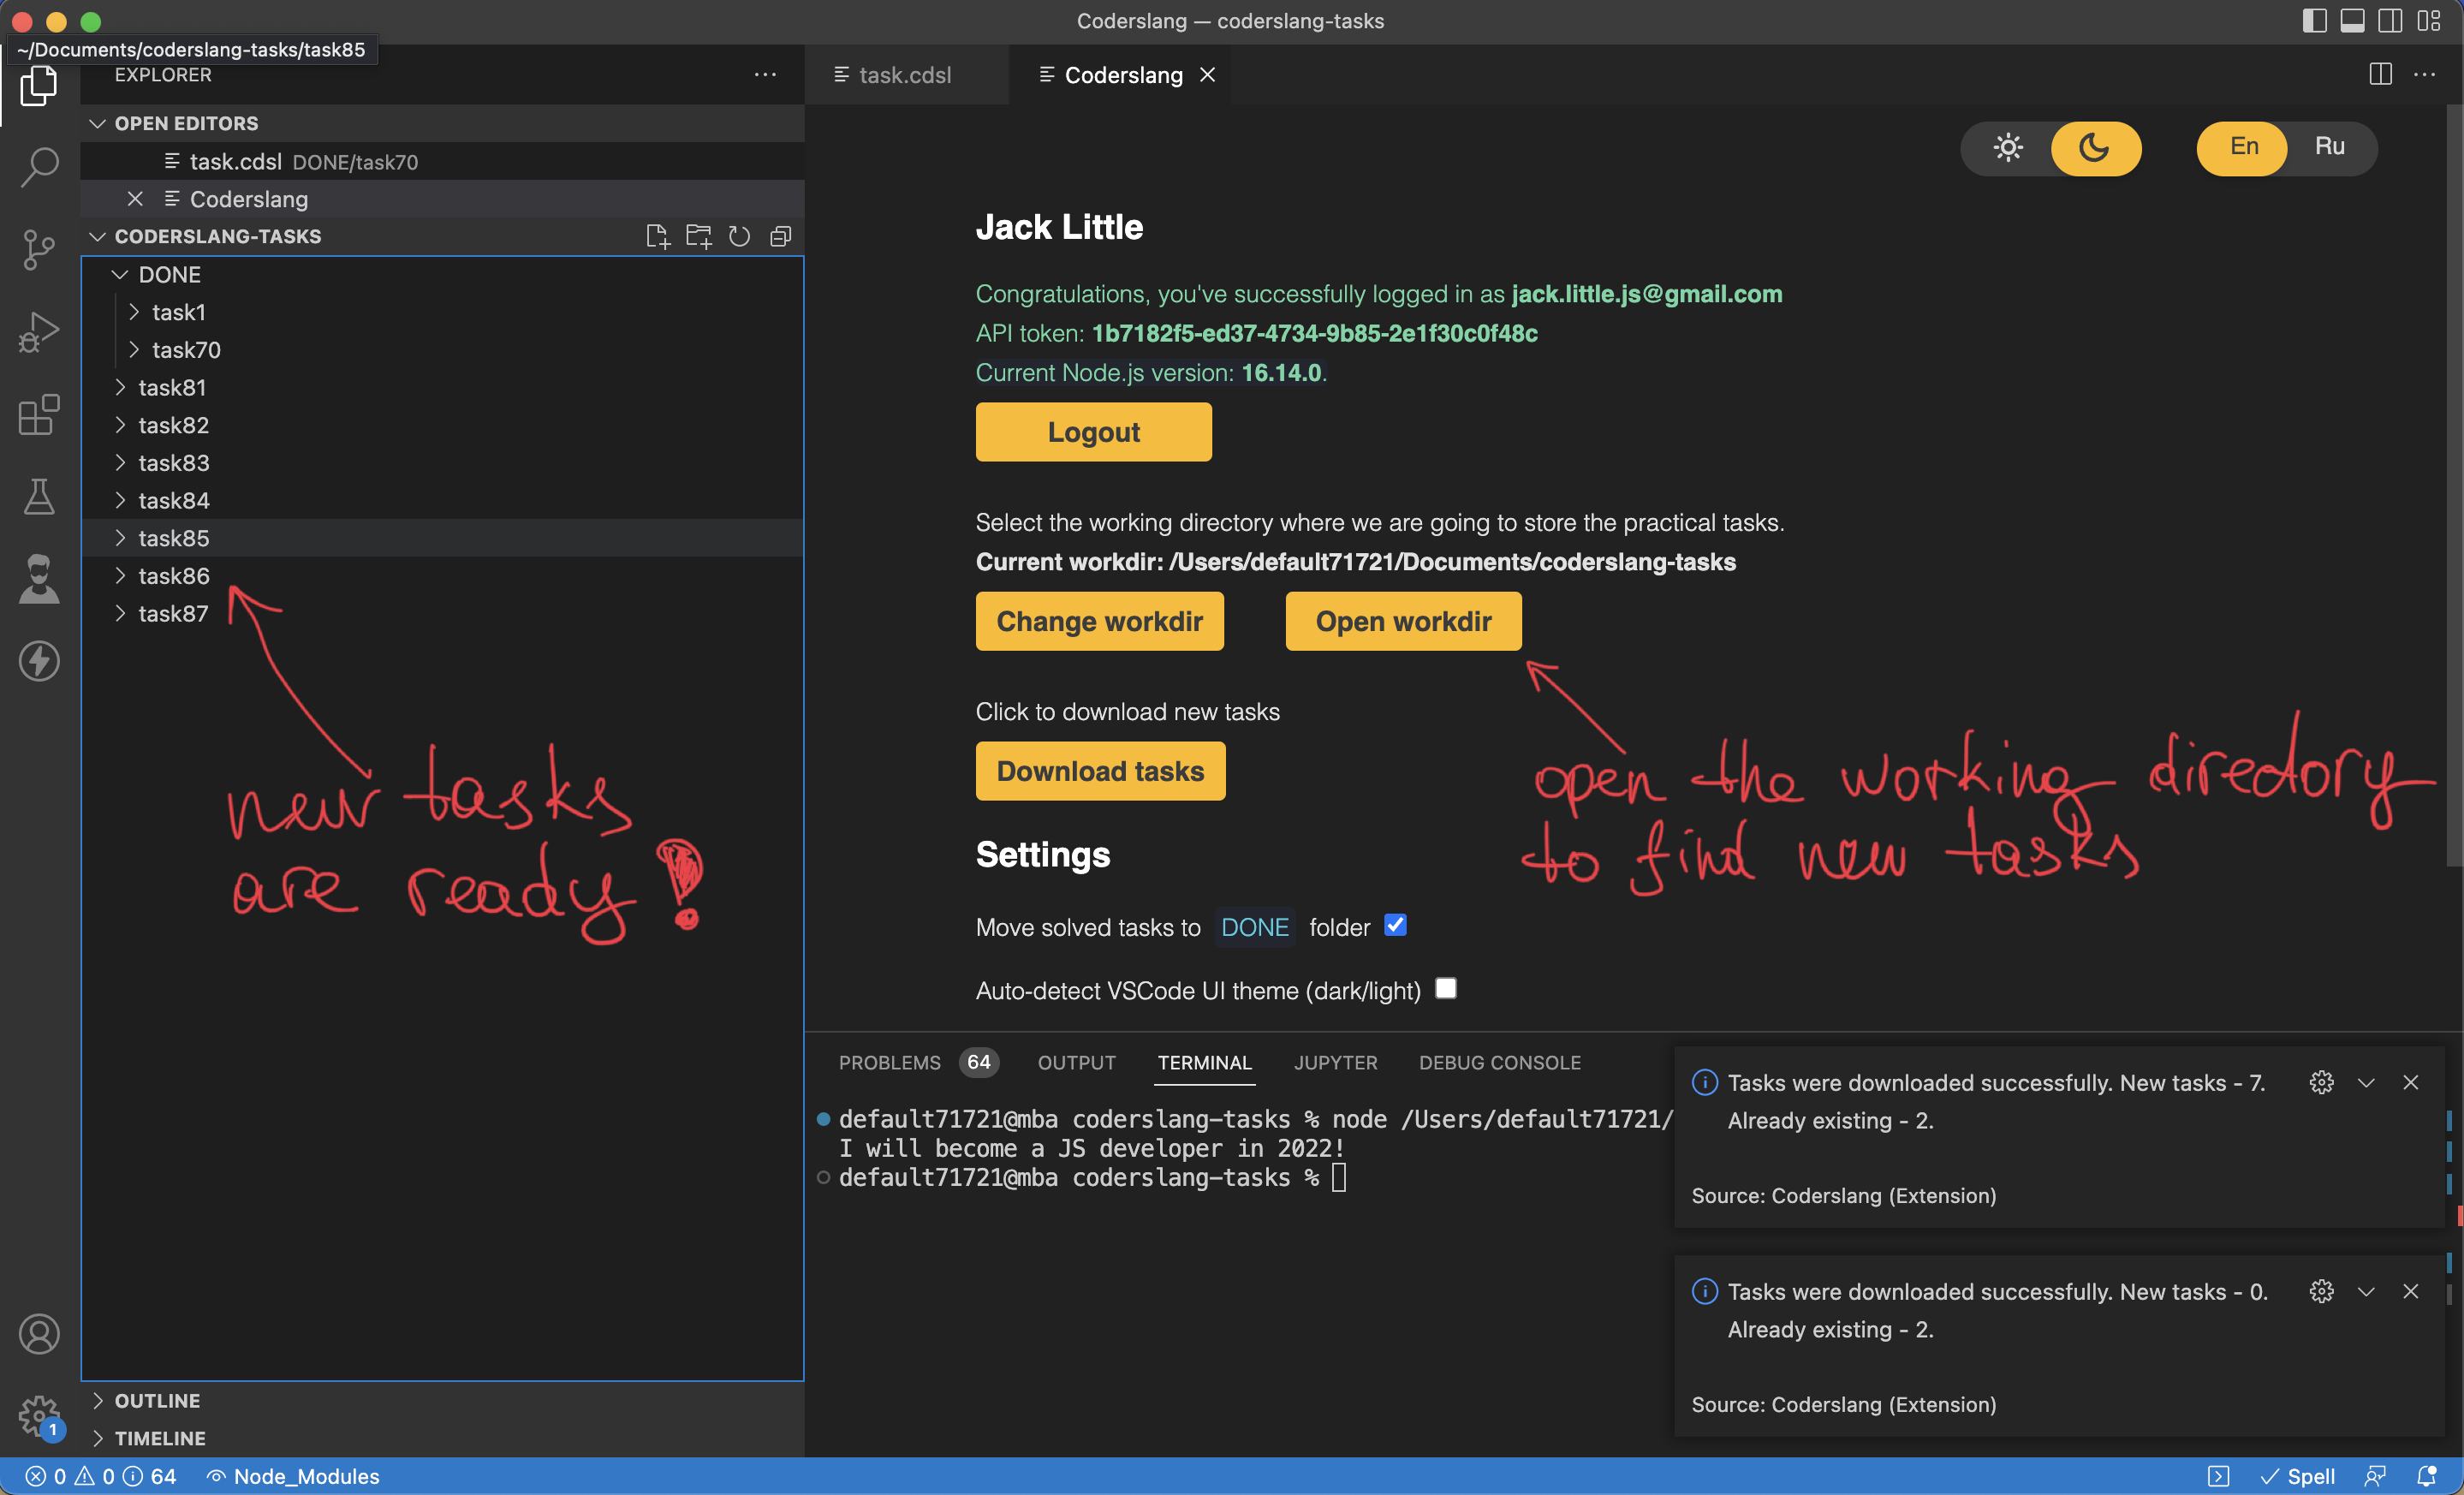
Once you log in, you‘ll see a welcome message with your current email address, your API token, and the installed Node.js version.
Set up the working directory for your coding tasks
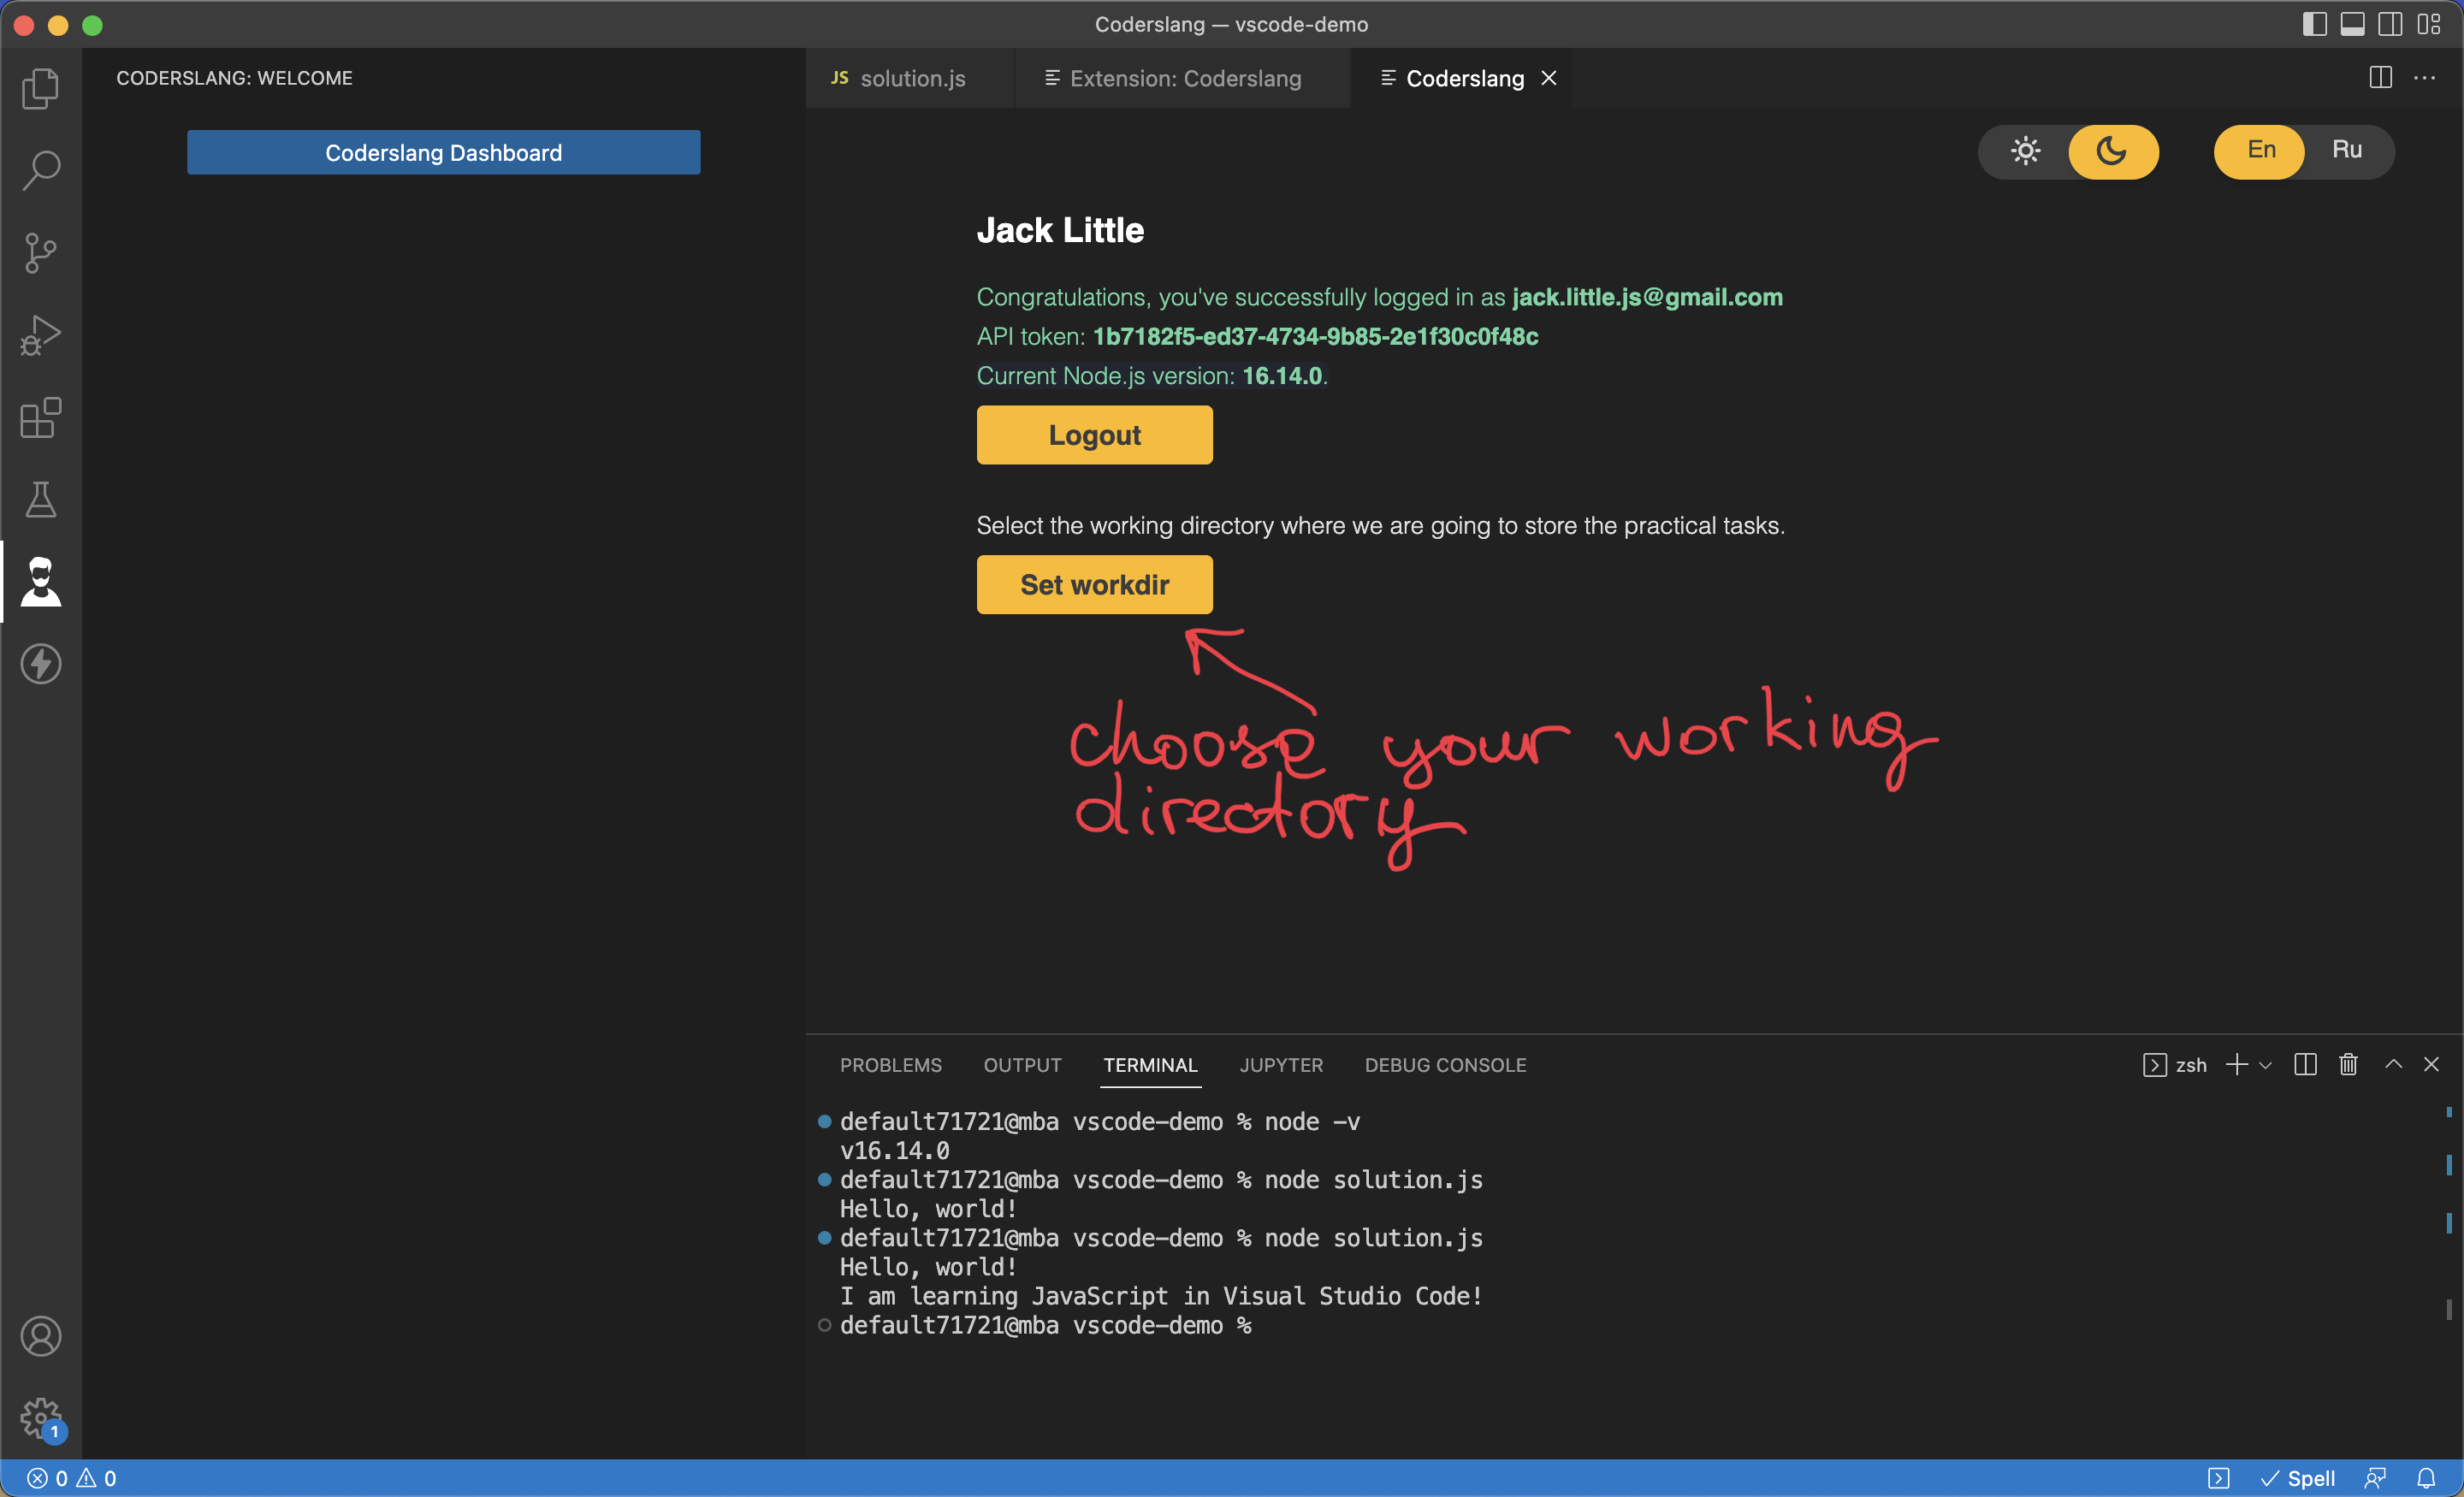
The next step is to choose a working directory for your JavaScript tasks.
The working directory is a folder where you’ll store all the coding tasks. Make sure the working directory is located in a safe place where it’s not mixed with the other content and wouldn’t get accidentally deleted.
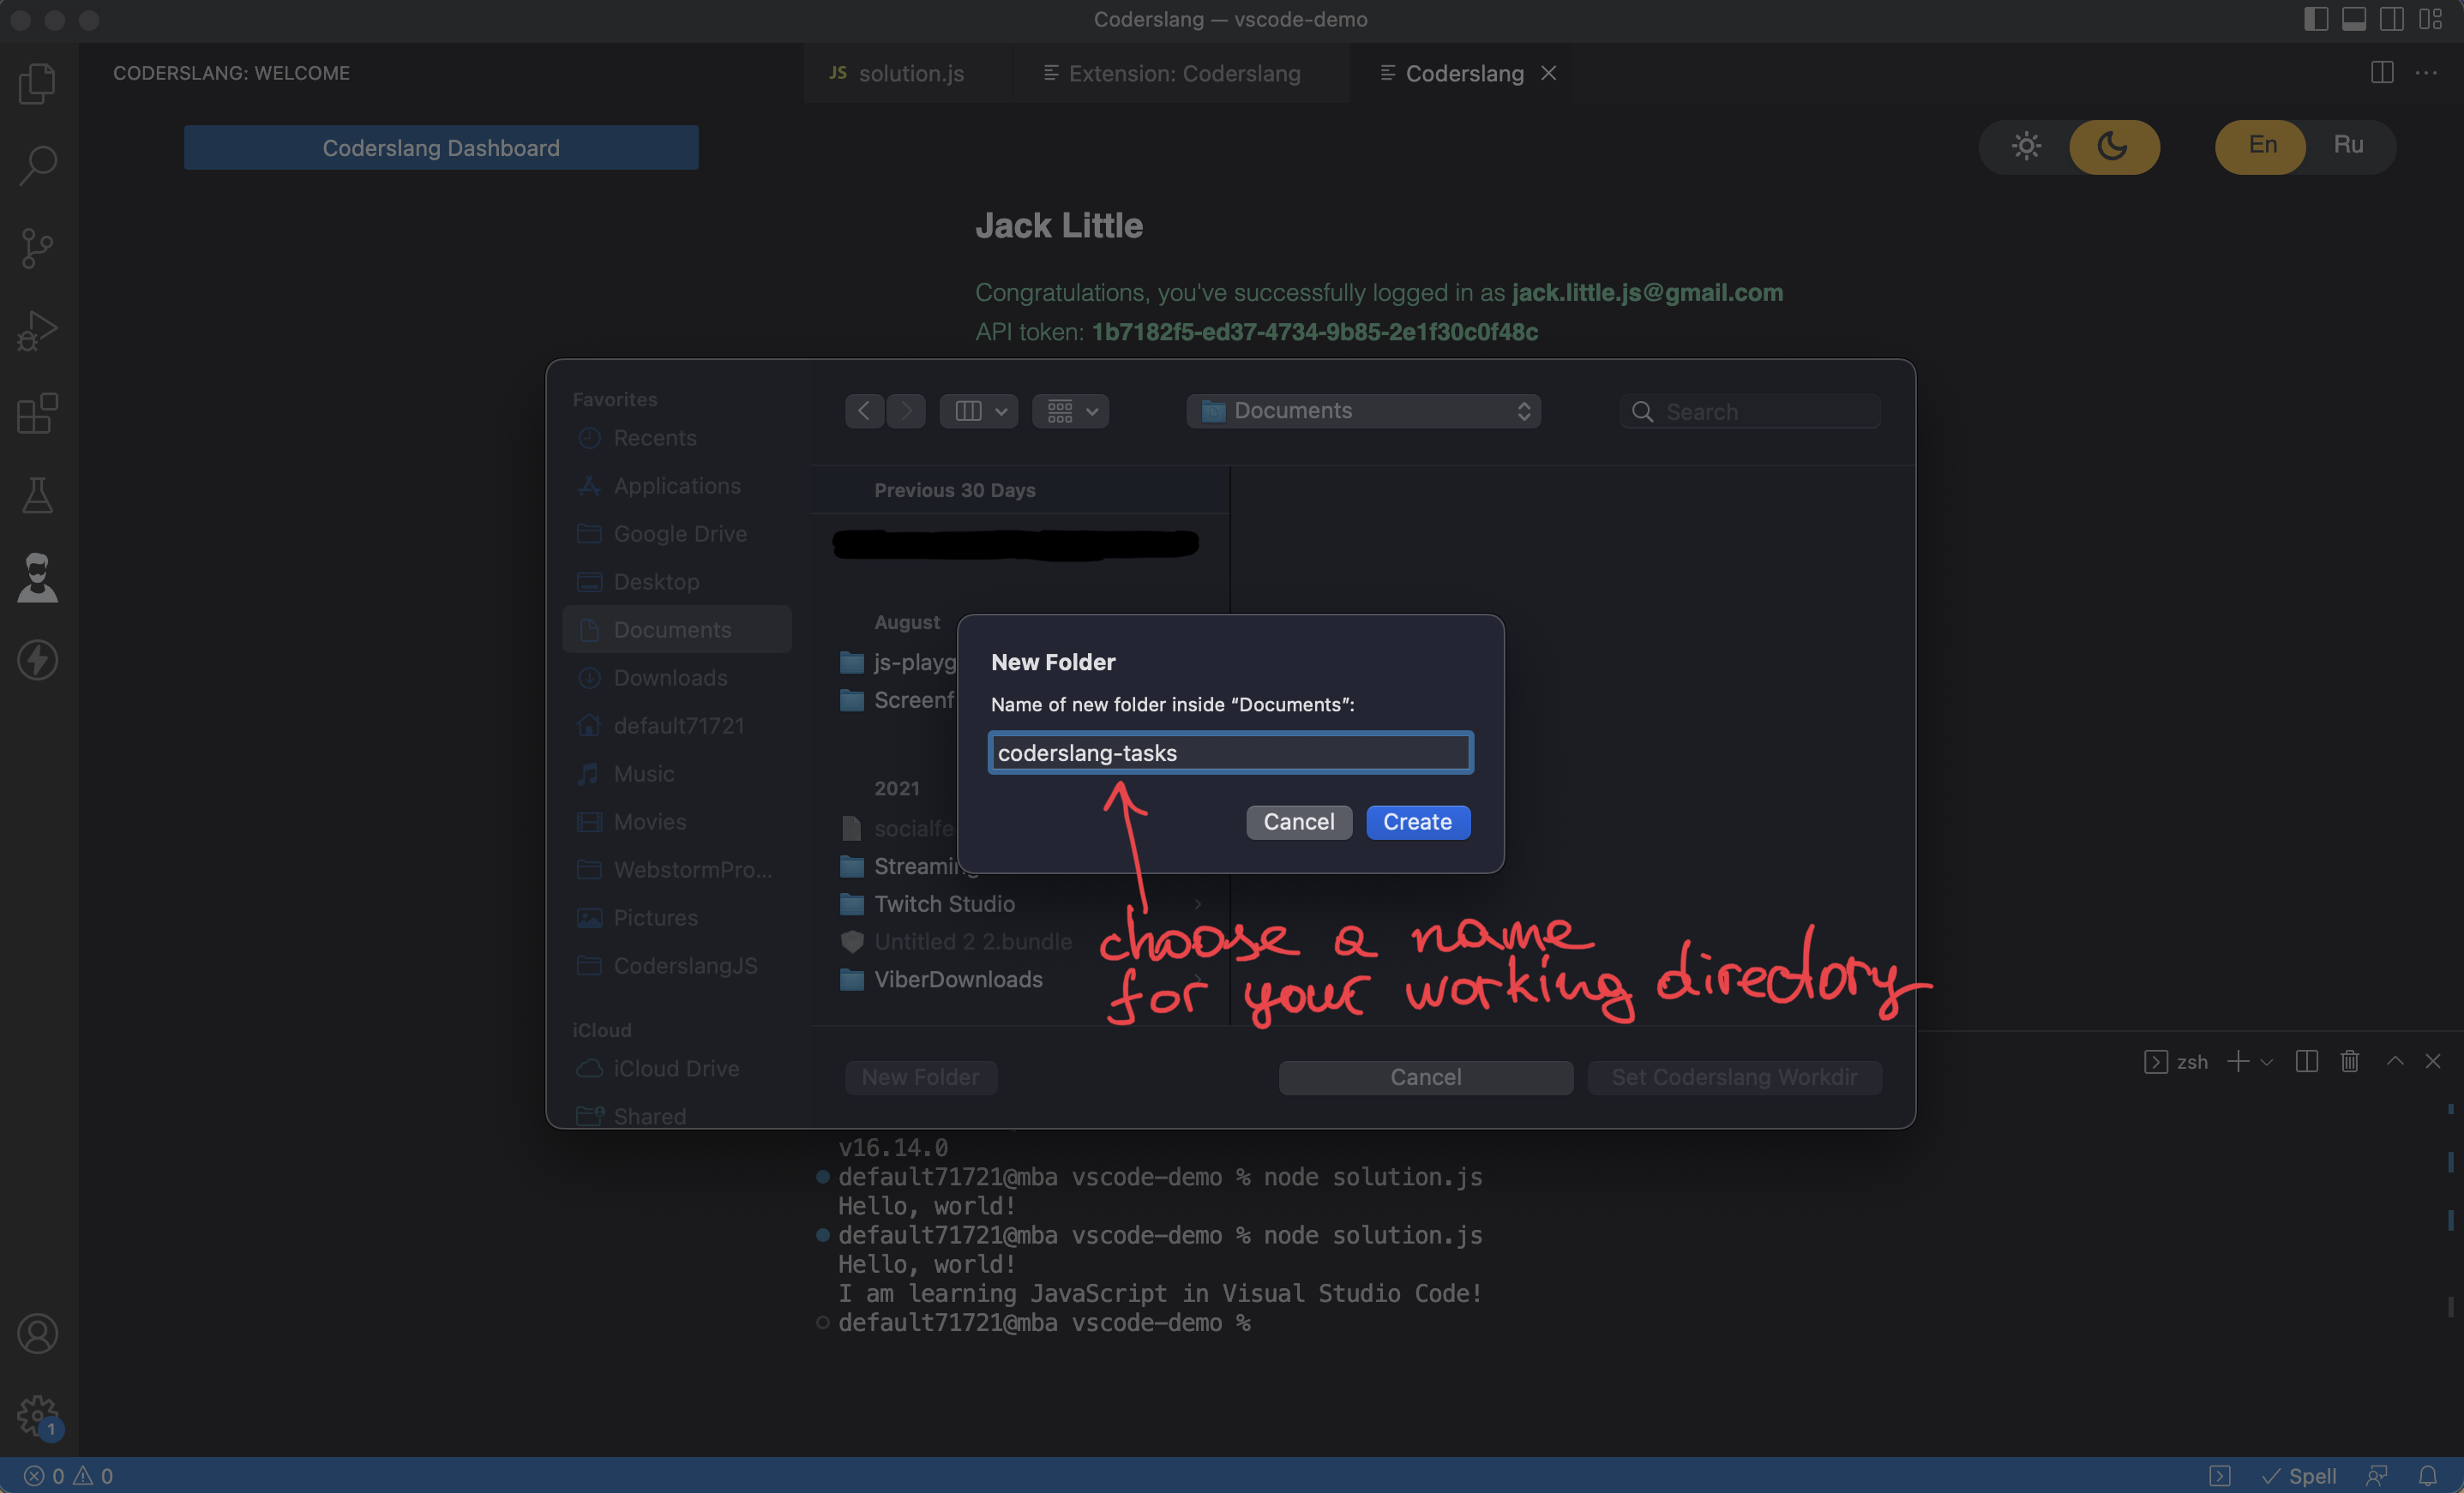
A solid way to start is by creating a new folder.
Get your first coding tasks in VS Code
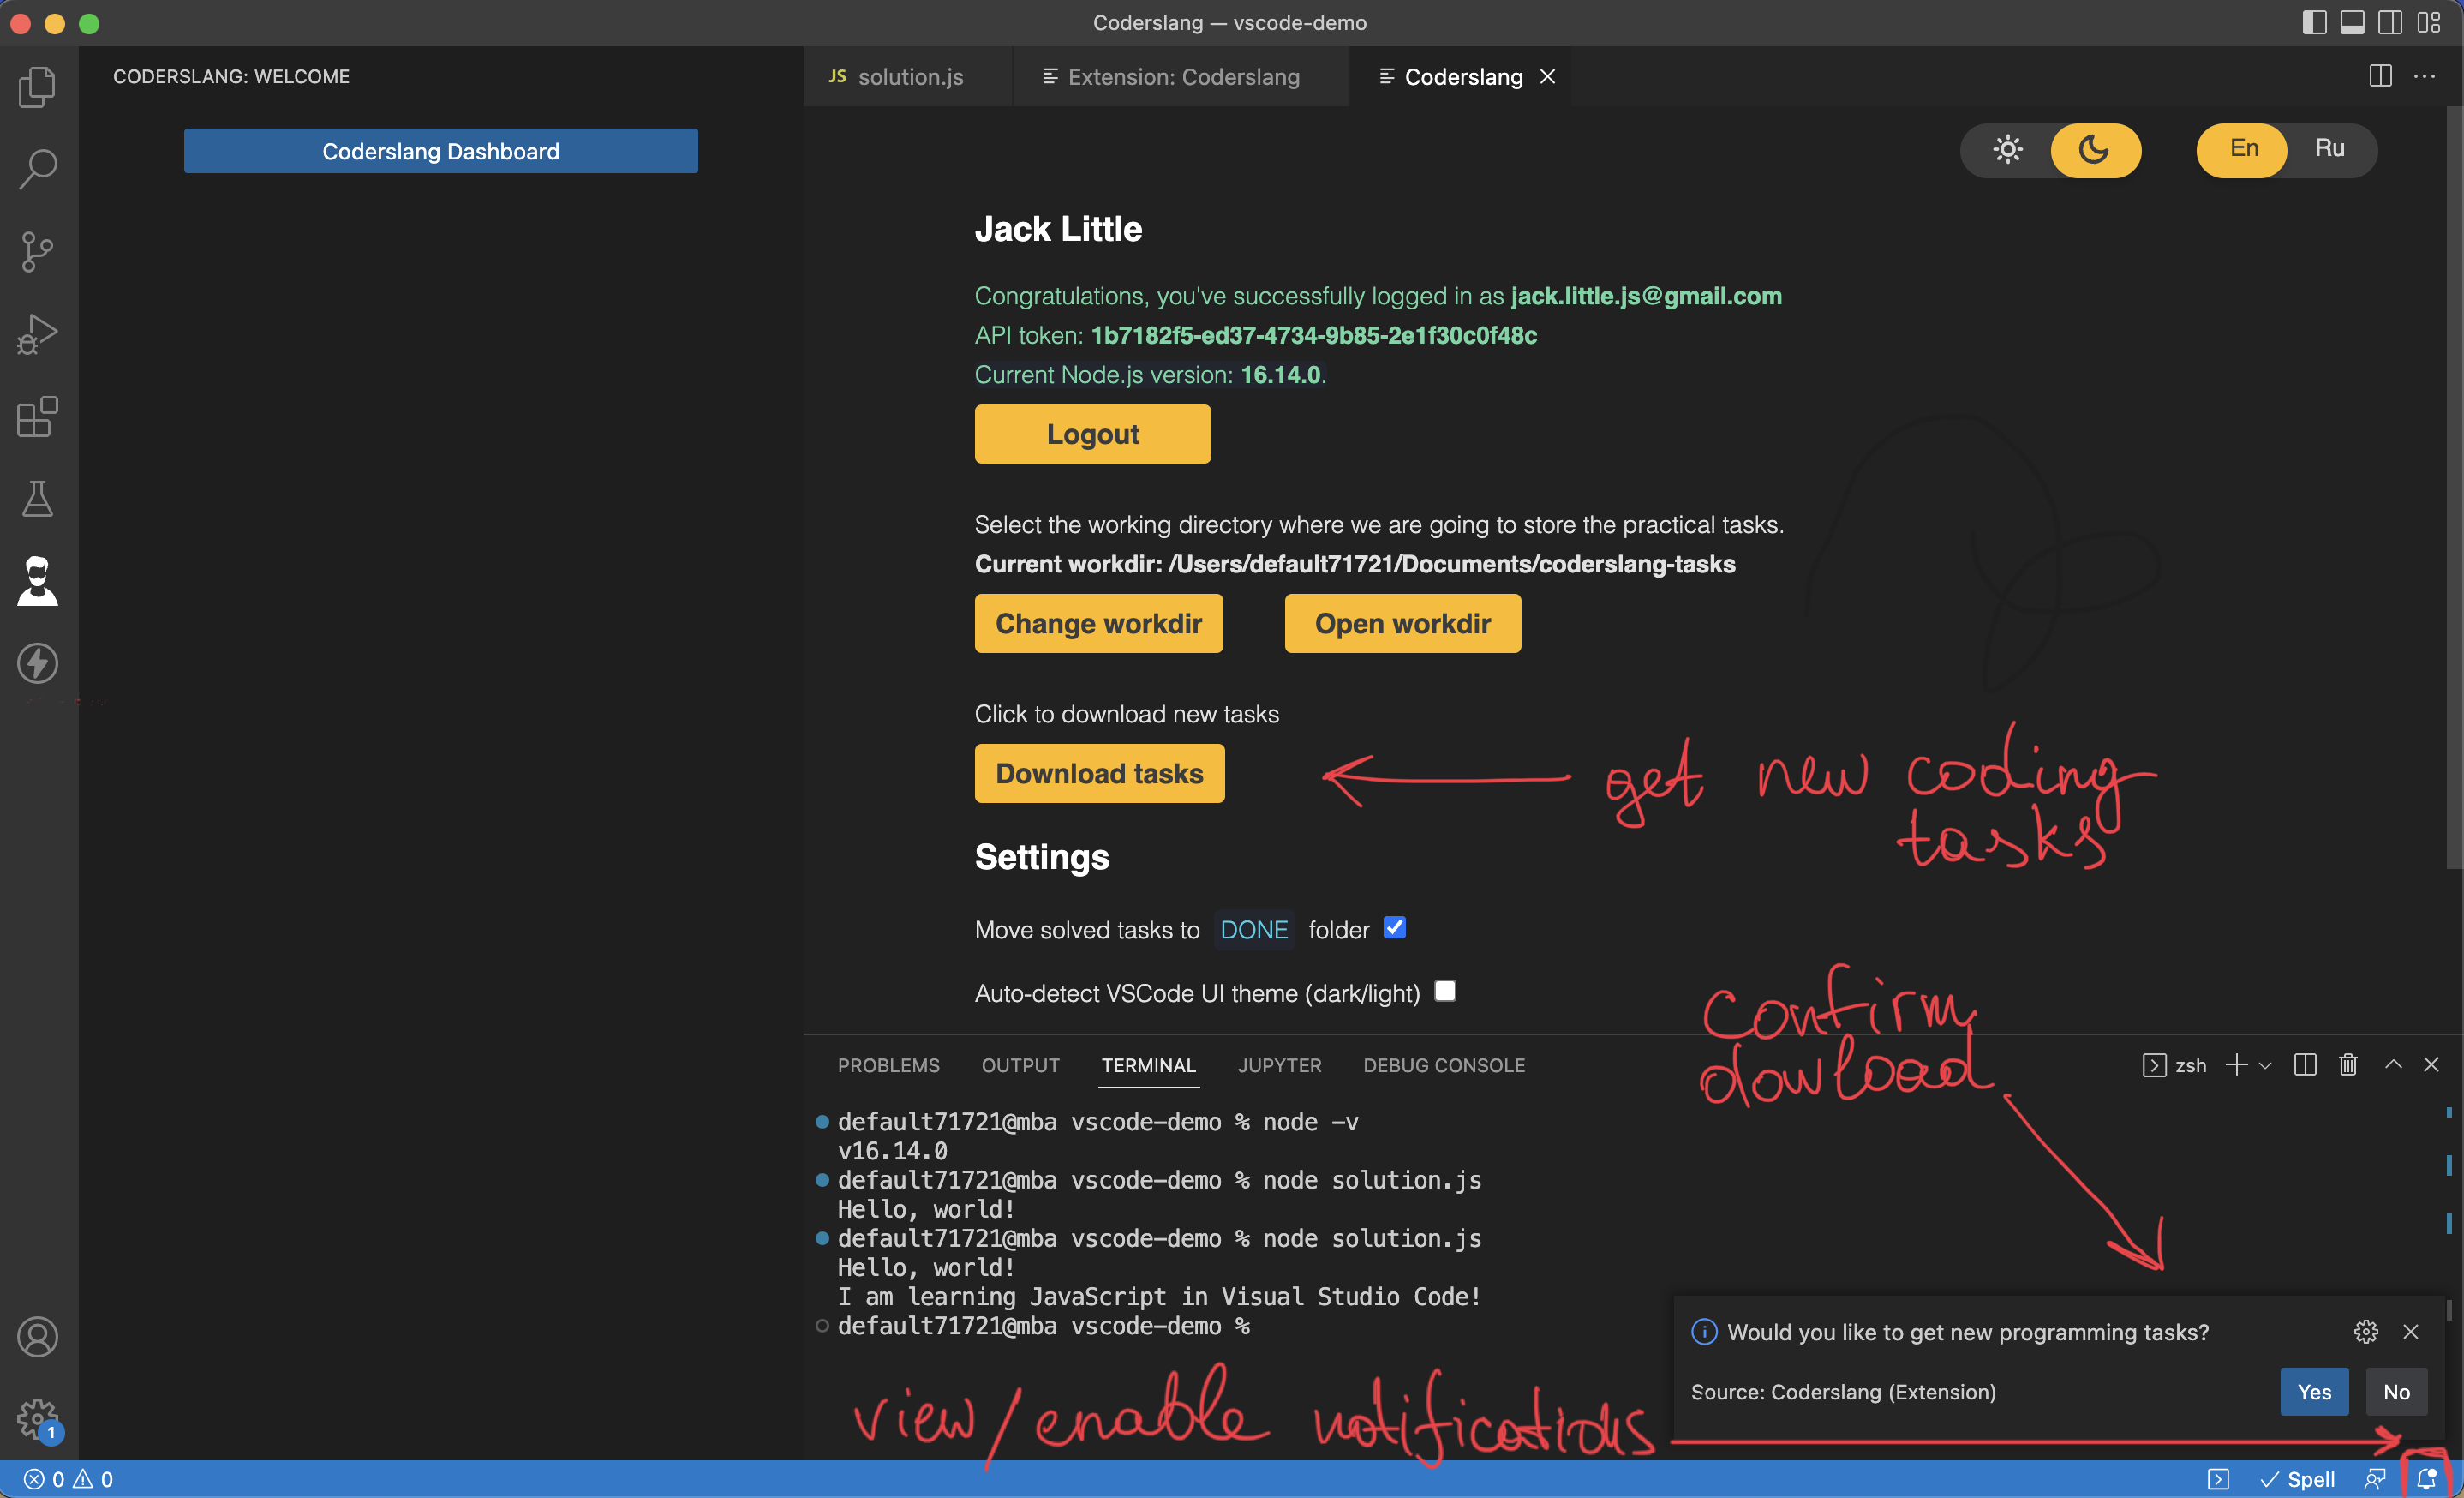
Once you’ve set the working directory, you can download new coding tasks by clicking the button “Download tasks”.
Your first coding tasks become available once you open the lecture
First program
After clicking the download button, you’ll need to confirm the action by clicking yes in the bottom right corner of VS Code. If the confirmation message doesn’t show up, hit the notification bell to view/enable notifications in Visual Studio Code.
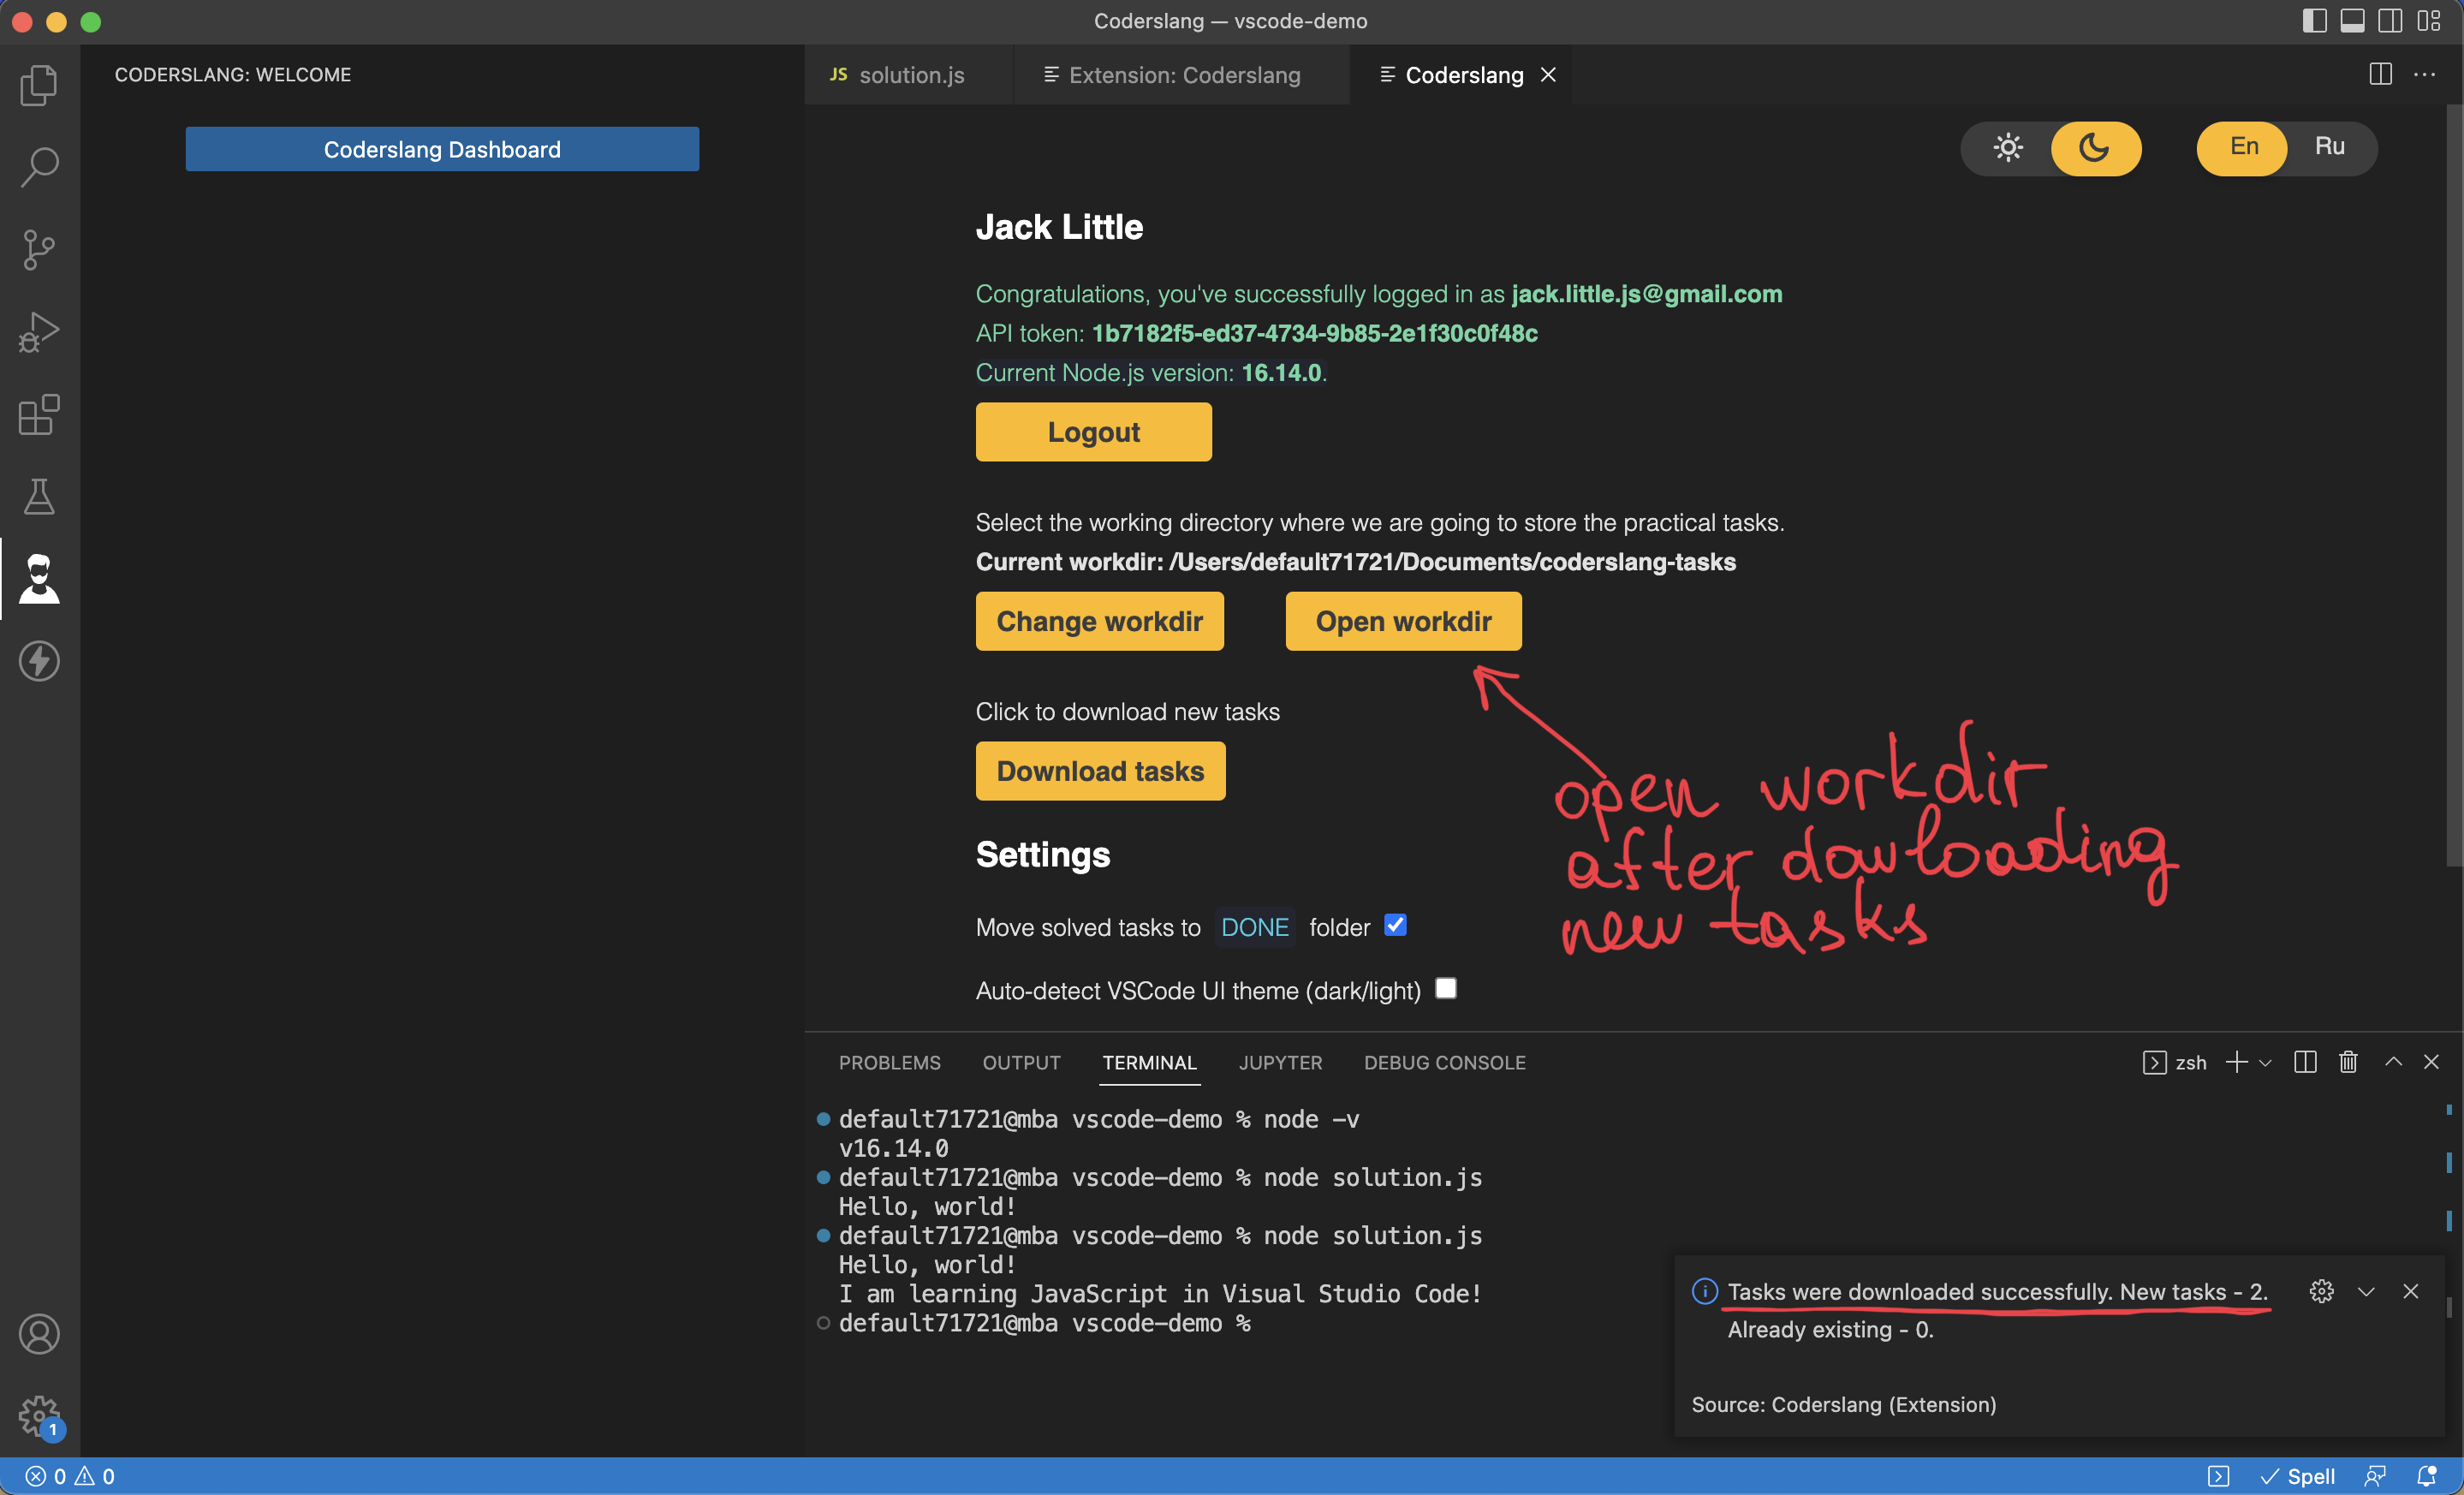
After downloading tasks, you’ll get a confirmation message in the bottom right corner. It’ll say how many tasks were downloaded.
Then, go ahead and open the working directory.
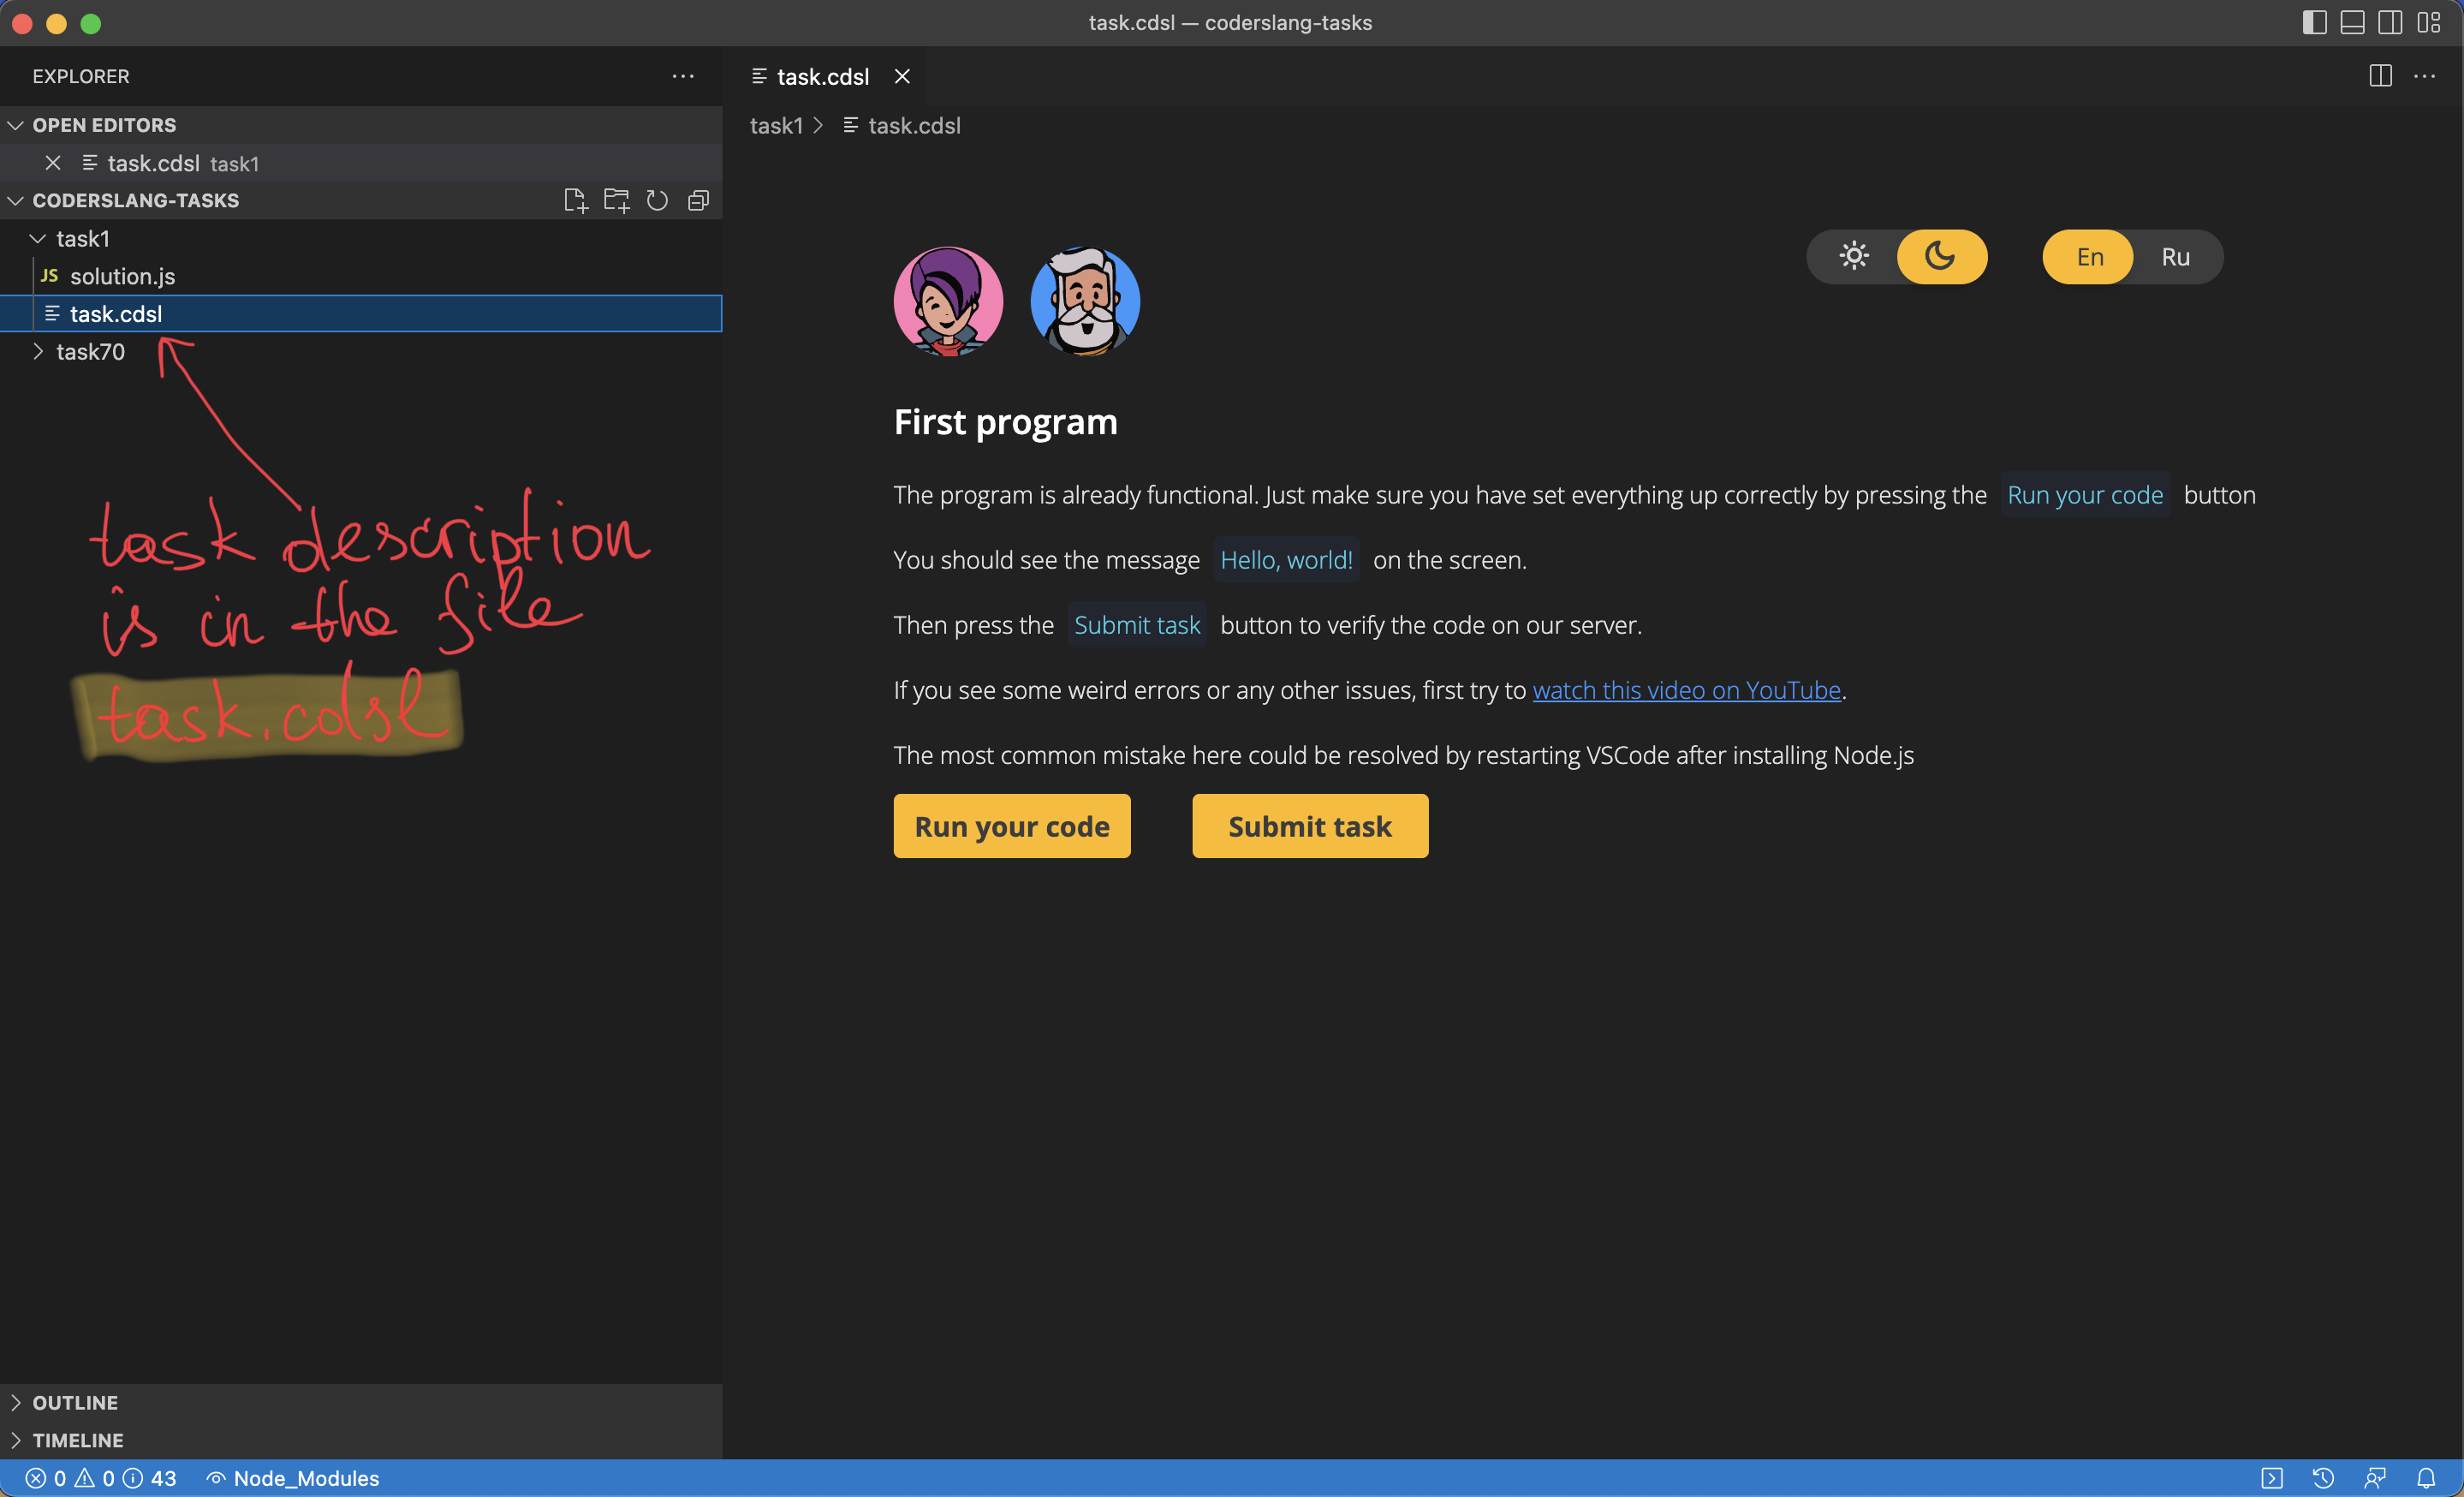
In your working directory, you’ll see new folders.
Each folder represents the coding task.
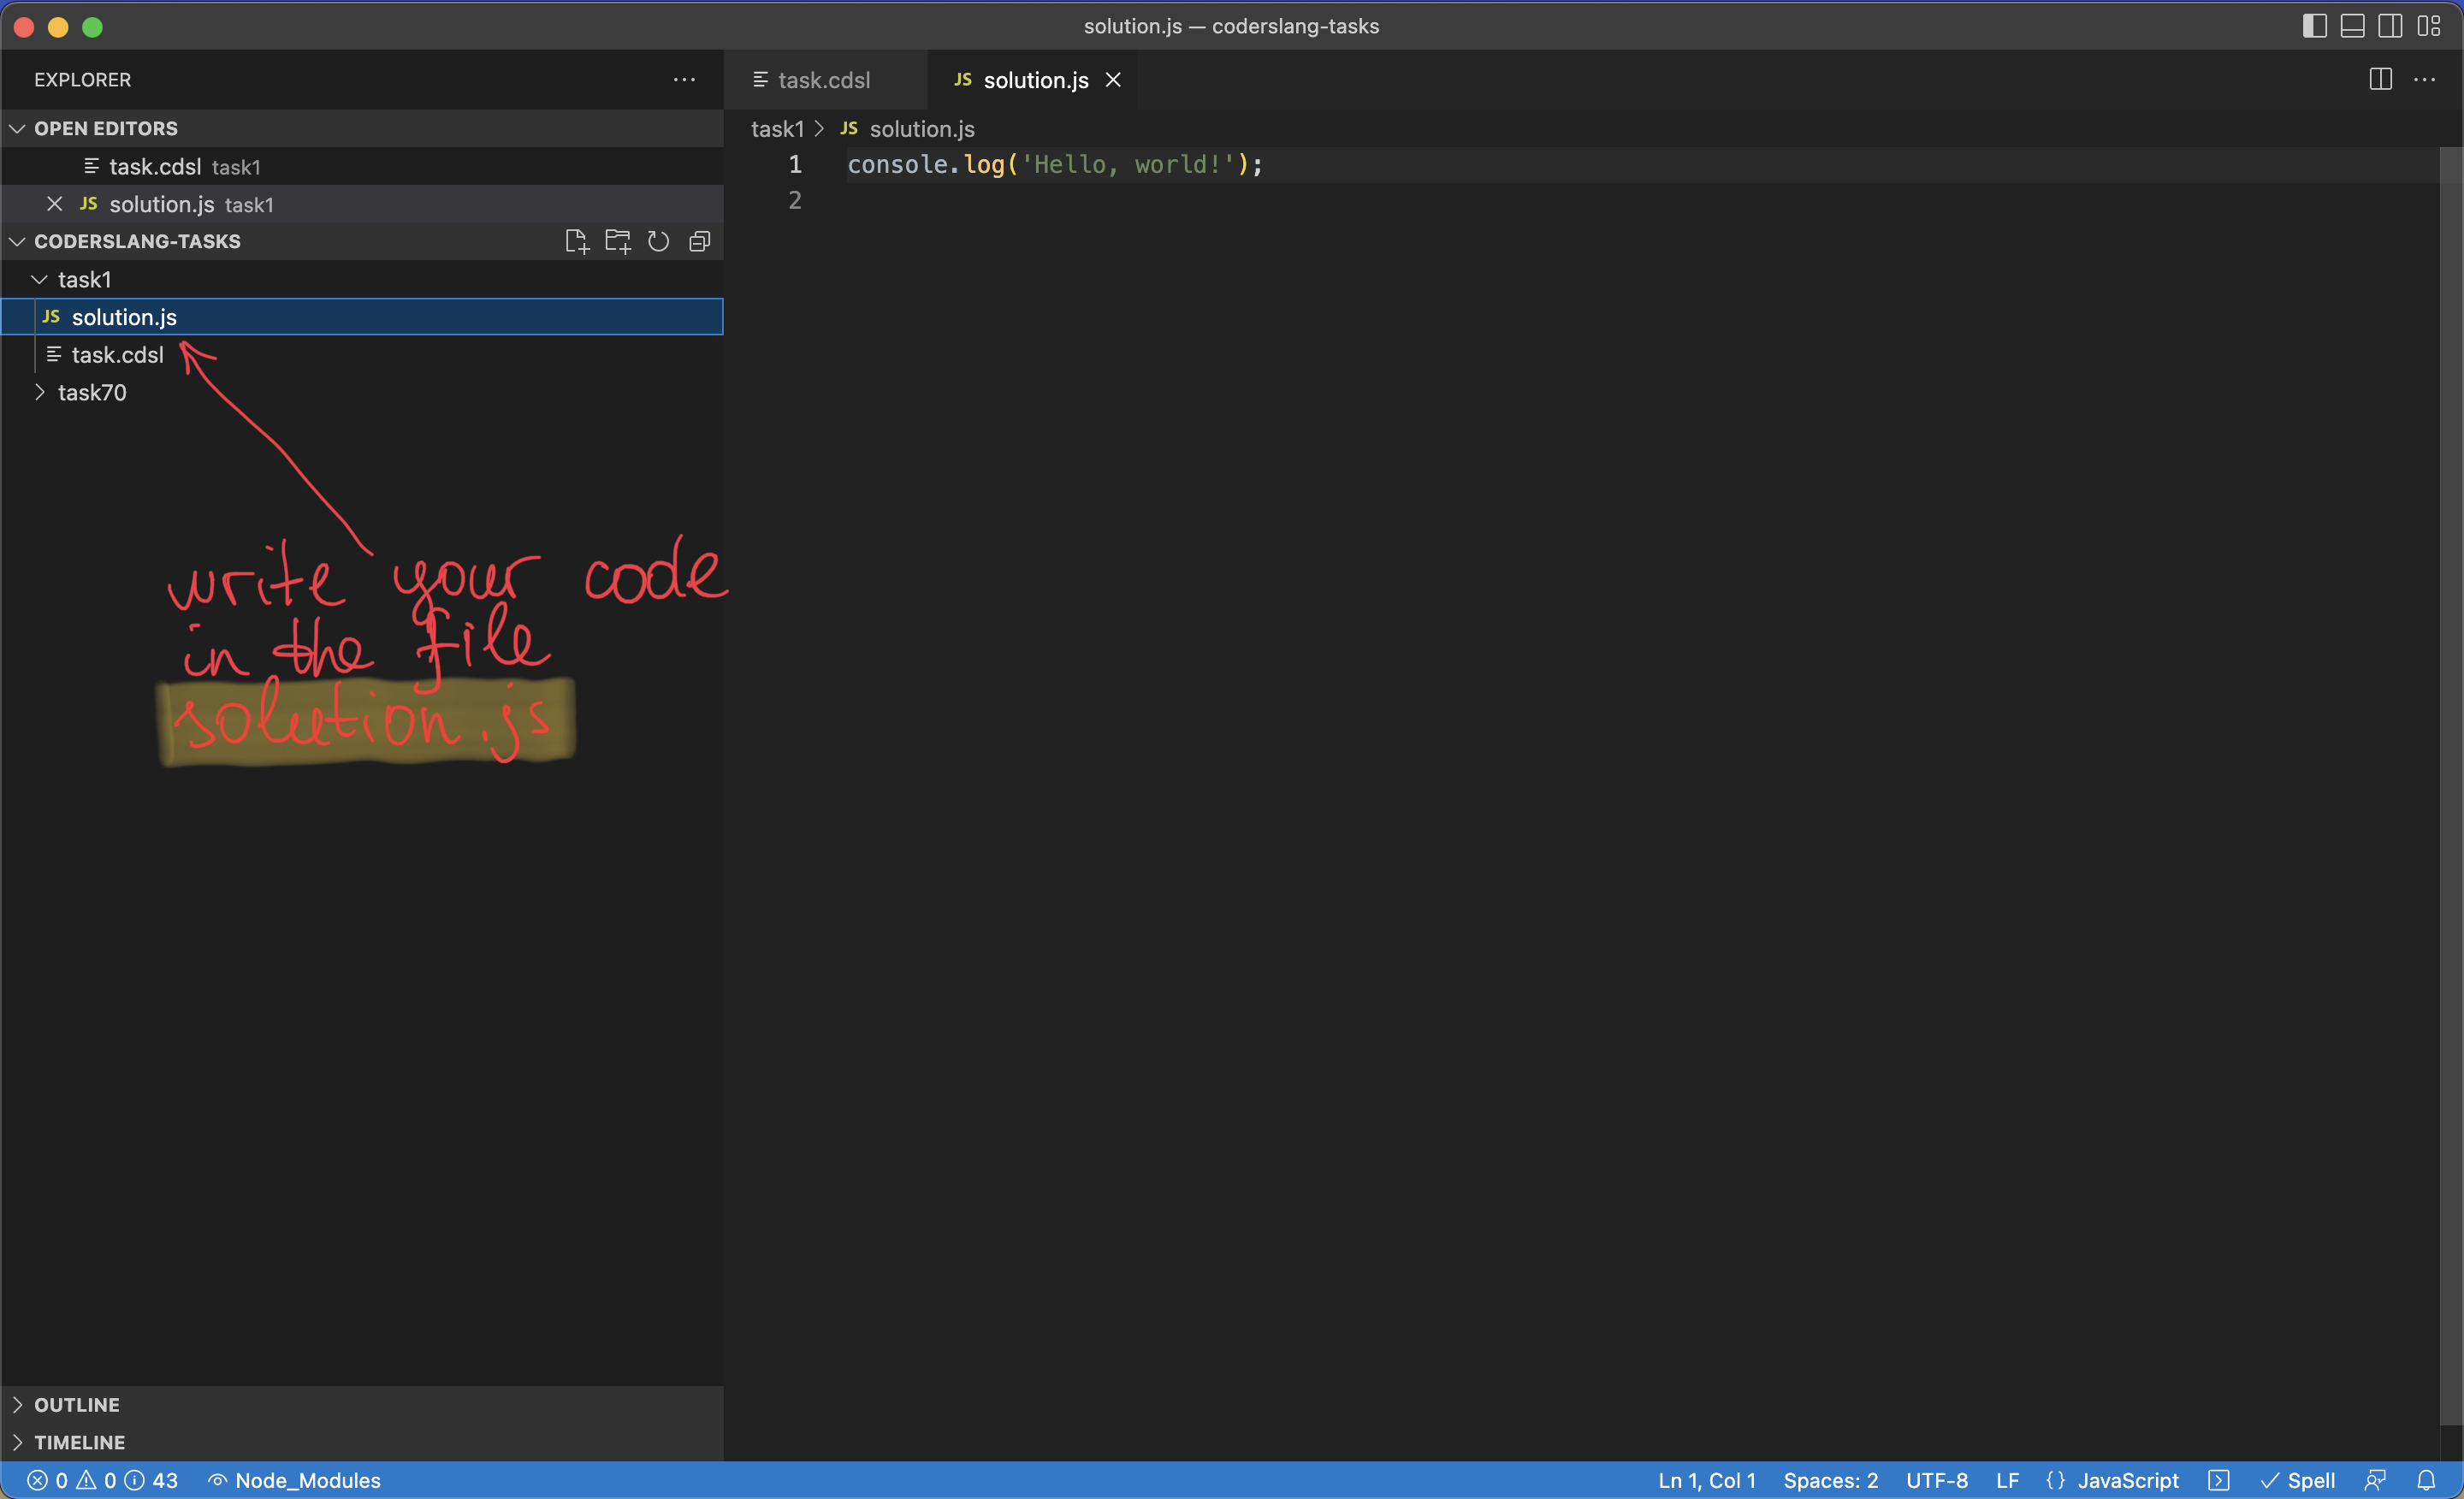
The task description is always located in the file task.cdsl
The initial code for the task is located in the file solution.js
In your first task of the course, you don’t have to change it.
Submit your first coding task for verification
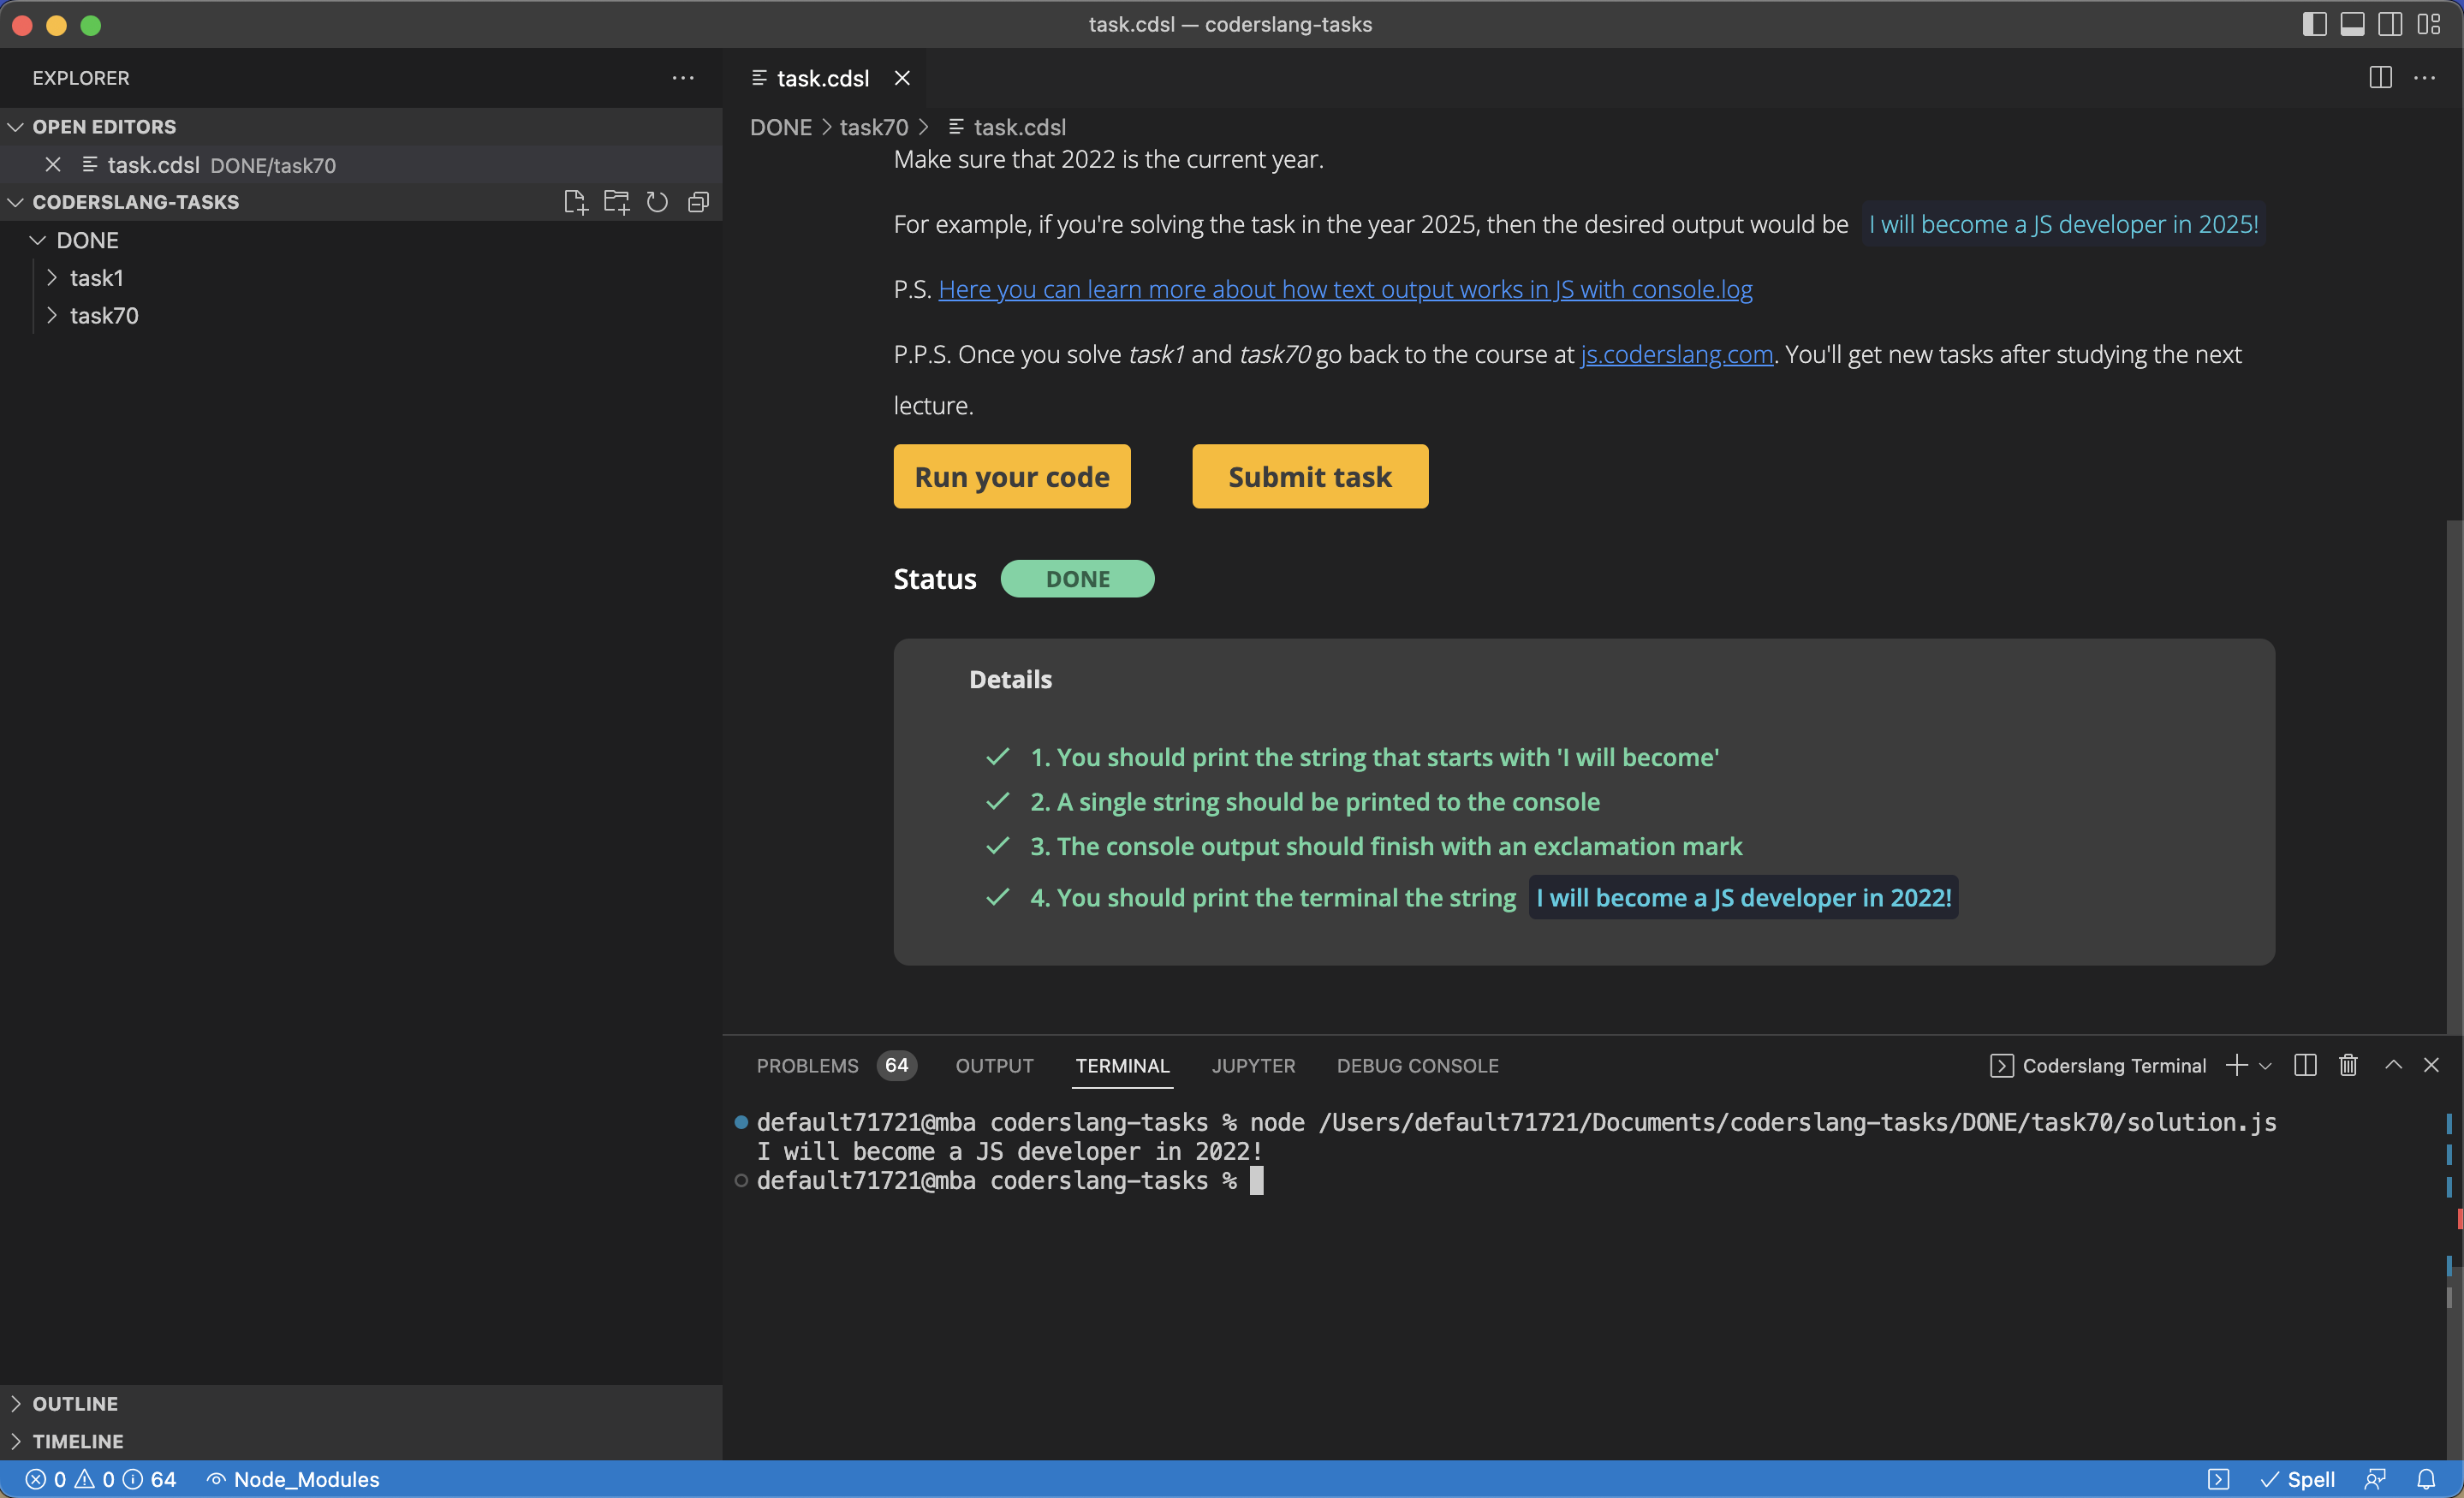
When you open the file task.cdsl, you’ll see the buttons to run your code and submit your task for verification.
Always run your code before submitting a task. It’s your responsibility as a developer to make sure your code works!
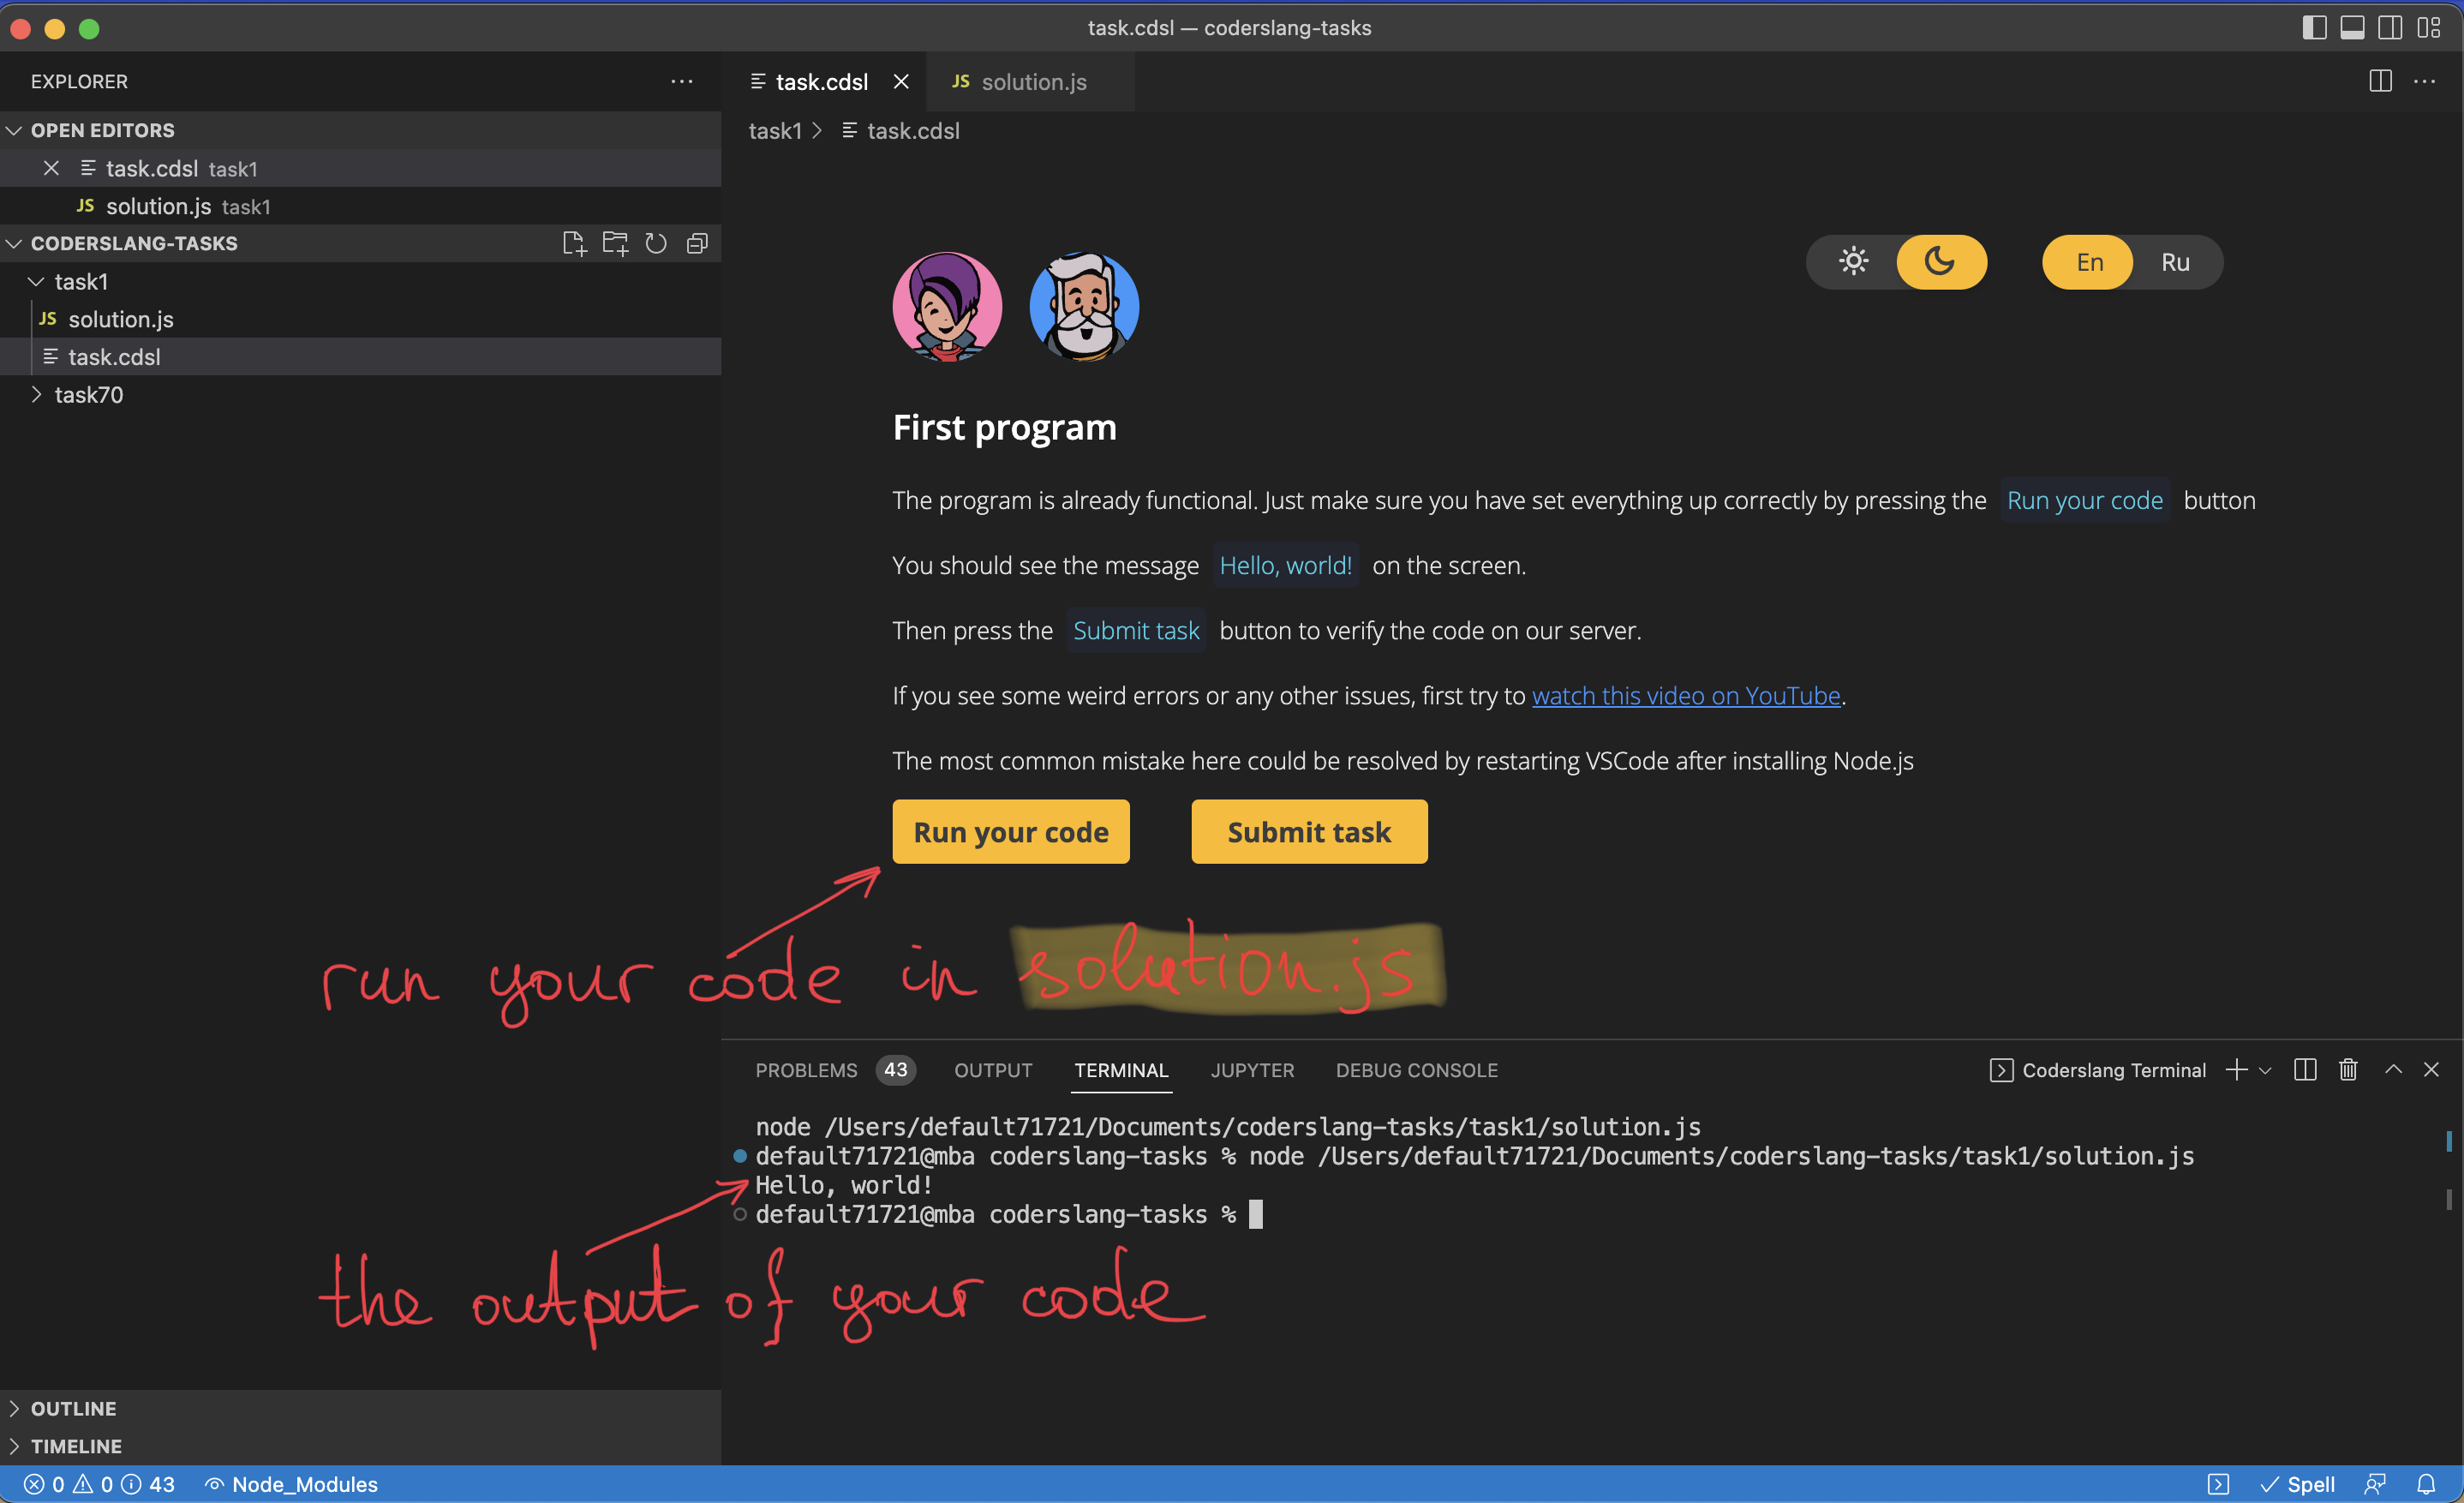
After you run your code and make sure the output is in line with the task description, you can submit your task for verification.
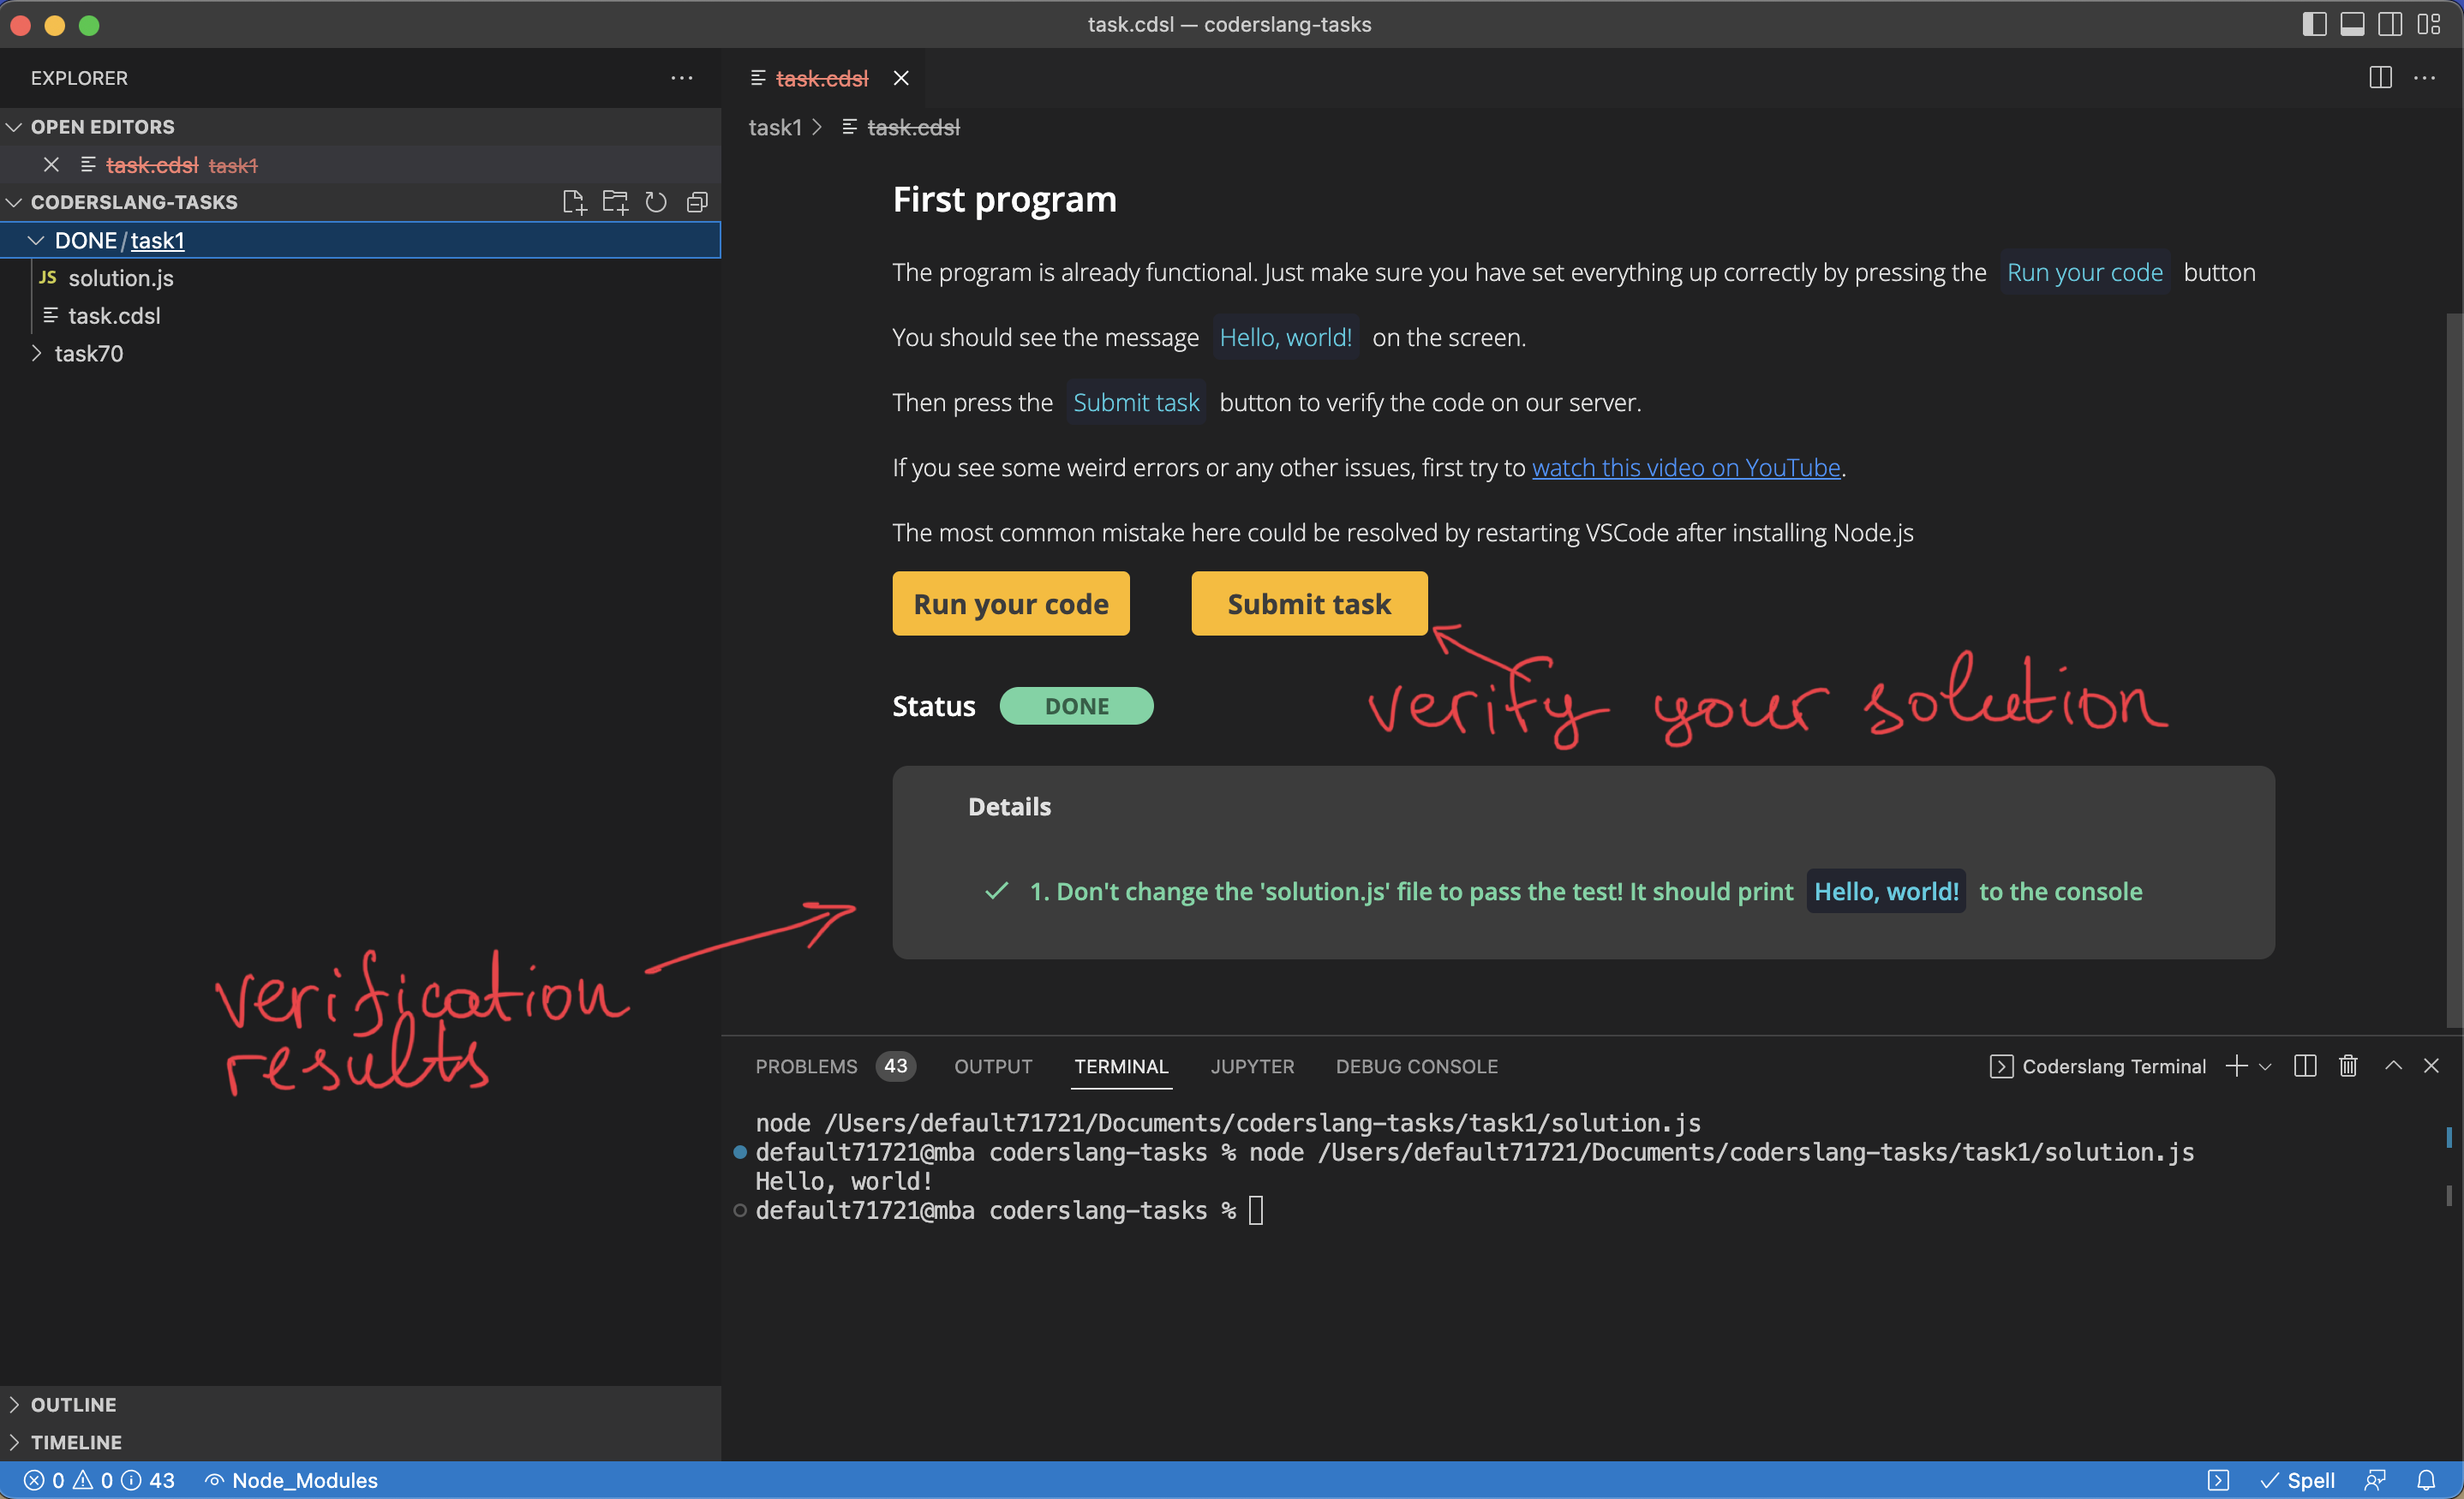
The first task doesn’t require you to change anything in solution.js. The goal is to familiarize yourself with the interface and get you prepared for more tasks.
Solve the next coding task and deal with errors
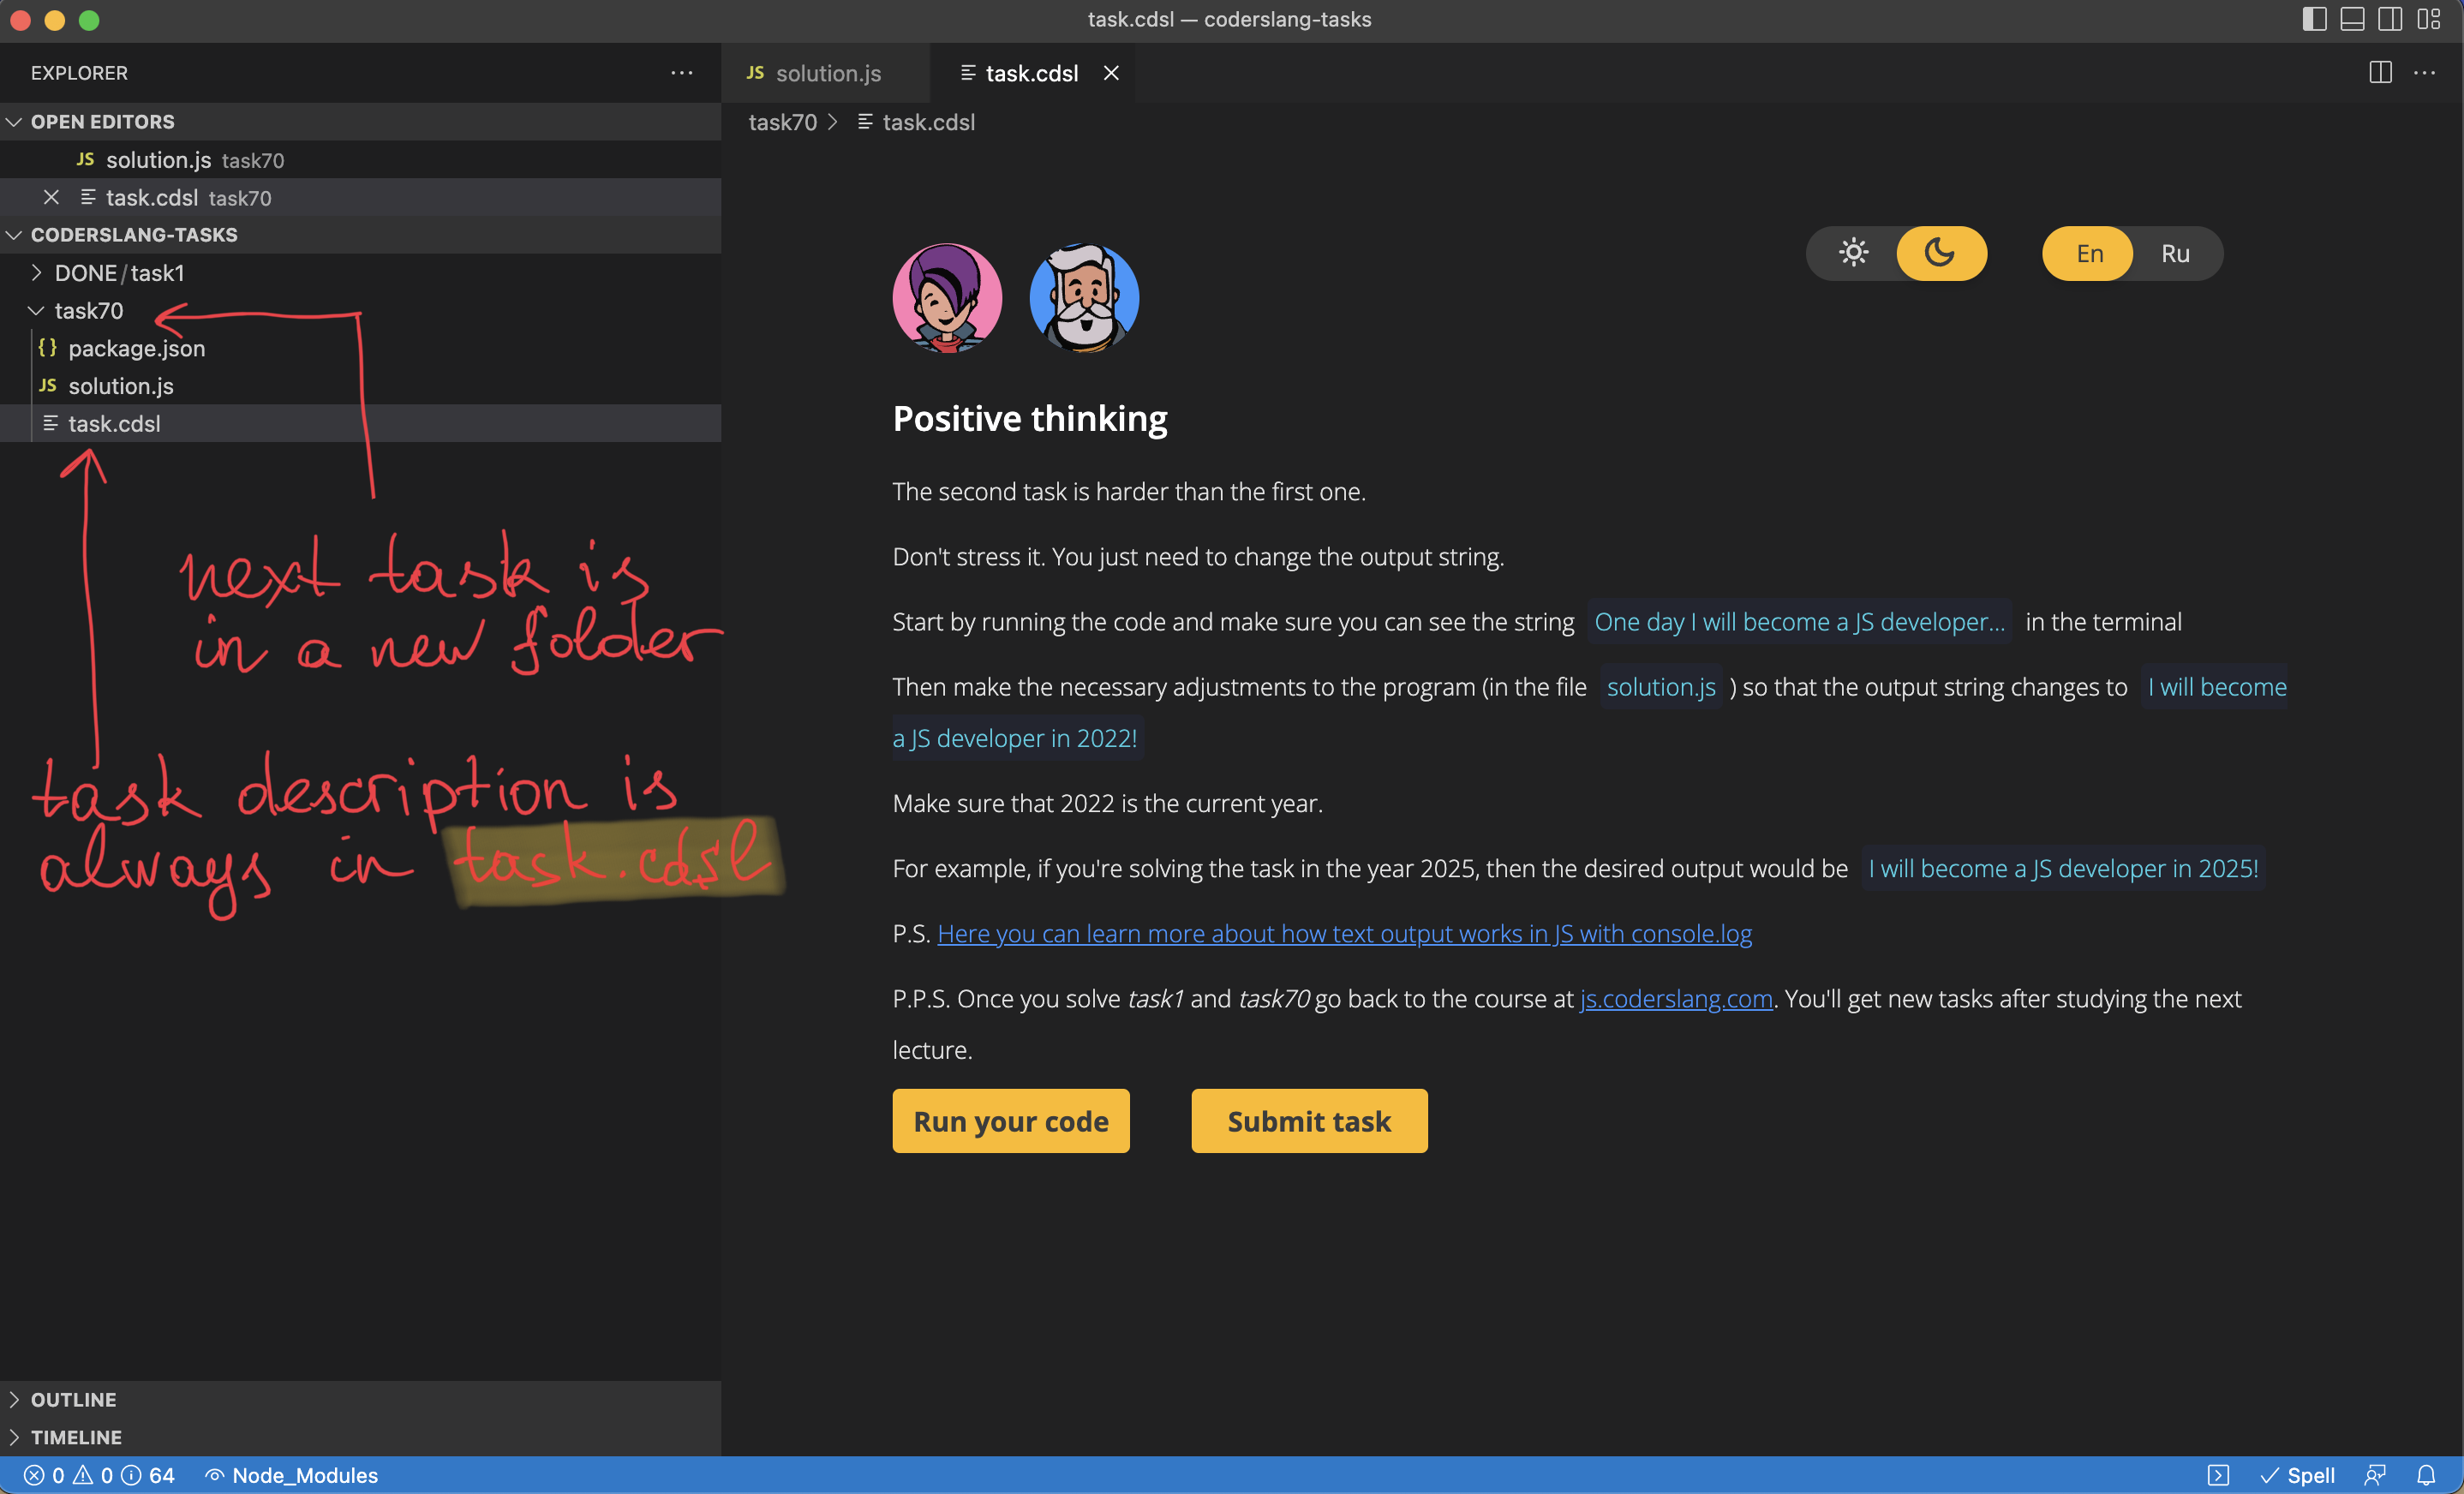
The next coding task is located in a new folder. In my example, it’s called task70
Here are the steps that I took while trying to solve the task:
- Open the file
task.cdslin the foldertask70to read the task description - Make necessary code adjustments in the file
solution.js - Run the code and verify the output
- Submit the task for verification
Unfortunately, after the submission, I noticed that the task didn’t pass the verification.

The good news is that the things that had to fix were highlighted in red and I figured I needed to add the exclamation mark to the string I placed in console.log
Once I made that, I ran my code once again, and then I resubmitted the task and got it done!
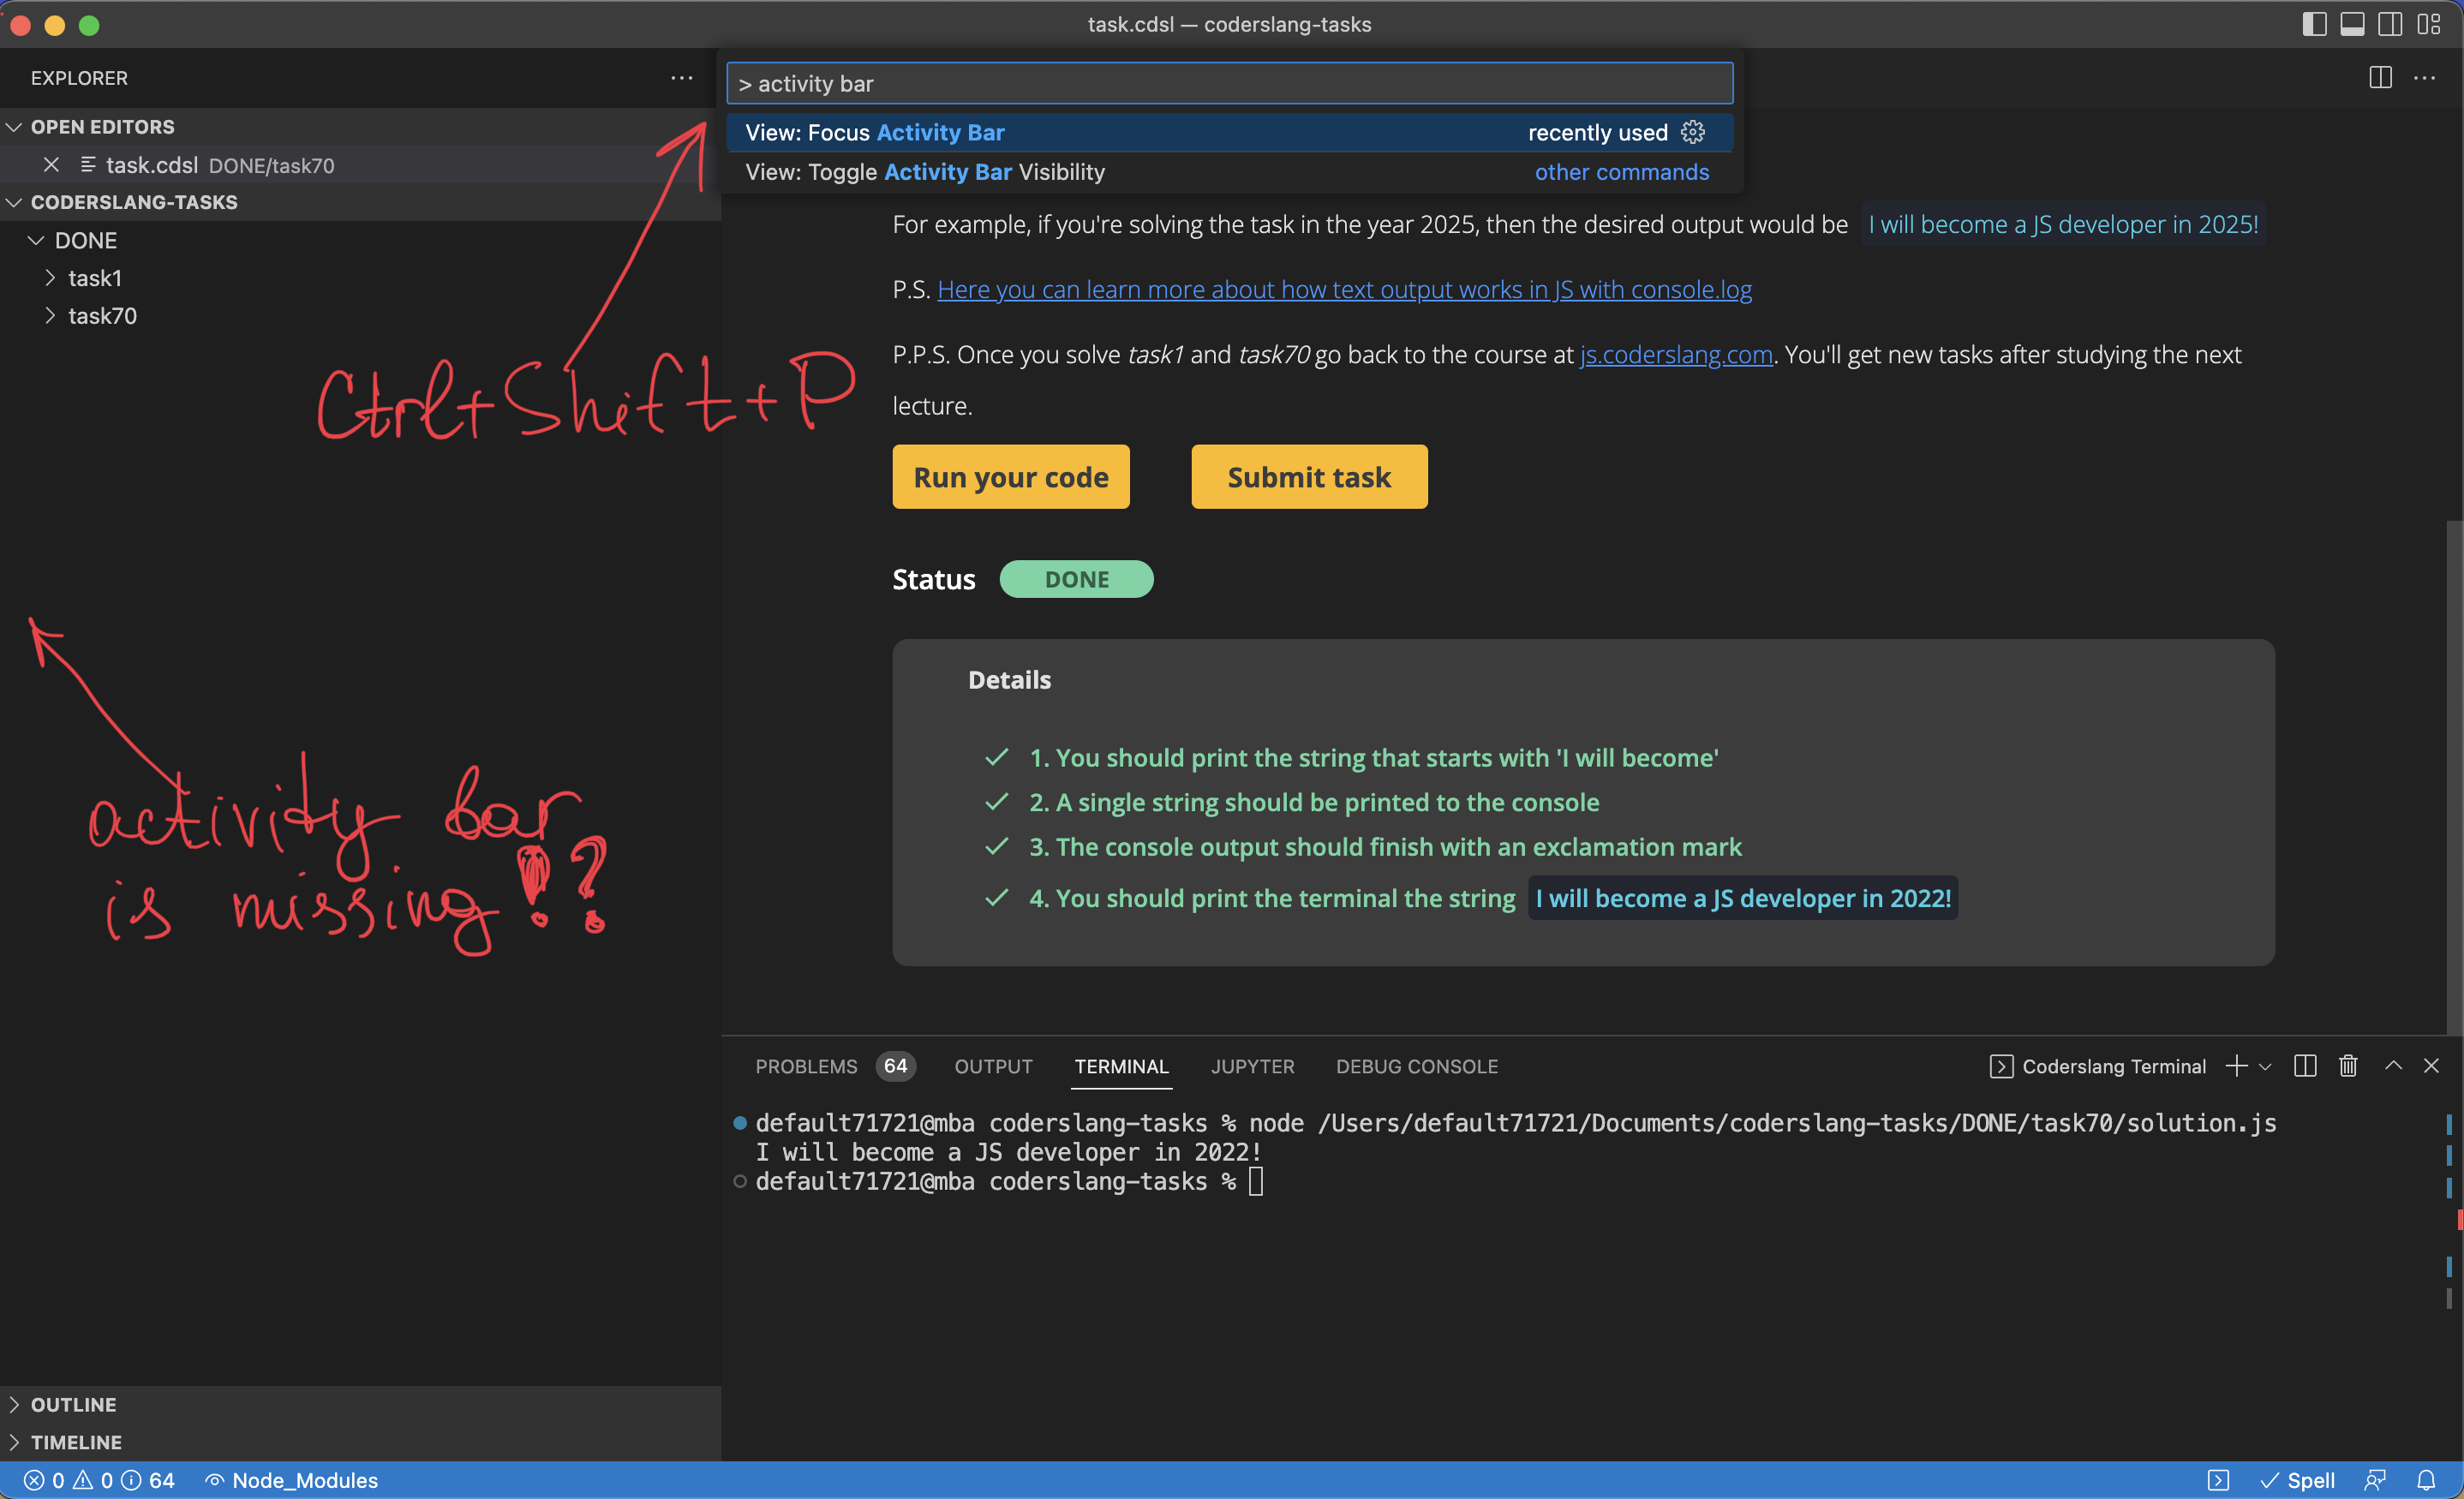
Deal with the missing activity bar
Sometimes you may end up in a situation where the activity bar doesn’t show up anymore. It’s very inconvenient because you lose quick access to the installed VS Code extensions and features like a file explorer.
To get that activity bar back, you need to press the combo Ctrl+Shift+P (or Cmd+Shift+P if you’re on macOS) and type activity bar in the input.
The option that you’re looking for is called View: Focus Activity Bar. Select it and the activity bar will be back.
Get more JavaScript coding tasks
To get more coding tasks, you need to follow the same steps as before.
- Open Coderslang extension in Visual Studio Code
- Open Coderslang Dashboard
- Click
Download tasksto get new coding tasks - Confirm download by clicking
yesin the bottom right corner
New coding tasks become available only after you open a new lecture at js.coderslang.com

Once you download them, open the working directory by clicking the button Open workdir
You’ll see new tasks in the new folders like task81, task82, and so on.