This article is for the intermediate level. This article explains the importance of writing better CSS class names with code snippets using SCSS. This article is targeted for the group of people who are interested to learn about BEM naming convention and want simple and descriptive explanation to what block, element and modifiers in BEM are.
Problem with conventional CSS class names
Starting off with the problems with the commonly used CSS class names. Learning and working with CSS is easy. But as the size of the project goes up, you have to continuously rework on CSS code; either refactor existing code or write new lines, making it more complex as the time goes. This directly adds to the strain of maintaining the code.
General people have an unhealthy habit which says “If it works then don’t touch it”. If something is working then don’t dare to touch it if you don’t have an idea about it. If we start with a bloated CSS code base then we don’t dare modifying it. Due to CSS globally operating nature, a change in some part of the code can easily show its effect on other aspects of the project on which we don’t want any change. So it is better to start following a standard naming convention(BEM naming convention). Following standard practice means you build a base upon which you will build your code and modifying it or maintaining the same would feel easier. This helps collaboration with fellow developers easier which directly helps in minimizing the level of frustration with the codebase.
Introduction
So what is BEM then? BEM stands for Block Element Modifier. This is a popular naming convention adopted to write more clear class names for your HTML elements. Double hyphens — and double underscores __ are used to write the structure of HTML element class names.
BEM class names look like this.
.block{}
.block__element{}
.block--modifier{}
At first glance it looks confusing. What does this even mean? But don’t worry. Once you understand this it will be far clearer and you will know the advantage of using this practice. We will learn to make use of this practice by making a smiley emoji in this article.
Block
BEM defines a block as a standalone entity that has meaning on its own. We can imagine blocks as parent components.
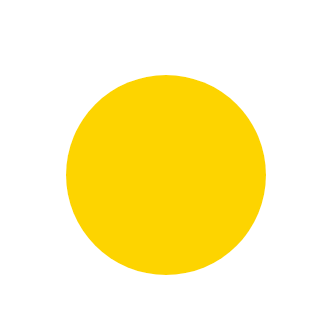
In the case of our example of smiley emoji. We can say the face is a block element.
This is an outline of a face without eyes and mouth. We will add mouth and eyes using elements.
Element
Element is defined as part of the block. Without block, its existence does not have meaning. We can imagine elements as child components that are inside the block element. Element is defined using __ double underscore.
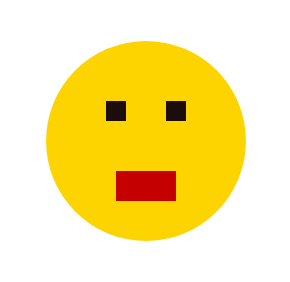
In the case of our smiley emoji, eyes and mouth are elements.
Our face has eyes and mouth. They are just square for now. No round eyes or smile on face. We will change its appearance using modifiers.
Modifier
A modifier is defined as a flag value that is used to modify or change the appearance of either block or element. A modifier is defined using — double hyphens.
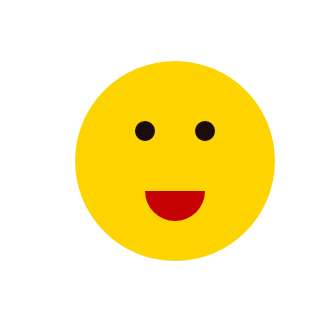
In the case of our smiley emoji, a smile on a face, flat eyes, purple face are modifiers. These modifiers change the appearance of the face, eyes, and mouth.
Now look our face has round eyes and a smiley mouth. We can add many modifiers as needed.
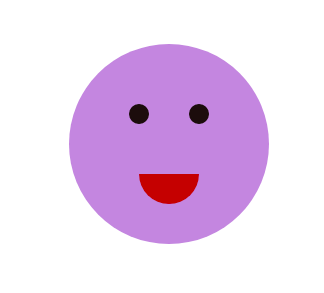
Now our face has purple color using face—purple modifier.
The general outline of our scss looks like this.
.face{
	&__eyes{
		&--round{}
	}
	&__mouth{
		&--smile{}
	}
}
Follow me and start building emoji along me
Now you have got basic idea about what is block, element and its modifier. Now let’s start creating our emoji.
Step 1: Block
<div class="container">
	<div class="face">
	</div>
</div>
.container {
	display: flex;
	justify-content: center;
	align-items: center;
	margin-top: 200px;
}
.face {
	background-color: rgb(250, 203, 47);
	height: 200px;
	width: 200px;
	border-radius: 50%;
	position: relative;
}
We have successfully created face for our emoji. Now let’s start adding eye and mouth element.
Step 2: Elements
<div class="container">
	<div class="face">
		<span class="face__eyes left"></span>
		<span class="face__eyes right"></span>
		<span class="face__mouth"></span>
	</div>
</div>
.left {
	left: 30%;
}
.right {
	right: 30%;
}
.face {
	background-color: rgb(250, 203, 47);
	height: 200px;
	width: 200px;
	border-radius: 50%;
	position: relative;

	&__eyes,
	&__mouth {
		display: inline-block;
		position: absolute;
	}
	&__eyes {
		top: 30%;
		background-color: rgb(26, 13, 13);
		height: 20px;
		width: 20px;
		margin: 60px;
	}
	&__mouth {
		top: 65%;
		left: 50%;
		transform: translateX(-50%);
		height: 30px;
		width: 60px;
		background-color: rgb(185, 37, 37);
	}
}
Notice that double underscore __ in span eyes and mouth elements. These represent elements of the face. Whenever we see code like face__eyes, we can say that this is an eye element whose parent element is face. Without face, this eye element existence is pretty useless.
If you are using normal CSS then its equivalent CSS code looks like this.
.face {
  background-color: #facb2f;
  height: 200px;
  width: 200px;
  border-radius: 50%;
  position: relative;
}
.face__eyes, .face__mouth {
  display: inline-block;
  position: absolute;
}
.face__eyes {
  top: 30%;
  background-color: #1a0d0d;
  height: 20px;
  width: 20px;
  margin: 60;
}
.face__mouth {
  top: 65%;
  left: 50%;
  -webkit-transform: translateX(-50%);
          transform: translateX(-50%);
  height: 30px;
  width: 60px;
  background-color: #b92525;
}
From above HTML and SCSS code, our emoji looks like this. But some distinct characters are missing. Let’s modify this emoji by adding rounded eyes and add a big smile to this emoji using modifiers.
Step 3: Modifiers
As mentioned earlier, modifiers modifys or change appearance of either block or element. Modifiers are denoted by using double hyphens —.
Modify elements: Eyes and Mouth
<div class="container">
	<div class="face">
		<span class="face__eyes left face__eyes--round"></span>
		<span class="face__eyes right face__eyes--round"></span>
		<span class="face__mouth face__mouth--smile"></span>
	</div>
</div>
.face {
	background-color: rgb(250, 203, 47);
	height: 200px;
	width: 200px;
	border-radius: 50%;
	position: relative;

	&__eyes,
	&__mouth {
		display: inline-block;
		position: absolute;
	}
	&__eyes {
		top: 30%;
		background-color: rgb(26, 13, 13);
		height: 20px;
		width: 20px;
		margin: 60;
		&--round {
			border-radius: 50%;
		}
	}
	&__mouth {
		top: 65%;
		left: 50%;
		transform: translateX(-50%);
		height: 30px;
		width: 60px;
		background-color: rgb(185, 37, 37);
		&--smile {
			border-radius: 0px 0px 50px 50px;
		}
	}
}
Now our emoji looks familiar with rounded eyes and a smile on its face. We can also modify block element itself.
Modify Block: Face
Let’s give purple face to our emoji.
<!-- Other code is same -->
<div class="face face--purple">
// Other code is same
.face{
	&--purple {
		background-color: rgb(187, 152, 223);
	}
}
In our case we have added purple face to modify the color. We generally use this kind of modifier to add support for light mode and dark mode to buttons, texts, background color or so on. We can also add modifiers to button on disabled or active state.